Debra Prinzing

Get the Email Newsletter!

Archive for the ‘Playfulness’ Category

Here Comes the Couple: A chance to win Free Wedding Flowers

Monday, November 19th, 2012

I’m so inspired by the creative and generous souls around me. When I see their work, I am compelled to share it!

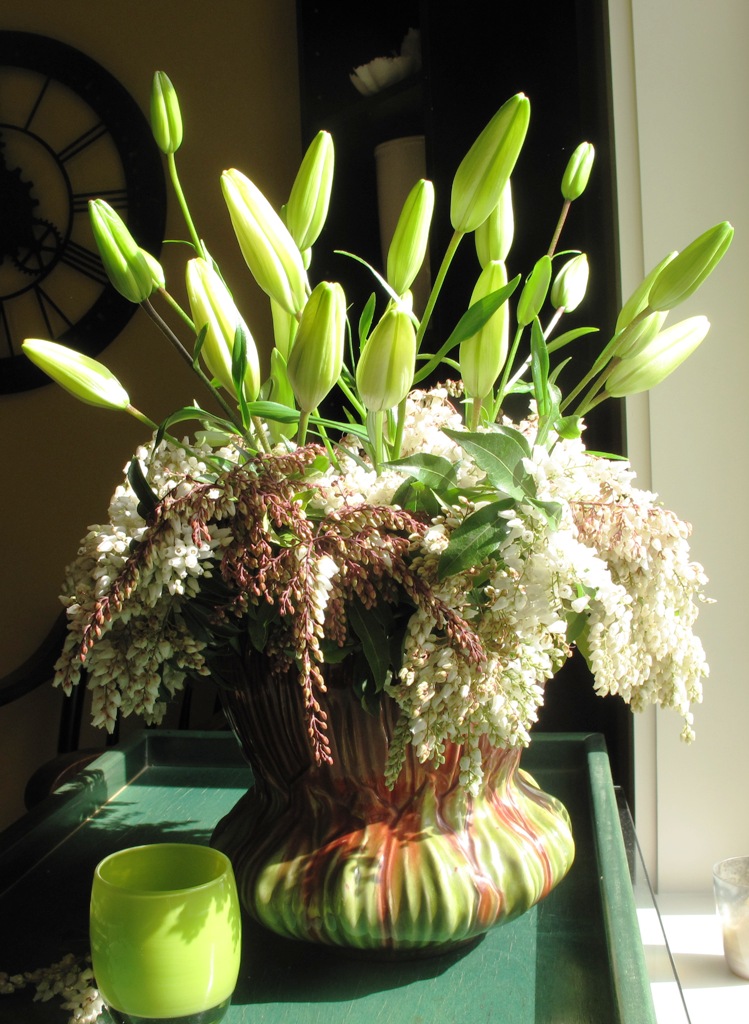
Last week, on a visit to Seattle floral designer and flower-grower Kelly Sullivan’s, I couldn’t take my eyes off of a beautiful floral still-life arranged on her end table.

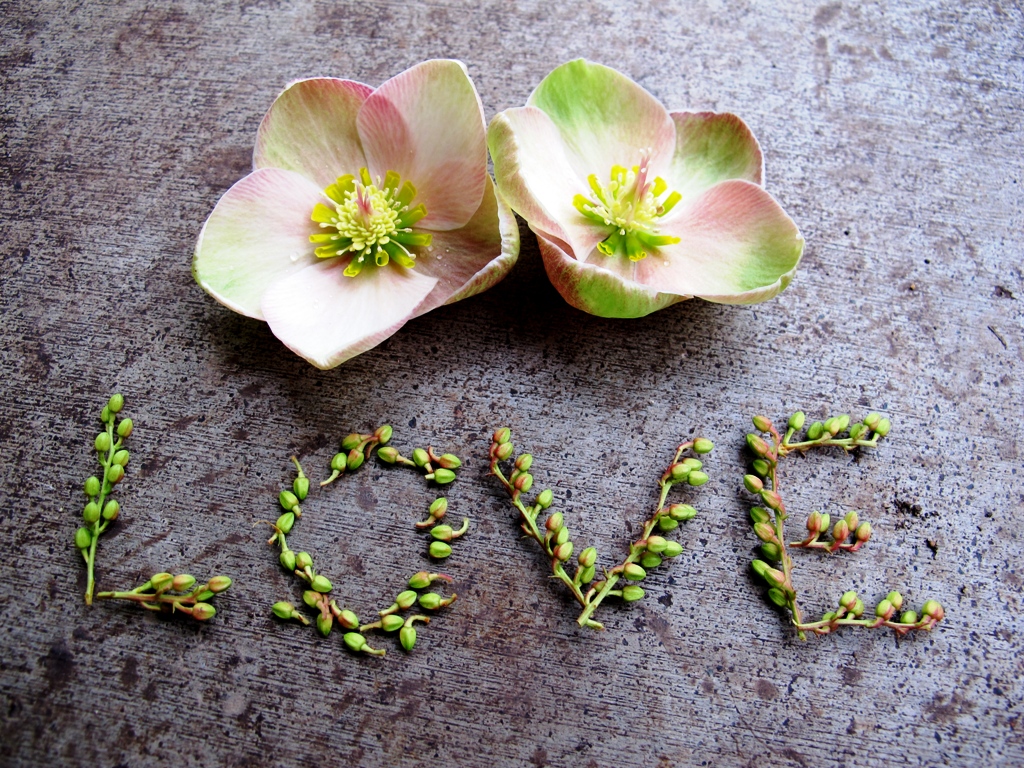
Here’s what it looked like:

For anyone obsessed with the joy of garden flowers, you’ll immediately recognize the Helleborus blooms at the top of this image and the little sprigs of Pieris japonica flowers used to spell out L-O-V-E.

“That’s gorgeous, Kelly!” I exclaimed. “What are you up to?”

“I’m giving away one-thousand dollars’ worth of wedding flowers,” she explained. “To one Washington couple getting married next year. It’s my way of honoring marriage equality.”

Kelly is the owner of Botanique Flowers, a by-appointment floral design studio in Seattle. She’s known for creating seasonally-inspired designs with a romantic, natural feeling. I previously wrote about Kelly and her subscription CSA-style bouquet program (the article was entitled “Floral Choreography,” and you can read it here). Kelly grows many of the flowers and foliage for her designs in her own cutting garden. And, she designed my cutting garden, which I’m slowly installing and hope to have finished next spring.

Kelly’s new project, the Love Is Love Sweepstakes, celebrates the passing of Referendum 74 with FREE wedding flowers for one Seattle couple who will be married in 2013. “I believe LOVE IS LOVE, period,” Kelly says. “Botanique stands behind any couple that wants to celebrate their love through marriage.”

If you’re planning on tieing the knot in the greater Seattle area anytime next year, you are eligible to win $1,000 worth of wedding floral design services from Botanique. Contestants can enter by visiting the Love is Love page on Botanique’s website and filling out the entry form.

All entries must be received by 5 p.m. (PST) on Friday, December 7th. Kelly will notify the winning couple on Monday, December 10th.

All I have to say is kudos to Kelly for dreaming up this wonderful gesture of love and support for the couples of Washington. I hope other designers are similarly inspired! The lucky couple will be doubly lucky to have Botanique Flowers as a celebratory symbol on their wedding day.

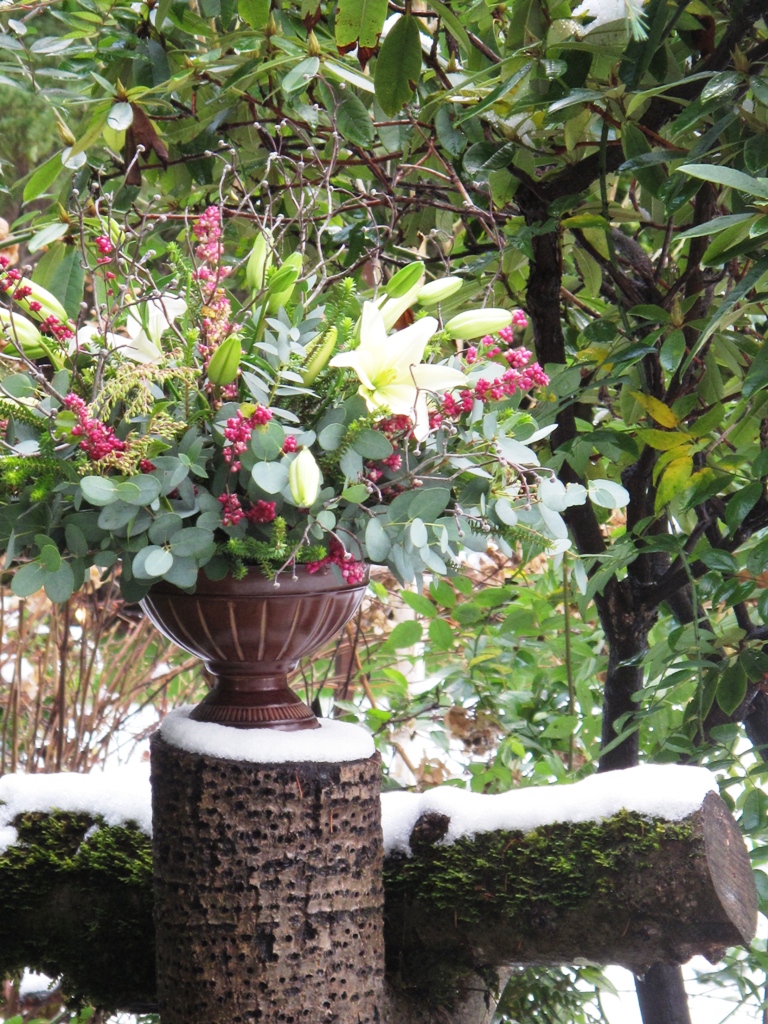
Here’s one more gorgeous floral still-life, created by Kelly:

Behind-the-Scenes of a Country Gardens photo shoot

Monday, June 11th, 2012

Creating a magazine story involves a lot of moving parts.

Last year, I worked with a huge team of talented people to produce a feature story for Country Gardens magazine called “Art by Hand,” which appears in the current Summer 2012 issue. Editor James Baggett had the original vision for this story — and he asked me to produce and write a group of short profiles that together tell the story of craftspeople and artists whose work is inspired by the garden, wildlife and nature.

Our starting point was Dirt Couture, the online garden emporium started in 2010 by Cindy McNatt. Many of you know Cindy for her daily updates called Dirt du Jour, which is a fun, g0-to site for all the latest gossip about plants, books, people and trends in the gardening world.

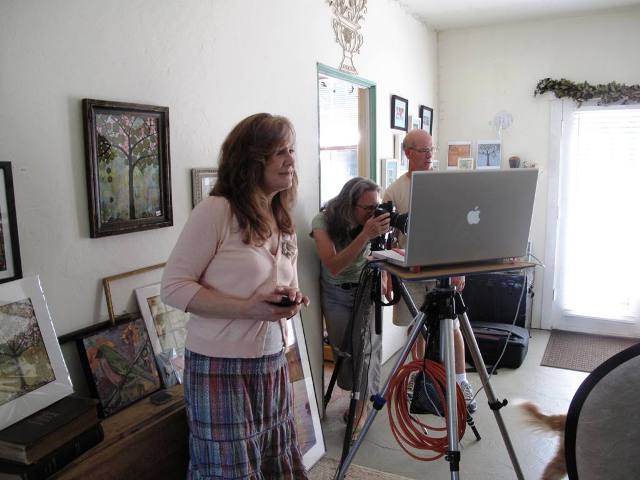
Cindy suggested several of the artists whose work is featured on Dirt Couture, and since photographer Laurie Black and I are now both located in the Pacific Northwest, we decided to focus on three folks in Oregon and Washington. We photographed their portraits and work last July.

Last September we headed to Southern California for a visit to Cindy’s gorgeous garden and the world headquarters of Dirt Couture (aka, her kitchen table!). Pulling together all these separate pieces and making them into an 8-page feature for Country Gardens was way more work than just visiting a beautiful garden and spending 24 hours photographing it. But I love teaming up with Laurie and her husband Mark King, and things always seem to have a good flow when we’re on location together.

So you can read the story here — or, better yet, pick up a copy at the newsstand. Laurie’s photos are amazing (and PS, she also photographed the cover of the same Summer issue to illustrate my feature about The Herbfarm Restaurant’s Basil Banquet. That’s another fun story!).

Here are my favorite out-takes from “location.”

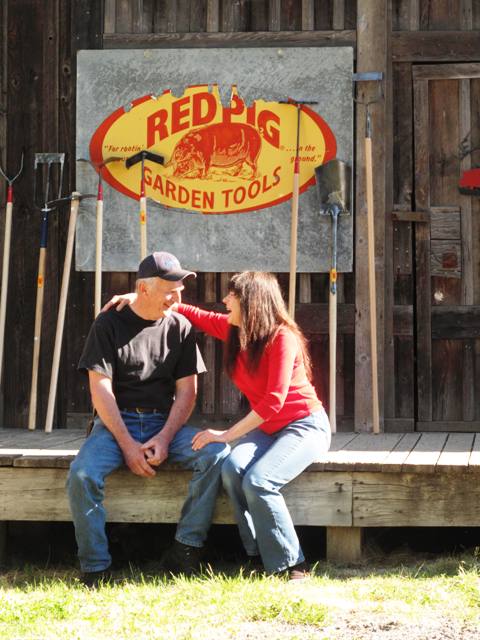
Bob Denman of Red Pig Garden Tools in Boring, Oregon, is one of the country’s last blacksmiths making hand-forged gardening tools and implements. You can learn more about his work here:

Bob and Rita Denman, of Red Pig Garden Tools

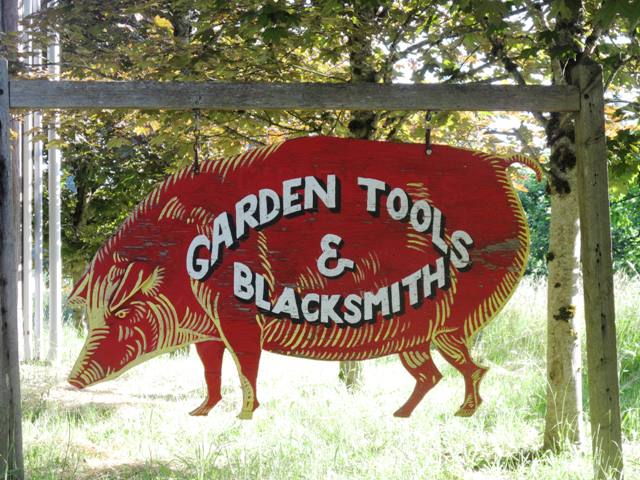
Love this old-timey sign!

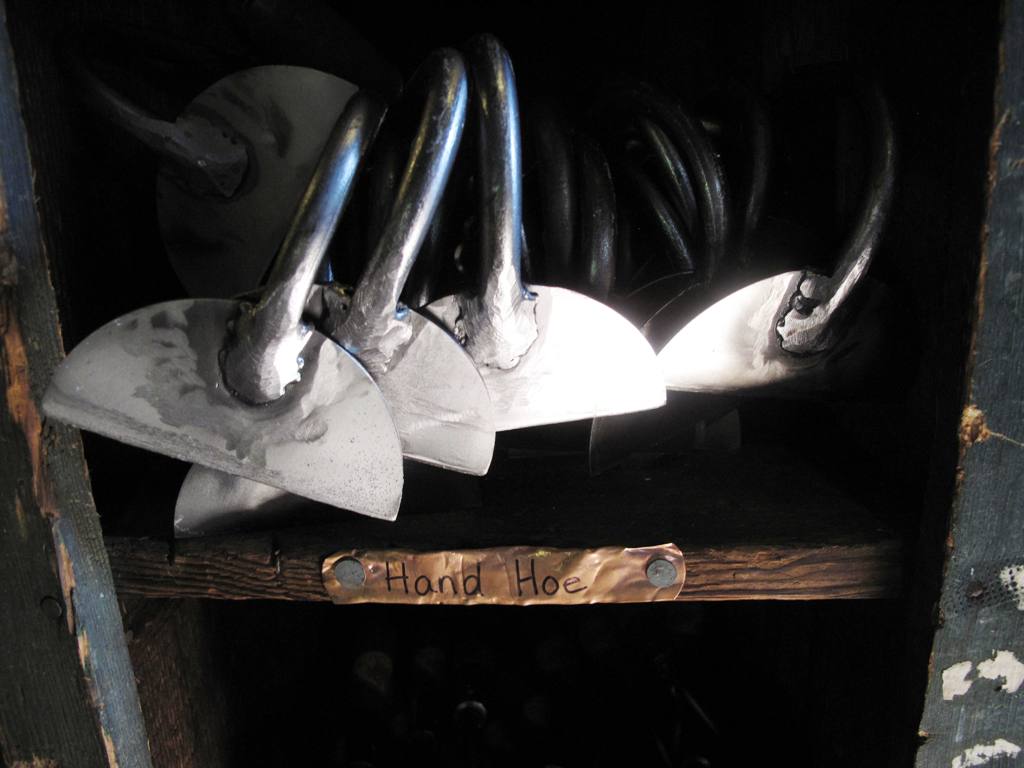
You can see the actual forge-marks on these hand hoes. Rustic beauty!

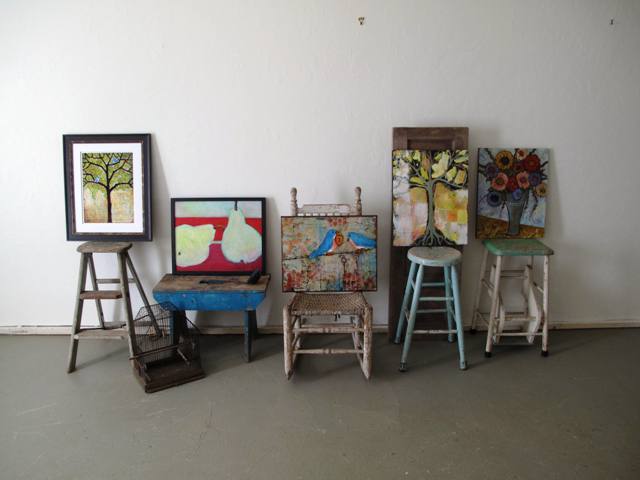
Artist Blenda Tyvoll uses mixed media to cover her canvases with soulful trees, inspired by the Oregon farm where she and her family grow Christmas trees! Check out more of her work here.

I love this little gallery I styled with Blenda's canvases and her collection of paint-chipped stools.

from left, Blenda studies her collection of tree-inspired paintings as Laurie Black and Mark King capture the shot.

Potter and artist Marybeth Sommers of the Seattle area has adapted the traditional Raku method to create bird houses and bird feeders. They are charming! We photographed Marybeth and her work at the Dunn Garden in Seattle. Thanks to the folks there for making that happen! Marybeth’s studio is called Ring of Fire Pottery.

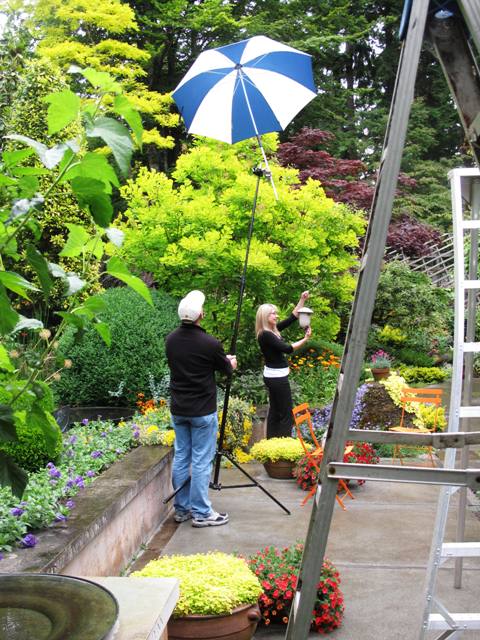
Here's what happens when the showers arrive in the middle of a photo shoot! That's Mark King, holding a rigged up photographer's stand with an umbrella clipped onto it. Just to keep our subject Marybeth dry while Laurie take her portrait.

A sweet vignette of Marybeth's bird feeders in the colorful Dunn Gardens.

Finally, we spent a day with Cindy McNatt, creator of Dirt Couture. Visit the site here and learn more about all of these artists, plus nearly 100 more artisans and crafters. You won’t be disappointed!

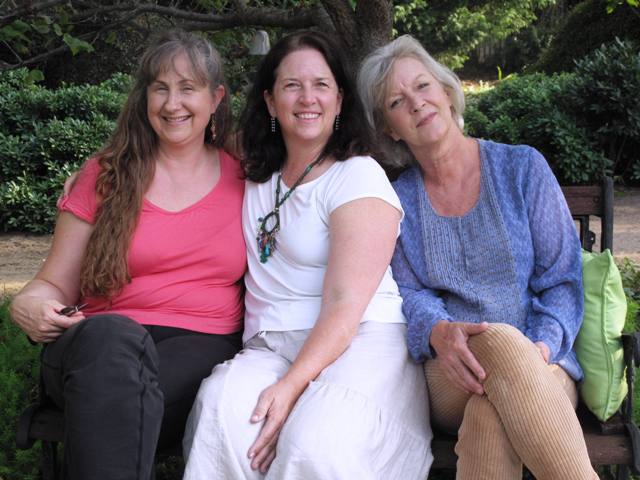
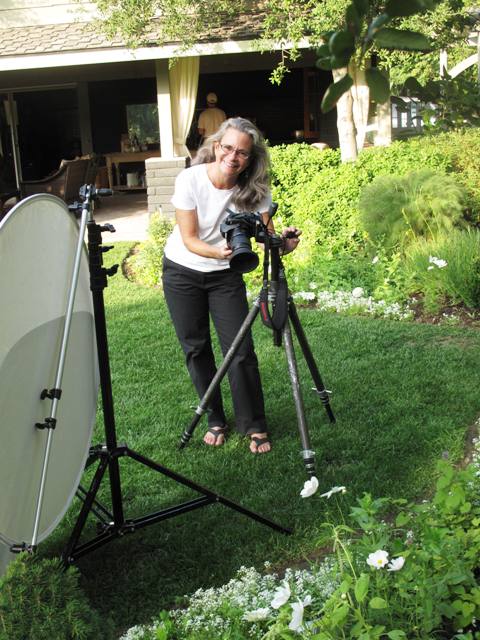
Garden Writer friend Julie Bawden Davis (left) visited Cindy McNatt (right) and me (center) during our photo session. It was fun to reunite with my SoCal girlfriends!

Laurie King, a dream of a photographer to work with!

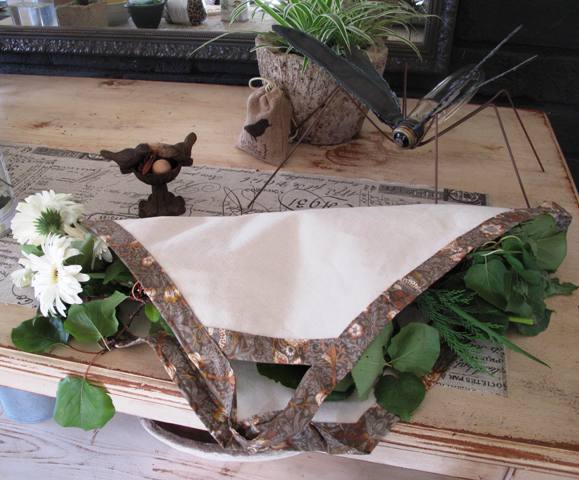
Dirt Couture's canvas harvest trug - perfect for gathering flowers and herbs.

The end! Now we’re busy planning all the stories to be created this summer for 2013 issues~

Making it to the New York Times: The author’s “holy grail”

Thursday, March 29th, 2012
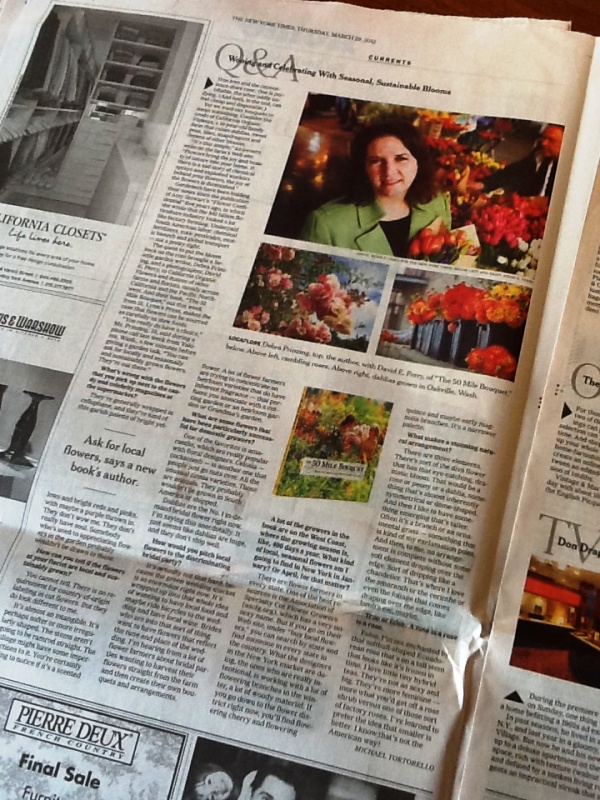
A friend emailed me the photo he took of today’s paper and wrote: “Look who I ran into”

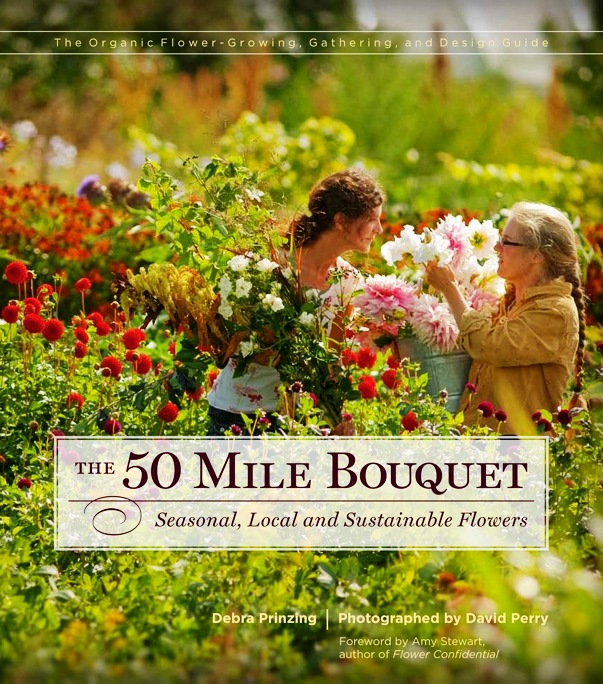
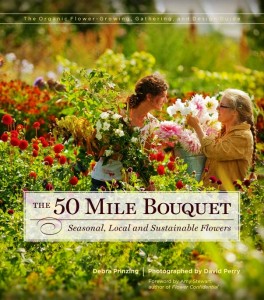
Today’s New York Times featured a piece about The 50 Mile Bouquet, complete with our book’s cover, two luscious flower photographs by David Perry, and a portrait of me. Everyone in the St. Lynn’s Press family is ecstatic, to say the least. This sort of thing doesn’t come around often, if ever, in the life of an author. Here is the full text of the Q&A.

Michael Tortorello, a gifted writer whose work regularly appears in the NYT Home section, set up a phone interview with me last week. Due to time zone differences, his travel and my own travel schedule, it turned out that between the two of us, we could only find one hour that worked for a phoner! I was literally seated in Stephanie Clevenger’s SUV, which was parked in front of The Red Barn – the gathering place for Yakima Master Gardeners. The minute Michael and I finished up the Q&A, which he recorded, I dashed into the barn and gave a Container Design presentation to about 75 MGs . Whew.

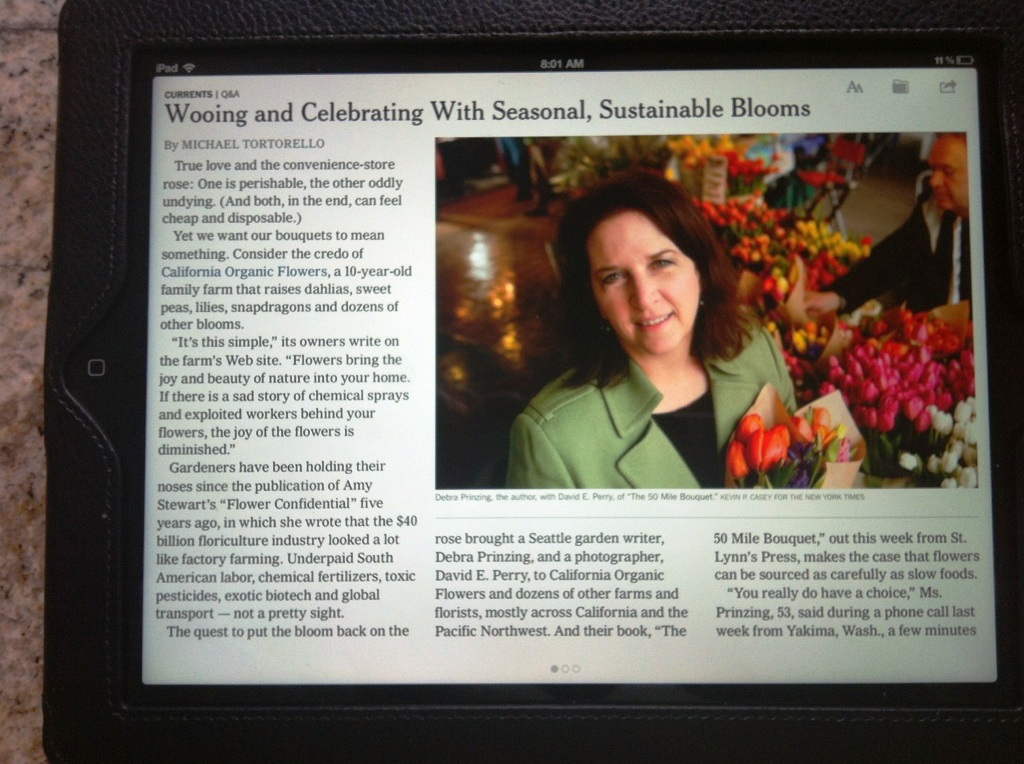
Another friend sent me a photo of her Ipad edition of the NYT.

There was a similar crunch when it came to getting a photograph, which took place earlier this week with just a few hour’s notice. Lola Honeybone of MediaWorks Nashville, a friend whose book PR skills are unparalleled, and whose help I enlisted for our book’s publicity efforts, emailed to ask: Where would be a good spot for a portrait?

I immediately thought of the brilliantly beautiful Pike Place Market stall operated by Alm Hill Gardens (Gretchen Hoyt and Ben Craft, owners). This is the single best place in Seattle for organic tulips, daffodils, hyacinths, lilies, and other amazing crops that come later in the year – like lilacs and peonies. Their farm is located in Everson, Wash., close to the Canadian border, and Alm Hill is a gold-standard flower fixture at the Market. My go-to source! Plus, since we have a 2-page spread on Gretchen and Alm Hill in The 50 Mile Bouquet, it seemed fitting to take the photo there.

I met freelance photographer Kevin Casey at the stall on Monday afternoon. My flower-seller pal Max Clement was working, as he does most Mondays, and he indulged us by stashing Kevin’s gear and my stuff while we did the photography. It was certainly less painful that I thought it would be, thanks to Kevin’s easygoing style and also the way he let me know what “worked” and what didn’t. Do I smile? Do I look serious? Ugh!

Here I am with a “taste of tulips,” posing with Kevin Casey, a NYT freelance photographer.

In the end, I’m pleased with the photo used in the story – especially because Max and the tulips appear in the frame!

But I had a chance to turn the tables on Kevin, too. I asked him to pose with me for a photo that Max shot with my Iphone. We look goofy, but who cares? It was way fun and an unforgettable experience. Turns out, Kevin is an old newspaper staffer like me, so we compared notes about editors and writers with whom we’ve both worked in the past. It really is a small world.

Last evening, I received an email from Mary Robson telling me that she’d seen the story on the NYT’s web site. It’s also fitting that I first heard from Mary, a dear friend to so many gardeners and readers from her days as a popular columnist with The Seattle Times, and as King Co.’s Extension Agent who trained hundreds of Master Gardeners over the years. Mary and I co-authored The Washington-Oregon Gardener’s Guide in 2004 (and Lola was our publicist then – see what a small world it is?). What a treat to hear it first from her – the best co-author a girl could ever have.

This morning, the “real” print edition arrived in our driveway. Bruce went out to get it first and used the edge of the Home section to tickle my face and wake me up at about 6:30 a.m. Later in the day, friends texted and emailed their own photos taken of the story in the print edition and Ipad version.

I know that the 24-hour high is about to wind down, but then again, maybe not. There is something called an after-life for stories. I know because when my own articles are posted online I’m always surprised to see that they have an extended shelf life, sometimes for years.

For now, I’m just grateful and happy to have been part of the experience. Something great is coming from the combined creative efforts of two people who adore and admire flower farmers and floral designers. So as my friend, the late Linda Plato, would have said: “It’s all good.”

Shutters, stylish and succulent-filled

Sunday, November 13th, 2011

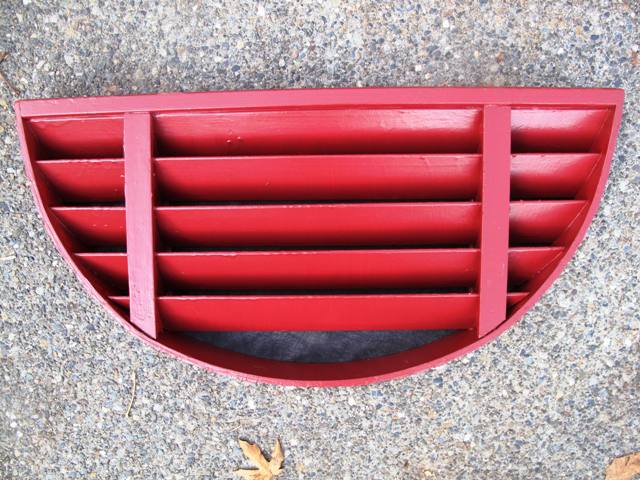
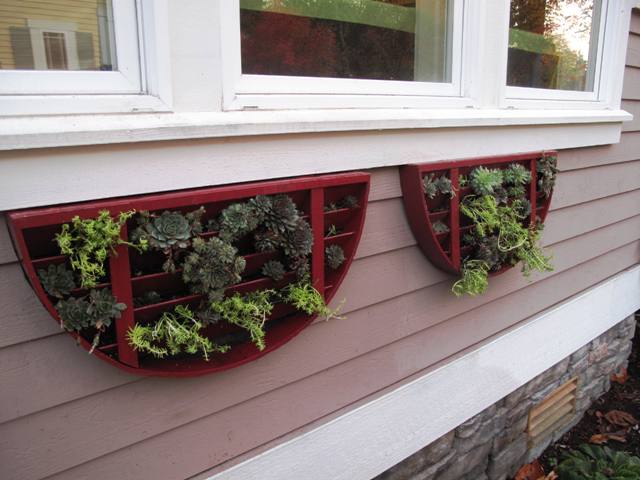
Last year I blogged about finding a set of half-circle shutters at a vintage sale. I wanted to emulate my friend Baylor Chapman’s succulent-planted shutters that grace her outdoor terrace in San Francisco. Since then, a few folks have emailed to ask if I EVER finished that project? Much to my embarrassment, those dusty shutters sat in the garage, untouched for nearly a year!

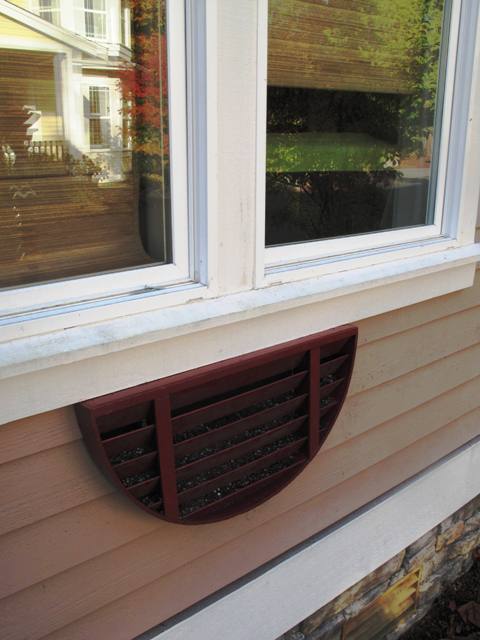
But finally, now that we’ve settled into a permanent residence, I’ve been able to work on this project. The shutters have been cleaned and given three coats of exterior paint. To turn them into vertical succulent planters I mounted both pieces with wood screws outside my office windows and then stuffed the openings betweeen each slat with sedums and sempervivums. Let’s see how they look:

Step one: Paint the shutters. I used semigloss acrylic berry-red, the paint used for my home's exterior trim

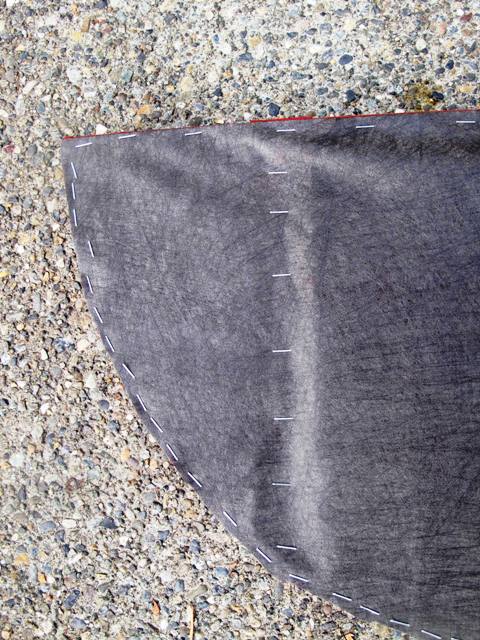
Step Two: Staple landscaping cloth to the back of both shutters.

Step Three: Mount shutter and fill the "slots" with potting soil.

Step Four: Plant with hardy sedums and other succulents.


Backyard Bouquets

Wednesday, October 26th, 2011

As some of you may know, I’ve been working on a book about local and seasonal floral design for several years, since 2007 to be precise. My collaborator, photographer David Perry, and I have been using the working title, A Fresh Bouquet.

But that’s all changing now, with a new title from our new publisher, St. Lynn’s Press. The words evoke just the right idea we want to communicate: The 50 Mile Bouquet: Discovering the World of Local, Seasonal, Sustainable Flowers.

Nice, huh? Our publication date is April 2012 and I’ll be writing lots more news about it soon.

Since all I’m doing these days is interviewing flower farmers, eco-couture floral designers and gardeners who grow their own cut flowers, my head is swimming with beautiful blooms.

And somehow in all this flurry of work, I’ve failed to post the out-takes from my floral design story that ran a few months ago in Better Homes & Gardens. So today, I’m taking a moment to get to it.

Backyard Bouquets - in BH&G's July 2011 issue

How great that 7.3 million readers of the July 2011 issue were introduced to the timeless notion of gathering flowers from the garden, a local farmer or a market stand – IN SEASON – and creating a simple, yet sumptuous arrangement that’s of the moment!

I have my editors Eric, Doug and Gayle to thank, because they believed in the idea and created the perfect opportunity for me to fly to Iowa and design a series of bouquets literally out in the field at Howell’s Family Farm.

I shared some of my on-the-scenes location photos last year, but here, finally, are my photos and recipes of the actual arrangements.
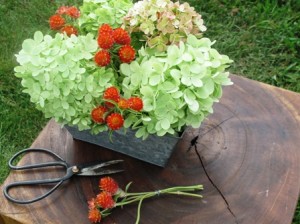
Project One

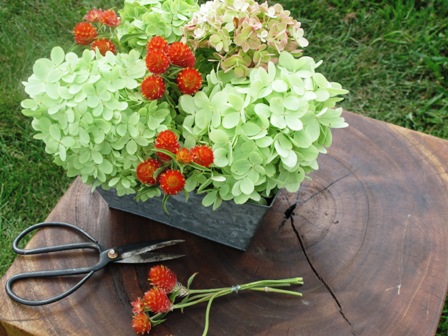
Project One features a rectangular galvanized container, measuring about 5-by-8 inches and about 5 inches tall. This small vessel was perfect for a compact bouquet with two simple ingredients. First, I filled the opening with four or five luscious heads of ‘Limelight’ hydrangea, the stems cut fairly short, say 3 inches long. To fill the spaces between the hydrangea heads and to add contrasting color and texture, I made miniature bunches of ‘Strawberry Fields’ gomphrena by wiring five slender stems with wire so that each bunch could be inserted as if it were a single flower. This is the perfect arrangement to enjoy while it’s fresh and then let it slowly air dry as an everlasting bouquet.
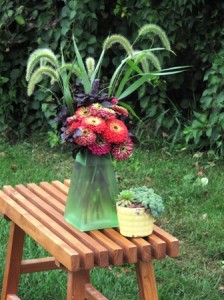
Project Two

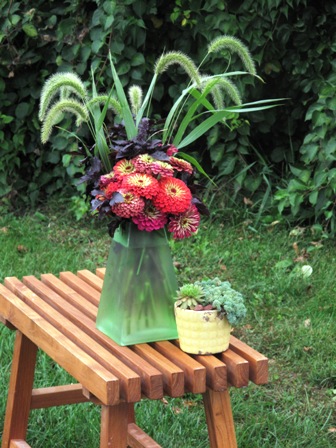
Project Two features a tall, square, modern green glass vase with a neck opening that’s smaller than the base. So of course, to make it look abundant and full, I had to create volume and height. The starting flowers here are sultry-looking zinnias from a new seed mix called ‘Queen Red Lime’ – I love the terra cotta, mauve, and reddish blooms with a lime-green center. Once I had those in place, I thought: We need dark foliage. And lucky for me, the folks at Howell’s, like many cut flower growers, have discovered how well basil performs as a cut ingredient – especially purple basil! Think about it: when you harvest basil from your garden and bring it indoors to keep in a jar on your windowsill, have you ever noticed how long those cut stems last? Of course basil is a great cut floral ingredient! The third element here is one of those happy coincidences – common foxtail grass, which some consider a ditch weed, that perfectly echoes the green vase, and catches the late summer sunlight just beautifully. Three simple ingredients in perfect harmony.
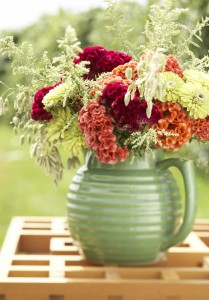
Project Three

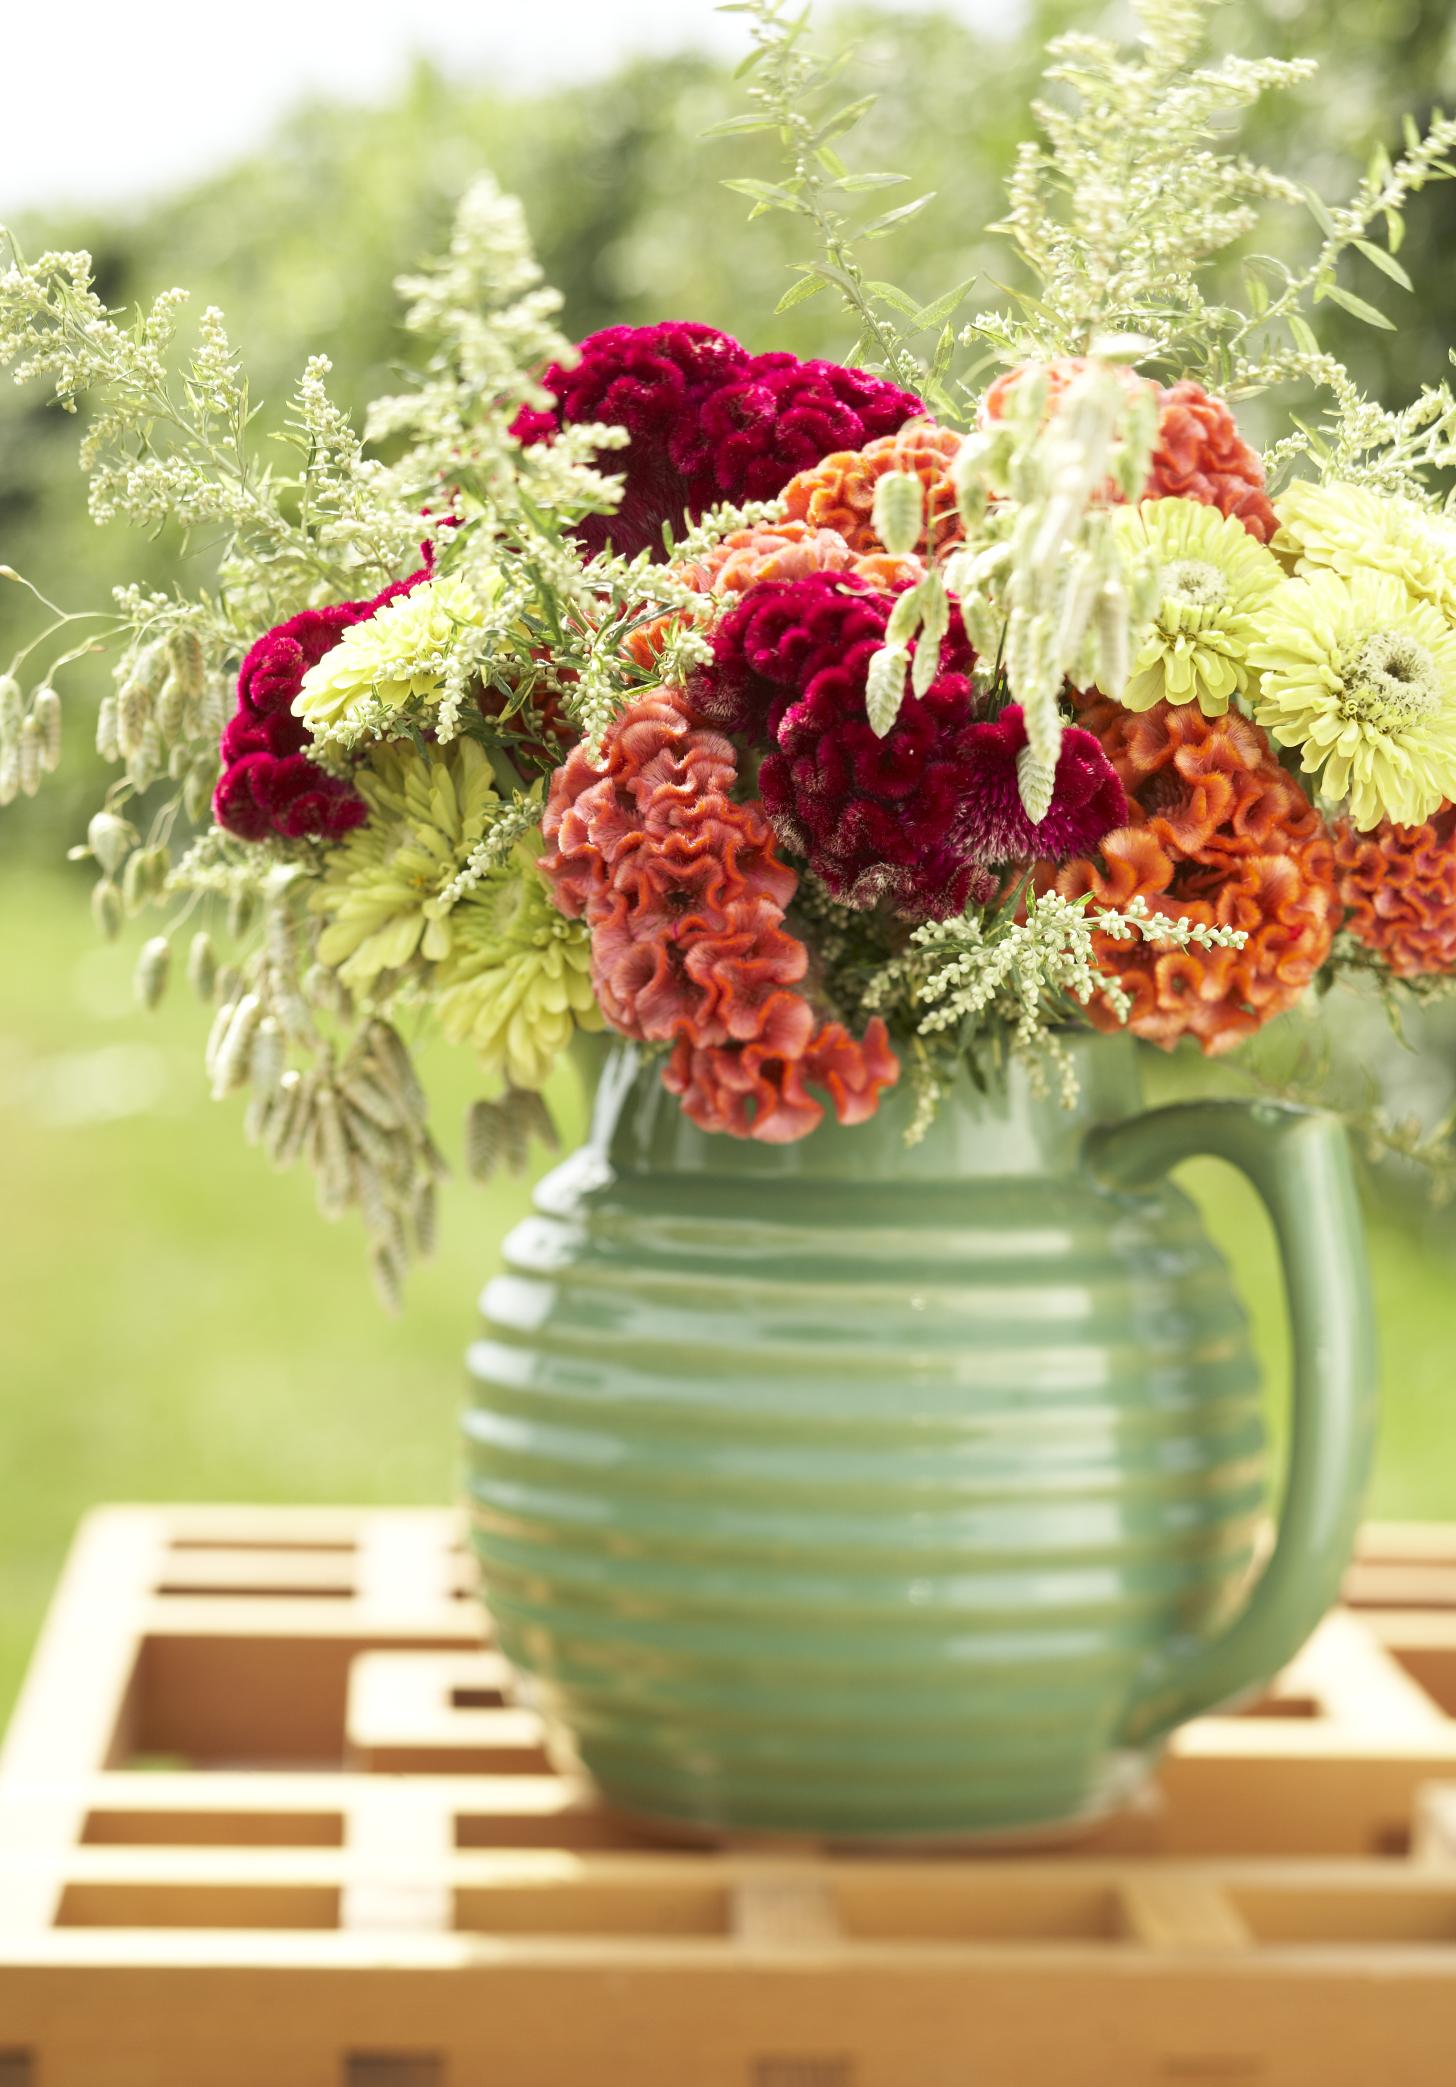
Project Three is one of my very favorites, because of the mix of colors and textures. Contained in a vintage pitcher, I absolutely love the playful combo of velvety cockscomb (the crested form of Celosia ) with all the lime green contrasting forms. Here’s how I made this bouquet. First, I filled the pitcher with soft greenery, a white mugwort (Artemisia lactiflora) that fills the opening and becomes the supporting structure for all the subsequent stems. Second, I stripped foliage off of 10 maroon and coral-hued cockscomb flowers; then I cut the stems pretty short and inserted each into the fluffy base, making sure that you can’t see the stems showing at all. Third, I added some ‘Green Envy’ zinnias, which echo the pitcher’s green quite nicely. For a sense of movement, as a final touch, I inserted taller stems of quaking grass (Brizia maxima), so they seem to hover above the bouquet. Casual and the epitome of summer!

Two other projects fell on the cutting room floor, so to speak, so you get to see them here! Actually Project Four showed up in the iPad edition, along with a video interview filled with my eco-savvy design tips. You actually have to download the July edition to see the entire interview (filmed by David Perry) on an iPad.

Here’s a rough-cut edit of the video:

httpv://www.youtube.com/watch?v=ZLKacMtjJUY
Project Four

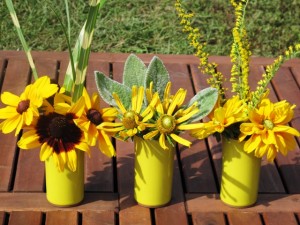
Anyone can replicate Project Four, a fun trio of mini-arrangements, which are displayed in a row or grouped together on the table as a centerpiece. We used three yellow tumblers that art director Scott Johnson brought from his kitchen cupboard. The simple idea was to showcase several varieties of black-eyed Susan flowers (Rudbeckia sp.) with a mix-and-match of foliage choices. The daisy-like Rudbeckia varieties include, from left: ‘Indian Summer’ and ‘Denver Daisy’ with zebra grass (Miscanthus sinensis ‘Zebrinus’); ‘Irish Spring’ with lamb’s ears; and ‘Prairie Sun’ with goldenrod (Solidago). This type of design works well when you only have one or two of anything in bloom at a given time – voila!
Project Five

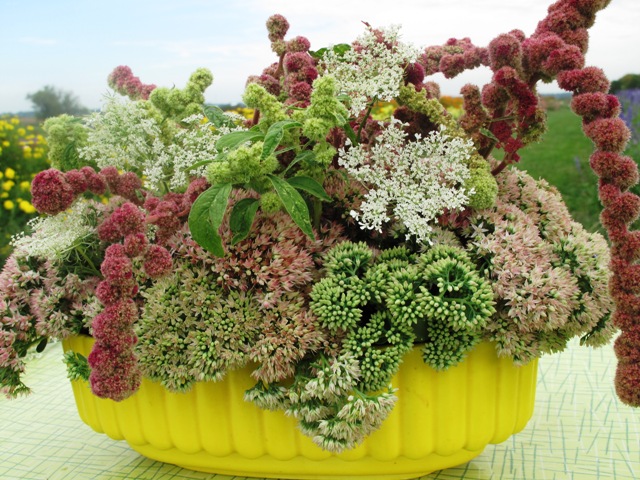
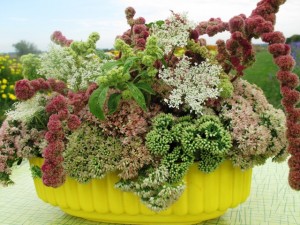
For Project Five, the last arrangement, I had to rise to the challenge of creating flowers that wouldn’t fall out of the wide, saucer-like bowl. Similar to cutting the hydrangea stems short in the first design, I cut lots of Sedum ‘Autumn Joy’ in their unopened stage. A this point, they still look pretty green because the buds are tight. When you cut the stems short, say at 2-3 inches, you can really cram a lot inside an opening. To me, they almost look like heads of broccoli! But the tightly-packed sedums create a foundation through which other stems can be inserted. And in this case, I inserted old-fashioned love-lies-bleeding (Amaranthus caudatus) and Queen Anne’s lace. The tassels cascade over the edge of the shallow bowl, and while it’s kind of quirky, I really love the effect of textures and colors.

Together, these five designs demonstrate the diversity of the cut flower world – and ways to arrange blooms without using florist foam to stabilize the stems. Have fun playing around with these ideas using your own vases and garden flowers.

On location with Jamie Durie for Better Homes & Gardens

Friday, September 2nd, 2011

On location in Los Angeles with Jamie Durie - photographed by Edmund Barr

On his popular HGTV show The Outdoor Room with Jamie Durie, stylemaker Jamie Durie uses interior and architectural design tricks to amp up dreary backyards.

By the end of a whirlwind 30-minute episode, you’re energized and inspired. Of course, nimble edits have compressed a couple of days of dirt, sweat and (possibly) tears into a dreamy landscape for the small screen. But still, there’s always a takeaway, a “lesson” that catches the viewer’s imagination. “I could try that,” you say to yourself. “Oh, what a simple way to disguise that ugly wall,” or “That’s brilliant!”

Some of the projects conjured by Jamie and his design team are complicated and require professional assistance to execute. But many others fall into the DIY mode: affordable and requiring only a discerning eye to add polish, such as using color, texture or materials to unify otherwise disparate objects.

That’s one reason why I really wanted to see Jamie’s garden firsthand. When I visited his Los Angeles outdoor design laboratory (aka his humble backyard) last spring I loved what I saw.

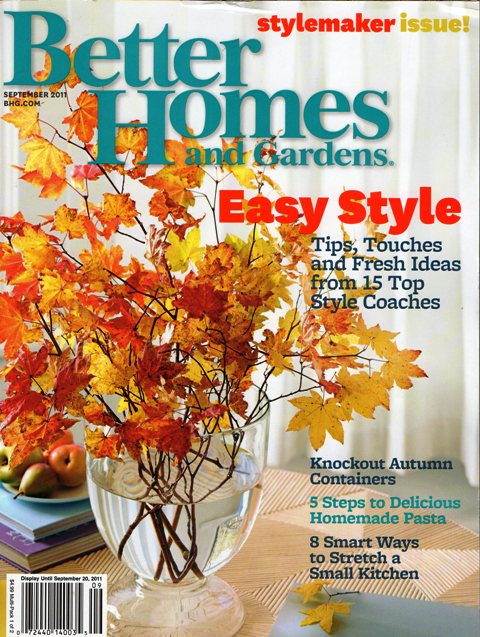
My assignment was to interview Jamie and help produce the Better Homes & Gardens “Stylemaker” story that appears in the September issue – out on newsstands right now.

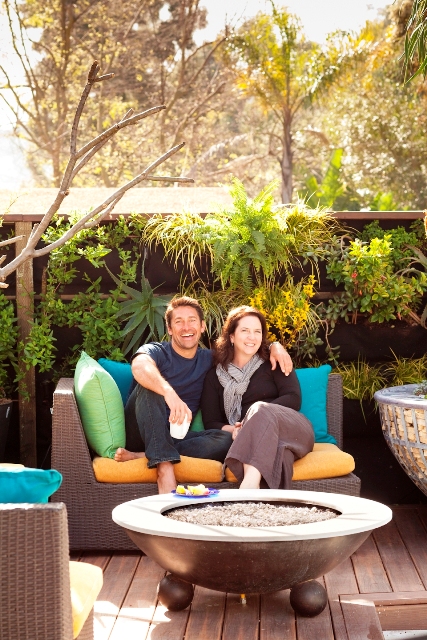
Art director Scott Johnson and I both flew into Los Angeles to work on the story. We were very fortunate to team up with LA photographer Edmund Barr and LA videographer Adam Grossman for the shoot. You can see my article and Edmund’s photos in the September issue; you can watch a fabulous how-to video with Jamie shot by Adam on BH&G’s digital edition. And a special thanks to Edmund for snapping this cozy portrait of Jamie and me, lounging in his outdoor living room. Fun, huh?

Many of Jamie’s best design concepts are ones he previously tried out for clients of Durie Design, his studio in Sydney, Australia, and Los Angeles. Some have been executed on previous episodes of The Outdoor Room, or in the pages of his new book by the same name.

We zeroed in on the ideas that move plants away from the obvious “ground plane” and onto other surfaces, such as living walls, green roofs and in the unexpected niches of garden structures. Jamie’s passion for plants is contagious – and you can see it spill over onto BH&G’s pages. Here’s an excerpt:

Outer Sanctum: HGTV star Jamie Durie uses unexpected designs to turn the barest backyards into green oases. 

“Once you create an outdoor room, you’ll fall in love with your backyard again,” says Jamie Durie, the star of HGTV’s The Outdoor Room.

A popular designer and TV personality in his native Australia as well as North America, Jamie encourages everyone who has a small patch of earth — or even just a patio or deck– to re-imagine their exterior environment as a functional, eco-friendly living space.

Jamie combines a passion for plants, sustainability, and the outdoors into a zeal for landscaping. He grounds his designs in green practices, using local materials, plants that tolerate the region’s climate, and clever techniques to put plants in almost every imaginable nook and cranny. Hanging planters cover his fences and walls, and pergolas support green roofs. Surrounding yourself with nature this way “can improve your health and inspire positive thinking,” says Jamie, who meditates every morning on the patio outside his bedroom.

Check out Jamie's new book for more tips and ideas.

Recently settled in Los Angeles, Jamie used the same advice he offers clients: Increase living space by creating more rooms outdoors rather than indoors. Instead of enlarging his modest 1950s house, he coaxed his once-ordinary backyard to live larger, with outdoor spaces variously designed for cooking, dining, lounging, and chatting. “Your spaces should accommodate your life,” he says. “Not the other way around.”
 “I have a new outlook when I open the doors,” Jamie says. “This house feels bigger than it is, since the lush garden is part of my home.”
The popular HGTV host and landscape designer shares his ideas, techniques and recent projects in Jamie Durie’s The Outdoor Room (Harper Collins, $25.99), a guidebook to creating beautiful exterior spaces.

Container Design Lecture

Tuesday, June 14th, 2011

Do your containers make you happy? SCOTT EKLUND Photograph, 1997

Do you find container design a frustration?

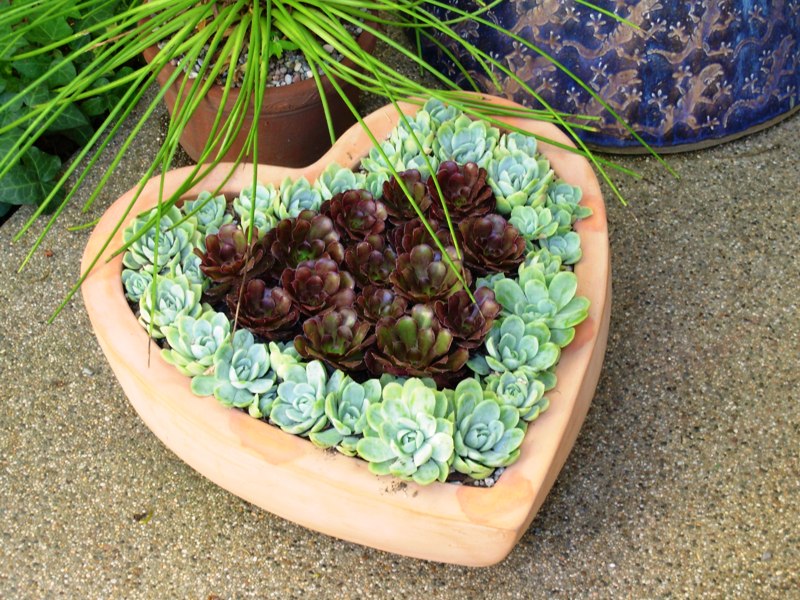
A terra cotta heart-shaped container, filled with succulents.

Recently, Andrew Buchanan, a photographer friend and former Seattle Post-Intelligencer colleague, told me that Slides.com is the best value for scanning 35mm slides into digital files. It costs about $1.00 per slide, which is a good bargain compared with $2.50 per slide that local labs charge. 

As an experiment, I sent 44 cardboard- and plastic-framed slides that have resided for years in a Kodak carousel tray to Slides.com to see what they could do.

Kay at Slides.com emailed the files to me today – just in time for tomorrow’s lecture.  As it turns out, the digitals seem crisper and brighter than the originals…and they can be manipulated, cropped and re-sized. Pretty handy! 

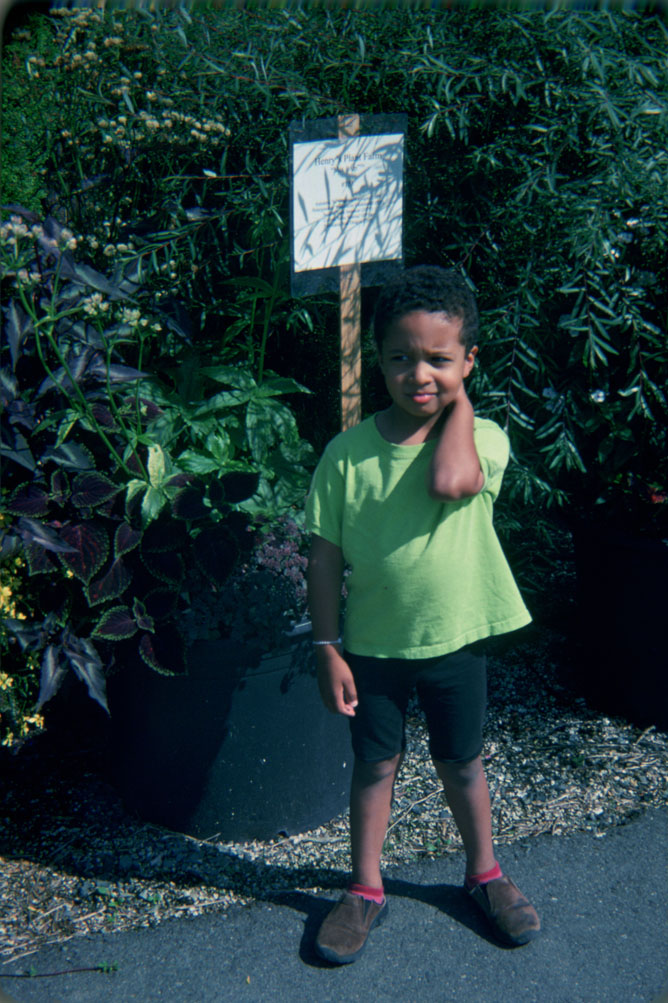
Happily, my talk’s opening slides look great. And they are very sweet. The little boy you see above as a baby and at left as a bored toddler who I dragged to a container plant trial is now 14 years old, about to begin High School in the fall. Time certainly flies – in the garden . . . and with children!

Concrete orb how-to

Sunday, June 12th, 2011

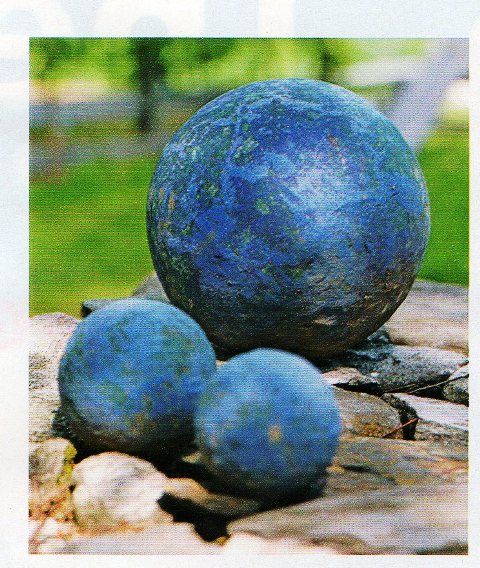
Here's the photo that inspired readers to ask: How do you make these cool orbs?

Last summer, I wrote a little piece about using orbs in the garden. Better Homes & Gardens illustrated the words with a photo depicting a trio of concrete spheres that looked like they were stained a denim blue color. Really pretty.

I posted two photo galleries of spherical ideas, emphasizing design principles for using circular and round elements in the landscape, but people still wanted to know how to make those concrete balls!

Fortunately, I found the instructions, posted by Fairegardens, a blog based in Tennessee. Francis of Fairegardens is heading to Seattle this summer to attend the Garden Bloggers Fling, an event that I’m organizing with three other writers, so it will be fun to meet in person!

Frances not only explains how to make these balls (which she first saw done on an HGTV program), she also goes into great detail on the steps, shares a supply list and many photos of the progress.

She calls these Hypertufa balls, but  explains that quikcrete mix can also be used. I hope this gets you motivated to make a big mess for satisfying results!

Contemporary trellises for your upwardly-mobile plants

Wednesday, June 1st, 2011

 Note: a version of this story appeared in the print edition of last Saturday’s LA Times HOME section and in today’s LA Times @ Home blog.

Jennifer Gilbert Asher and Karen Neill of TerraTrellis

This is their beautiful "Gracie" arbor, inspired by the shape of nursery hoop houses

Instead of a spindly, mass-produced support for your rose or bougainvillea, why not give that over-achiever a sturdy structure on which to climb? And why not train those vines and tendrils on a framework that’s both artful and functional?

Los Angeles landscape designer and artist Jennifer Gilbert Asher has reinterpreted classic garden ornamentation into modern, colorful – and durable forms.  Her TerraTrellis collection of steel tuteurs, arbors and wall trellises offers a stylish alternative to the type of generic (and often impermanent) metal and wood pieces you might find online or at big-box stores.

The pod-like 'Toki,' which Jennifer says was inspired by a Faberge egg!

“Playful architectural forms and compelling colors in the garden are what’s behind this collection,” says Asher, who also creates more expensive works of modern outdoor sculpture through TerraSculpture, a studio co-owned by Karen Neill. Pieces in the TerraTrellis collection range from $279 to $579.

Like the studio’s larger sculpture pieces, TerraTrellis’s pieces are fabricated by Mario Lopez, who runs a metal studio in south Los Angeles. The steel pieces are hand-welded and use stainless-steel hardware and cables. They are oxide-finished or cloaked in a joyous array of powder-coated colors like kumquat, berry and leaf.

Familiar forms from public gardens and even the agricultural landscape inspire the designs.

Here's the lovely color palette ranging from oxidized steel to powder-coat finishes

For example, the lines of TerraTrellis’s “Gracie Modern Arbor,” which looks like a 76-inch diameter double-circle emerging from a pathway, echo the shape of hoop houses that dot Southern California’s plant nurseries. The 58-inch high “Lazio Vase Trellis” is a scaled-down homage to the giant rebar artifices that contain riotous bougainvillea at the Getty Center’s Central Garden.

“These pieces are designed not only to support a plant, but to integrate with it,” Asher says. “This union ultimately forms a work of freestanding, living art in the landscape. We want people to tap into their inner landscape designer and have fun exploring interesting combinations of plant with trellis.”

Pot-ted (www.pottedstore.com) in L.A.’s Los Feliz neighborhood will carry the TerraTrellis collection. You can also order the pieces online at www.terratrellis.com

Here are some other designs in the collection – perfect for your stylish potager or rose border!

Lazio, trellis inspired by the majestic rebar structures that hold bougainvillea vines at The Getty Center

Ina, like a picture frame, for your wall or fence.

Akoris, a leaf green French-style tuteur, with a sculpted wire orb on top.

Detail, showing stainless steel cabling.

How about a pair of vertical trellises for your fence?

This one stands freely, like an artist's easel

Is pink this year's unexpected surprise color for the garden?

Jamie Durie’s very personal version of The Outdoor Room

Saturday, May 28th, 2011

This view takes in the two cabanas on the left and the dining pavilion at the opposite end of the pool

I joined Jamie Durie, of HGTV’s “The Outdoor Room,” for brunch and an interview in LA

I’ve been after celebrity garden designer Jamie Durie for more than a year to let me come and do a story about his personal Los Angeles backyard. I sensed he was stalling because, like many of us who make gardens (or write about them) for a living, our own outdoor environment is the LAST thing to receive our attention!

Turns out, Jamie and his producers of “The Outdoor Room” on HGTV  were cooking up big plans for his hillside property in Los Angeles’s Laurel Canyon.

Jamie reimagined the long-neglected yard, dominated by a vintage 1950s swimming pool, into a gorgeous series of outdoor living spaces. The magical transformation occurred over a three week time, and became the debut episode of The Outdoor Room’s season three, which aired earlier this year (you can see a schedule of re-runs of this episode by following this link).

In late February, I received an out-of-the-blue phone call from Jamie, saying: “The garden is finished – you’re invited to come see it!” Wow – this guy is good to his word.

Here's a bird's-eye view of the transformed outside living space - photographed from Jamie's hillside deck

We had a narrow window of a couple week’s time in which I could get down to LA for a photo shoot and interview, since Jamie was about to fly back to Australia for several weeks to shoot another show there. Whew. That guy lives a marathon life and makes it all look effortless. But we made it work. Here is my profile of Jamie’s project, which appears in today’s print and online editions of The Los Angeles Times.

The Los Angeles Times sent one of its very best photographers, Irfan Khan, to document the beautiful landscape. You can check out his web gallery of gorgeous shots here. I also took lots of reference photos to use while writing the story, and thought I’d post some of my favorites below.

Jamie asked me to include the many great resources he used to pull together this extreme garden makeover. So in case you’re curious, here is that list:

Resources & Materials

Bath: “The Outdoor Room” craftsman Steve Zimpel created the bath using recycled cedar from Durie’s original design.

Decking: Fiberon composite decking

Doors: LaCantina bi-fold doors

Fire: Escea outdoor gas fireplace; Durie Design Fire Pit

Furniture: Walter Lamb for Brown and Jordan reproduction chairs and chaises from Design Within Reach; all-weather wicker sectional, Durie Design.

Kitchen: Fuego modular kitchen.

Plants: Monrovia

Vertical garden system: Woolly Pockets

Pool Makeover: Jamie worked with Aric Entwistle of Los Angeles-based H2o Development Inc. to replace a conventional chlorine system with Spectralight, which uses ultraviolet light to kill pathogens and waterborne bacteria. The renovated pool is solar heated with a system from Suntopia Solar. A new infinity edge was fabricated over the original coping using carbon fiberglass, resin, high-tensile adhesives and several coats of waterproofing. It’s finished with Bisazza glass mosaic tiles.  

Like a raft floating over the garden, the upper deck provides excellent glimpses of the garden below.

Here's a bird's-eye view of the transformed outside living space - photographed from Jamie's hillside deck

I love this view from above, which shows how the box-beams form planting channels, and how the Roman shades create a canopy roof for the cabanas.

Here's the exterior of two pivoting planted "walls." When opened, they connect Jamie's bedroom to the garden.

A gorgeous detail of the stacked stone contained by one of two 7-foot gabion tree planters that Jamie designed

Here's a nice detail shot from inside the dining pavilion. You can see how the concrete retaining walls hold the hillside back and also form the interior walls where planters are hung and pillow-backs are rested.

A dreamy morning shot of the outdoor living room, featuring Jamie's own all-weather sectionals and a custom fire pit.

Inside the dining pavilion.

A detail showing how the Woolly Pockets vertical wall system adds foliage and flower texture behind the cabana.

The full-size view of the gabion tree planter - one of two in the garden.

At the end of my interview with Jamie, he talks about how much he enjoys living here. And it’s a perfect way to sum up the feelings I also had being in the highly personal garden environment: 

“Life just seems a whole lot more hectic in Sydney,” Durie says. “You can’t say that about Laurel Canyon. All I ever hear are birds. I’ve got squirrels running along the top of my green wall. An owl moved in once I finished the garden, and we’re starting to be visited by a ton of hummingbirds. I may not have kangaroos and koalas, but it’s kind of fun telling my mates back home that I’ve got coyotes in the canyon.”

Thank you for sharing your garden, Jamie. It was a treat! I hope you slow down long enough to really enjoy it~