Debra Prinzing

Get the Email Newsletter!

Archive for the ‘Playfulness’ Category

A Foraged Dinner at The Herbfarm

Saturday, May 7th, 2011

The Herbfarm Restaurant

Last weekend I was a guest at The Herbfarm, the only AAA 5-Diamond restaurant west of Chicago and north of San Francisco, rated number 1 in the Pacific Northwest for both food and service by the Zagat Guide

Dining there is a true “culinary experience” that draws food aficionados from around the world. I’ve been fortunate enough to eat at The Herbfarm Restaurant on three prior occasions dating back to 1995 when I dragged Bruce there to celebrate his appointment as Seattle’s deputy mayor. Our friends Jenny Ulum and Tim Gleason actually flew to Seattle from Eugene, Oregon, in order to join us at that meal. 

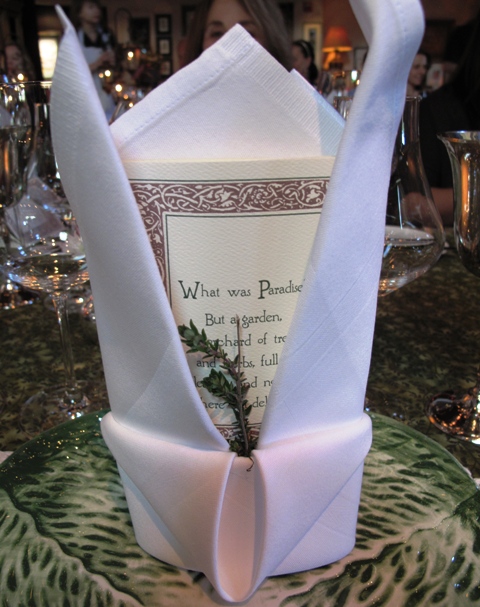
The menu cover reads: "What was Paradise? But a garden. . . "

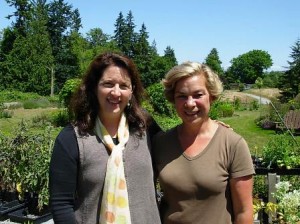
The Herbfarm Restaurant proprietors Carrie Van Dyck and Ron Zimmerman hosted fellow writer Robyn Cannon and me for an unforgettable meal last Sunday evening. We’re talking a four-and-a-half-hour, nine-course extravaganza that celebrates locally grown ingredients prepared with innovation and ingenuity. I say unforgettable, in that years after an evening at The Herbfarm, one can instantly recall tasting (perhaps for the very first time) a specific dish or uncommon ingredient. Oh, and did I mention that each course is paired with a Northwest libation selected by Sommelier Tysan Dutta? The wines are chosen to complement and enhance every bite. 

The Herbfarm’s history is long and not without drama (including a fire that destroyed the original Herbfarm location in Fall City, Washington, that was started by Ron’s parents in 1974 as a small nursery, followed by challenges trying to gain permission to rebuild). 

I have such fond memories of the old-timey Herbfarm. When my oldest son Benjamin was little, I used to take him out there to see the herb garden and a few farm animals. We still have the lavender-filled stuffed bunny rabbit, which we found in the gift shop. Those expeditions usually involved bringing along another mom and child to have a picnic in the herb garden. 

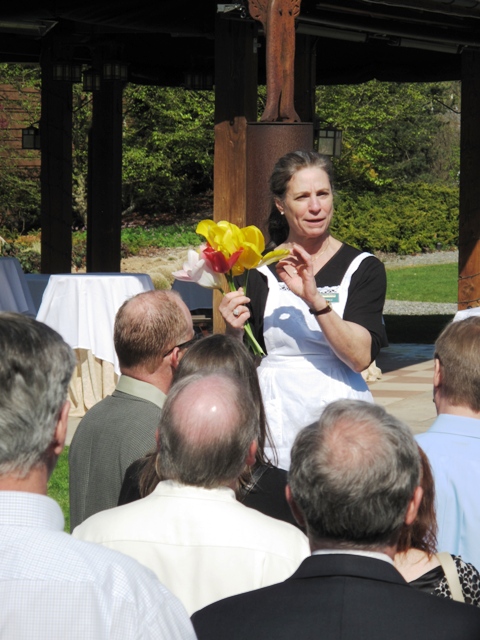
Carrie Van Dyck begins each meal with a tour of the garden.

The Herbfarm Restaurant’s current location in Woodinville dates back to 2001 when Ron and Carrie had to pick up and move the entire restaurant. They constructed a charming English-Tudor style cottage that houses antiques, a vintage fireplace, and tables that overlook the kitchen-as-theatre all night long. 

Robyn and I were staying at the adjacent Willows Lodge where we attended the Pacific Northwest Travel Writers Conference. And that’s how we ended up sneaking out of the proceedings late Sunday afternoon to join Carrie as she hosted the pre-dinner tour. The Herbfarm and Willows Lodge share a vegetable and herb garden where raised beds and clipped boxwood balls are interconnected by crunchy hazelnut shelled pathways. 

Carrie picked and passed around some of the edible ingredients that diners might expect to taste that evening — tulip petals, sweet cicely, sorrell, lovage, thyme, fennel and lemon verbena. We stopped to visit the resident pair of Vietnamese potbelly pigs named Basil and Borage, who reside in a pen next to the composting area. That seems appropriate, doesn’t it? 

Once we followed Carrie indoors and were seated for dinner, Ron took the stage to explain a bit more about the menu development. The Herbfarm creates 26 different themed menus each year, based on the seasonal availability of ingredients and the culinary whims of the chef Chris Weber and his team. By the way, Chef Chris is one of the youngest 5-star chefs in the country. Possibly THE youngest. What a talent!

READ MORE…

Makeover ideas for your concrete garden ornaments

Saturday, December 4th, 2010

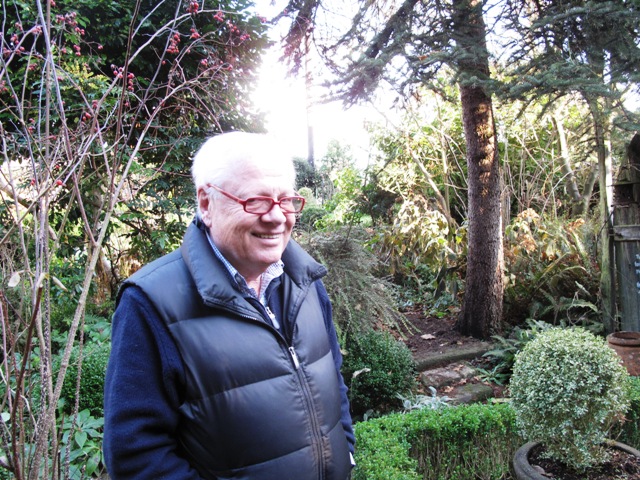
Meet Mark (aka "Marco") Henry ~ in his garden

On Friday, I enjoyed a rare luxury – a return to a favorite garden I’ve written about twice in the past decade: 

I hopped in the car and drove to Snohomish, Wash., where I lunched with two long-time friends from my days working for The Herald, the daily newspaper in Everett, Wash. (it’s a mid-sized city located about 30 miles north of Seattle). 

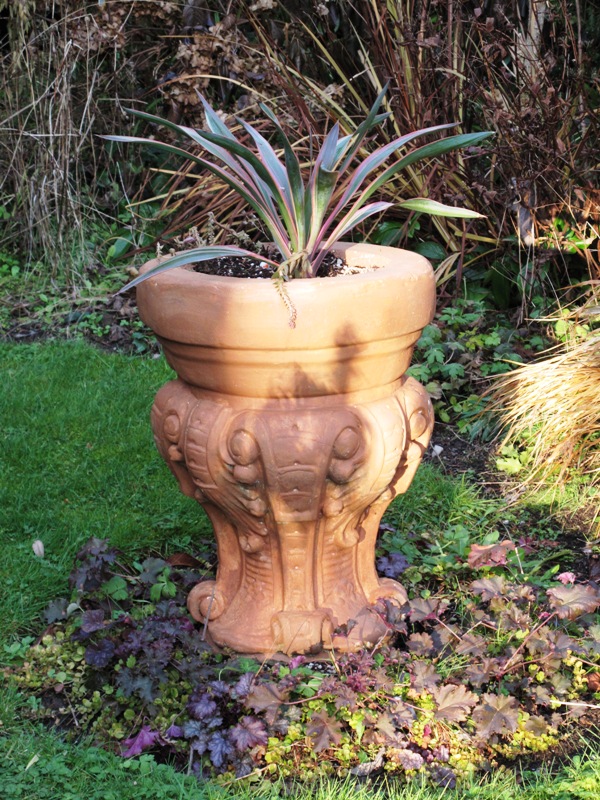
Here is a beautiful planter; once dreary gray concrete, it has been warmed up with a coating of terra cotta-colored Latex paint.

In the process, I learned something new about how to save drab, lifeless cast-stone (concrete) containers and garden ornamentation.

Read on for the simple steps

Marco Henry, a gifted artist, garden and interior designer and Venetian expert, hosted a little luncheon at his amazing home. We were joined by our mutual friend Darlene Huntington, one of my very first “sources” when I joined The Herald’s Home & Garden section in 2000.

Over the years, I have had the privilege of writing about both of these incredibly talented gardeners and their verdant, plant-filled environments. The two introduced me to other Snohomish County plant fanatics, owners of vintage homes, collectors of antiques and garden-makers. I have been so enriched as a writer and gardener from that 4-1/2-year episode of my life. 

After lunch we, of course, ventured out to Marco’s garden. Yes, it’s winter here in the Pacific Northwest, but when you have structural plants (such as Italian cypresses and ball-shaped boxwood shrubs), there’s lots to appreciate. When you see these elements, you understand what people mean when they say to design the “bones” of the garden for year-round interest.

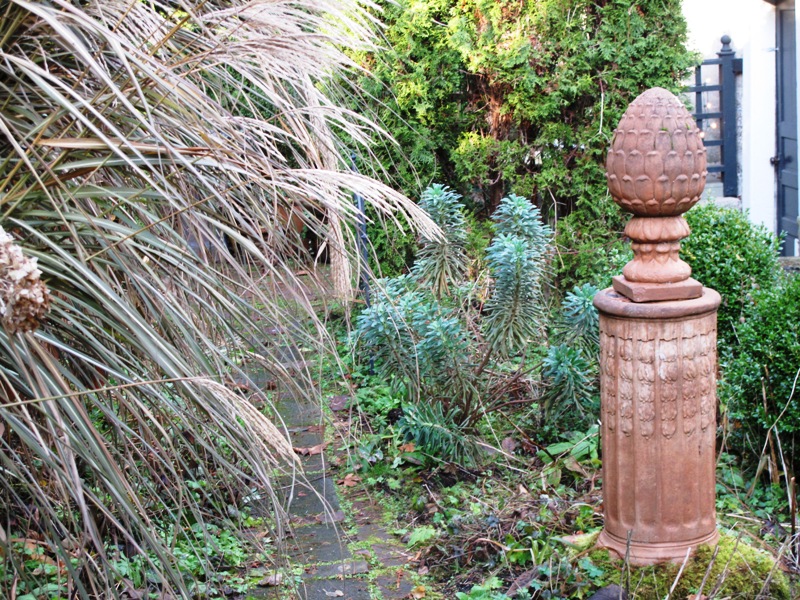
A simple coat of Terra Cotta pigment, from a can of Latex paint, transformed an old concrete pedestal and finial into a work of art.

I first wrote about Marco and his garden when it was included on the Northwest Perennial Alliance’s “Open Garden” tour  in 2000. Darlene marched me over to Mark’s home for an introduction. When I entered the Gothic-inspired wood gate, mounted into a niche in the beautifully-groomed hedgerow, I gasped and gazed in awe at what I saw inside: plant collections, art collections, vintage furniture, water features, sculpture and more – all surrounding a circa 1912 farmhouse and yard, complete with chicken coop and green house. 

This garden has the power to transport its viewer to a horticultural world we all yearn to possess. Is it a formal Italian garden? Or a cottage-style English estate? Maybe it’s a a landscape in the South of France. Each of these influences has a voice in Marco’s garden.

A teacher early in his career, Marco can be credited with giving a generation of fortunate kindergardeners an appreciation for art, color and beauty. Now, the grown-ups in his world can learn from his garden design techniques and his unique aesthetic.

My June 2000 article was called “Secret Garden.” I just unearthed that article and re-read it, savoring some of Marco’s choice quotes: 

“I’m a plant collector, a collector period. Some people put all of their collection together in one place. I don’t. I like to make something artistic out of it. 

“If I buy one of something I like, it’s the beginning of a collection. I could be Chinese porcelain or it could be coleus.” 

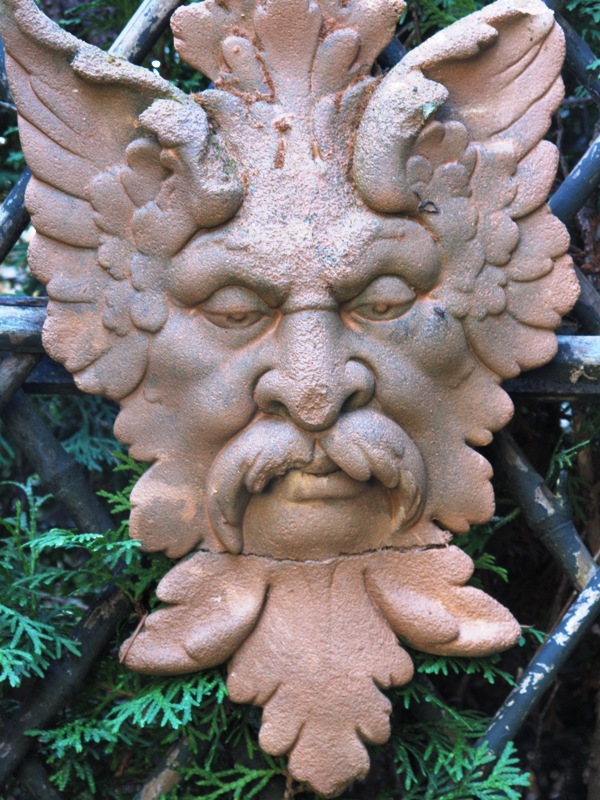
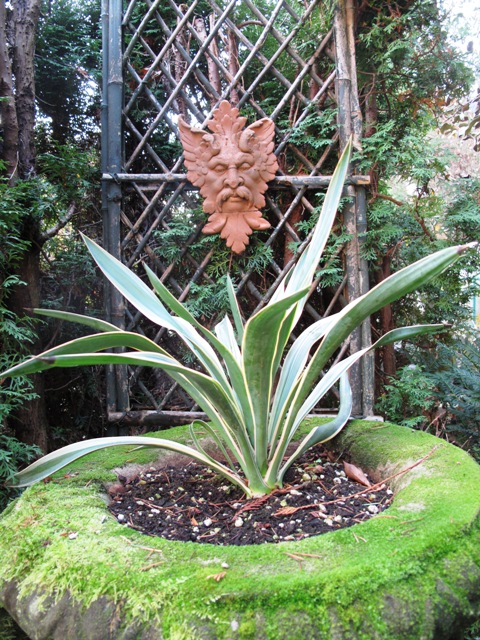
My eyes were drawn to the Green Man plaque, all the more noticeable now that he's been coated in Terra Cotta paint

Looks like original Terra Cotta, doesn't he?

In 2006, I was asked by Cottage Living magazine to again write about Marco’s garden. We had fun with that story, which was photographed by Richard Warren. I loved sharing Marco’s gardening style with a national readership, especially his tips on growing and designing with hydrangeas. 

Marco is passionate about Venice, a city he first visited in 1968 as a young man.  In a post-card written to his parents that year, he said he could imagine living in Venice. Now that dream is practically true, since Marco travels to Venice at least twice annually. He has guided many tours there for fans of Venetian architecture, art and gardens, and he lectures on the lessons we can learn from the gardens of Venice. 

Today’s lesson was all about Terra Cotta and the way it can warm up a garden, especially ones here in the Pacific Northwest that exist under a grayish cloud cover all winter long. Marco showed me several ornamental pieces that began their lives as uninteresting blobs of concrete. Concrete, he says, often recedes and is visually obscured by the greenery around it. Now he’s infused these pieces with the sun-drenched character of Italy. It’s a simple process and one I’m eager to try myself:

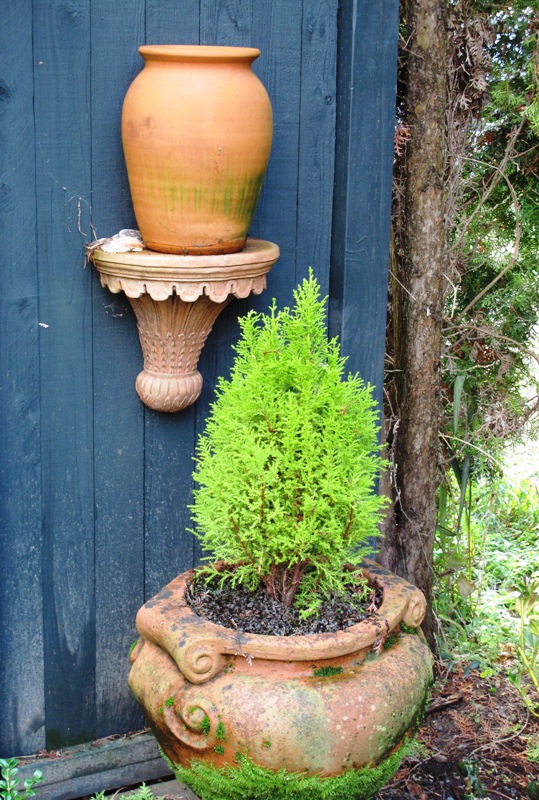
The little Terra Cotta "shelf" was transformed from gray cast-stone concrete to rich Terra Cotta - with Latex paint!

1. Find a piece of broken Terra Cotta pottery or a flowerpot with the perfect red-pink shade you love.

2. Take it to the paint store and ask the guys to mix up a can of paint that matches your sample. Be sure to order exterior Latex (water base) paint.

3. Fill a plastic bucket with some of the paint and drizzle in a bit of water to dilute it to a consistency that’s easy to work with. It can be more like a glaze or a stain in thickness.

4. Start painting any old piece of ordinary garden concrete. You may wish to coat the concrete with one, two, or three coats. The water-base pigment will “take” to the concrete differently, depending on how porous it is. Marco says the Terra Cotta-colored paint definitely “soaks” into the pores of the concrete.

5. Finally, you will enjoy what looks like perfectly-cast Terra Cotta. It weathers nicely and may soon take on a patina of age, moss, or lichen.

You’ll be pleased with the resulting appearance of your efforts. Old concrete gets a Mediterranean-style upgrade – to classic Terra Cotta. How easy is that? Thank you, Marco – great tip!

POST-Script: Thanks to Jim Bishop of San Diego-based Bishop Garden Design, who originally saw this post on my Facebook page, I want to share his cool ideas for painting concrete:

If you want to give (terra cotta) an immediate aged look, get a second can of (paint) in a darker version of the first color.

Water this down too or add a glazing agent and paint lightly over the object especially in the recesses. Rub off the excess until you get the aged look you want. Oil based gel stains work well too for creating an aged look and give you a longer working time.

Get out that paint, people! Have some fun!

What to do with salvaged shutters

Thursday, November 18th, 2010

Read on to learn what I'm going to do with these amazing shutters!

I recently spent the morning at a cool local flea market in Seattle. I was up early and out the door by 7:15 a.m., ready to get my creative juices going.

My mission: to discover as many castoffs from others that could make their way home with me.

The destination: 2nd Saturdayz, a popular flea market where vendors, dealers and designers come together to do business with salvage-savvy shoppers.

The apt motto: A Saturday Market of Fine Tastes and Curious Treasures.

Once inside the doors of a huge hangar (yes, the flea market is held at a decommissioned Naval base), I met up with Jean and Gillian. But not too much socializing is encouraged at these events. That is, IF you want to get the best deals. First-come, first-serve is the motto. Or: Every woman for herself.

I shouldn’t limit this endeavor to the female salvager because there were many men in attendance at 2nd Saturdayz. But still, you know what I mean. It’s a gal’s paradise.
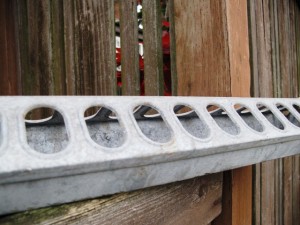
Galvanized chicken feeder. 30 sizeable oval openings. A succulent planter or a flower holder? Or both?

Lately, I’ve been collecting vintage flower frogs, which makes sense since I’m living and breathing floral design. But this time, instead of finding glass and metal frogs, cages and stem-holders to displace the dreaded florist’s Oasis, I picked up a galvanized metal chicken feeder.

Think of a loooong ice-cube tray with oval cutouts. In metal. Very cool. Now that I’m looking at it again, I may just use this nifty piece as a planter for hardy succulents. It’s probably leaky so that’s going to give the drainage I’ll need.

A nearly-pristine child's typewriter complements my grown-up Underwood.

I also picked up a vintage child’s typewriter. It can play nicely with my retro black Underwood typewriter that we bought back in 1985 at the Rotary Club Auction on Bainbridge Island. I think I paid $5 back in the day.

Those old typewriters, truly relics, are now priced at $50 on up. And to think so many of them have been dismantled to make jewelry from the letter keys. I’m guilty of buying one of those alphabet bracelets, too.

When I walked into one small “booth” with my friend Jean, an awesome Seattle landscape designer, I found myself absent-mindedly stroking the frame and spindles of a cast iron baby crib. The vendor had taken off one of the crib’s side-rails and piled pillows and cushions on the springs and against the three remaining railings.
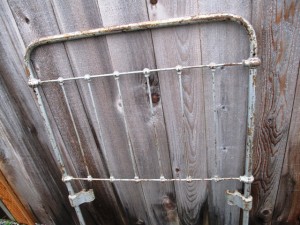
Here's the end of the baby crib. Next time you see this, I'll be lounging against some cushy pillows, perhaps under a shade tree. This crib will become my garden bench.

What did it recall? Yes, a very fashionable garden daybed or bench. And for $100, I totally lucked out. My friend Gillian, who is a pro at this sort of buying-and-selling of antiques and vintage items at Ravenna Gardens, pulled me aside to share the secret that she’s seen other dealers selling cast iron baby cribs for $600. I don’t have a “garden” in which to place this bench right now, since I’m in a rental house and I’m not yet ready to invest energy on land I don’t own. But . . . I did decide to bring this crib home and store the pieces in the garage until the next garden comes along. Luck-ee me!!!

I couldn’t ignore the central element inside the warehouse – a little hamlet of potting sheds. Their perky corrugated metal roofs, topped with finials created from shiny bits and pieces, stood high above the flea market’s landscape.

While gazing at the rustic but stylish potting sheds, I met designer/builder Bob Bowling. Owner of Bob Bowling Rustics of Whidbey Island, this engaging shed artist greeted me and generously shared his story.

Turns out, like some of the talented folks we featured in Stylish Sheds and Elegant Hideaways, Bob makes unique structures using reclaimed and recycled materials. Whimsical and playful, and finished off with salvaged windows, doors and other artifacts, the Rustics sheds are each a delight to see.
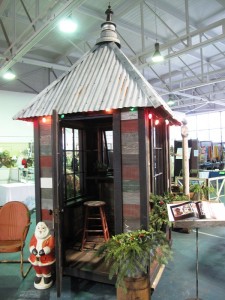
Bob's cool garden shed was hard to miss.
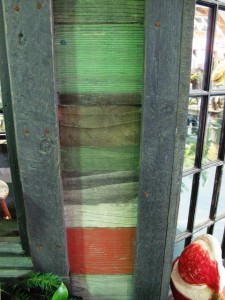
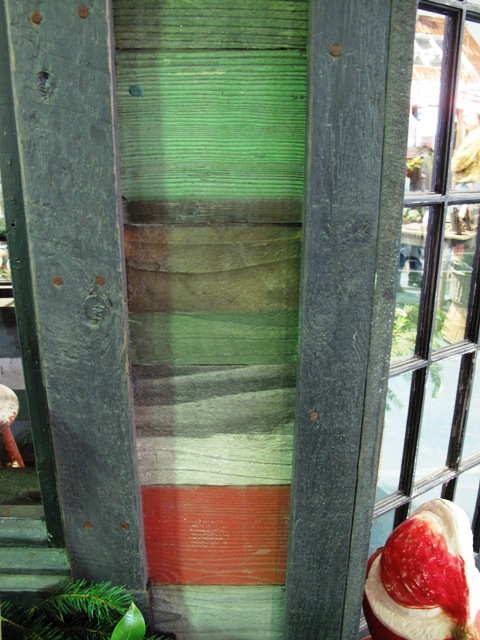
The "stripes" come from variously-stained boards.

The prices are reasonable, too. I should know. For $3200, you can get this “Rasta” shed. It measures about 7-by-7 feet in diameter (plus or minus) and features cool details, like the exterior of alternating stripes of differently-stained boards and the window boxes, door hardware and towering finial.

You could easily spend this much for a pre-fab storage or tool shed on the lot of your local big-box store. Which would add more art and style to your life, while also being quite functional?

All this thrifty flea-market shopping had energized me and made me feel quite artistic.

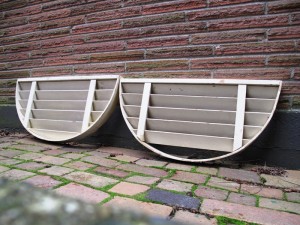
And then I met that shutter duo that called my name. Loudly. They appear to be half-circle crowns or eyebrow tops from a set of plantation shutters.

Wooden, with 2-inch deep slats, these pieces were displayed separately. Once I noticed both of them, I was not going to leave with just one! I don’t think I got a huge bargain, since I paid $28 apiece (but the seller insisted she had just cut the price in half). Whatever. When you spy something so uncommon, you have to act.

Other than changing the depressing buff-colored paint job to something more lively, what on earth do you suppose I will do with these crescent-shaped pieces?
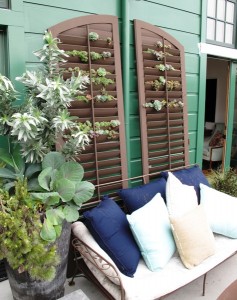
Hello! You two are pretty darned cute. That Baylor Chapman is uber-talented!
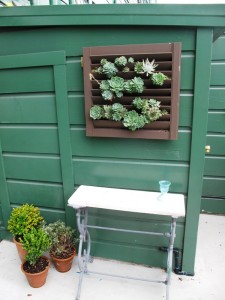
Here's another small shutter-turned-wall garden, compliments of Baylor Chapman.

For inspiration, I hearkened swiftly to my visit to Baylor Chapman, a talented San Francisco floral and garden designer I recently profiled for A Fresh Bouquet. After my friends Susan and Rebecca took me to meet Baylor at her floral studio, the three of us accompanied her to her loft apartment in SF’s Mission District.

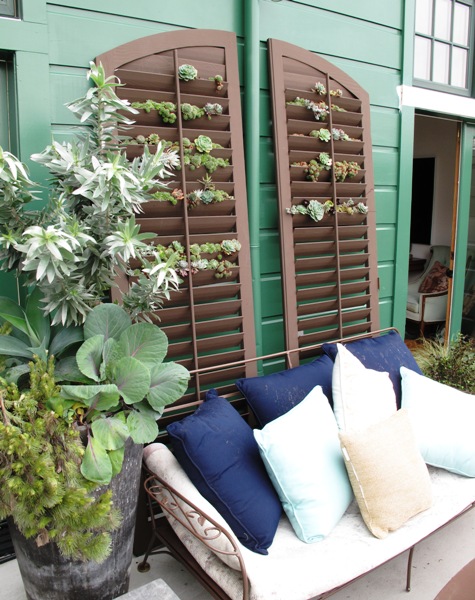
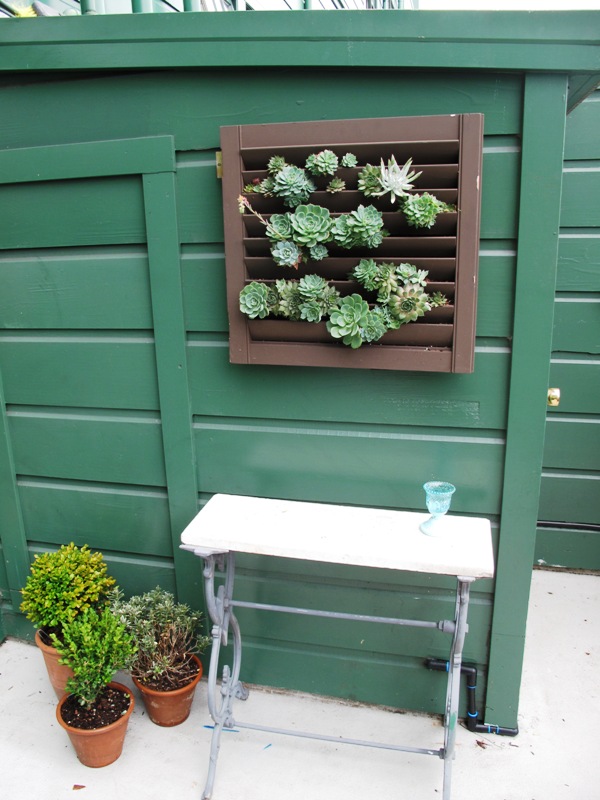
And there on the outside roof deck, were some pretty amazing succulent gardens – PLANTED IN SHUTTERS!!!

Naturally, I am going to draw from this incredibly clever idea and put those twin shutters to very good use with a vertical planting of hardy succulents. It may take until next spring, but stay tuned. And if you have any suggestions on what color I should use to upgrade the crappy paint color, please chime in.

The trick, according to Baylor, is to secure a layer of landscaping cloth like a little pocket or envelope behind each shutter opening. Then you can add potting soil and plant your sedums, succulents or whatever else seems fitting. You know, I really do love that chocolate brown finish on the shutters. Doesn’t it nicely offset the silver, gray, blue and green foliage of the succulents?

Well, all in day’s work. More to come as I execute these big plans.

What I did on my summer vacation . . .

Friday, October 8th, 2010

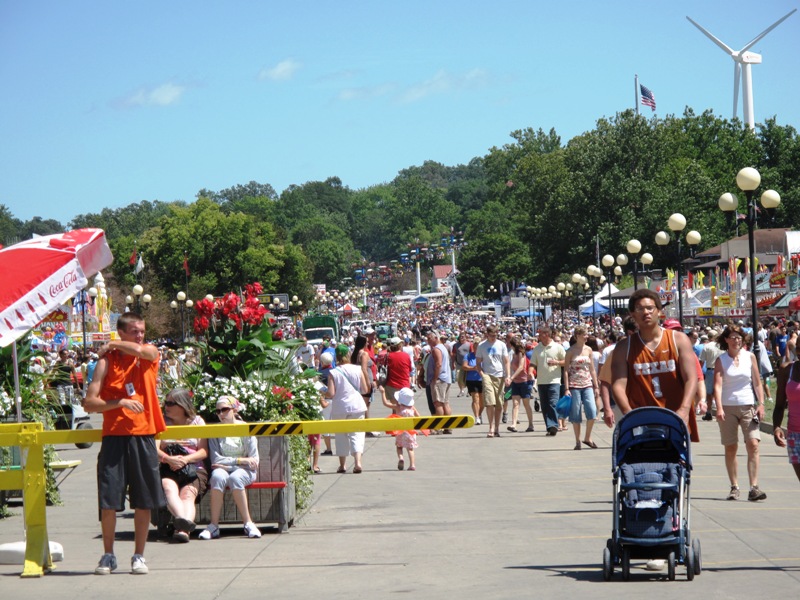
Welcome to the Iowa State Fair!

IOWA AND ITS FAMOUS FAIR 

This post was somehow lost between computers. I actually started writing it at the end of August. So . . . a little delayed, but no less informative (says I). The trip to Des Moines and Chicago was filled with “firsts” and I thought I’d share some of them, in a series of posts. 

Part One: On August 15th, I flew into Des Moines, Iowa, in the early afternoon. Susan Appleget Hurst met me and whisked me off to the famous Iowa State Fair for an extravagant and authentic Midwestern County experience. 

I’ve heard so much about this quintessential state fair so it was a thrill to take in the experience for an afternoon. Susan tells me that there’s an entire movement of fair fans who arrive with campers and RVs and pay to park their wheeled homes on-site in order to hang out at the fair for the full 10-day experience. 

I only saw the highlights, but they were unforgettable. If you only have four hours to take in this fair, here’s what NOT to miss! 

Lunch!

The sign says it all.

First things first: Eat lunch. 

Susan recommended a Pork Chop on a Stick. This is a savory chop cooked on open grills. The rib is butterfly-cut to form the “Handle” for easy, fork-and-knife-free dining. A napkin will do, but be sure to add some barbecue sauce. 

I asked the crew behind the counter about the pork chop’s popularity. “We sell 6,000 to 8,000 a day during the fair,” boasted one guy. Wow. This is a big Iowa Tradition and I sure enjoyed my chop. Given all the deep-fried offerings on the fairway, I think the chop was one of the healthiest sources of protein! 

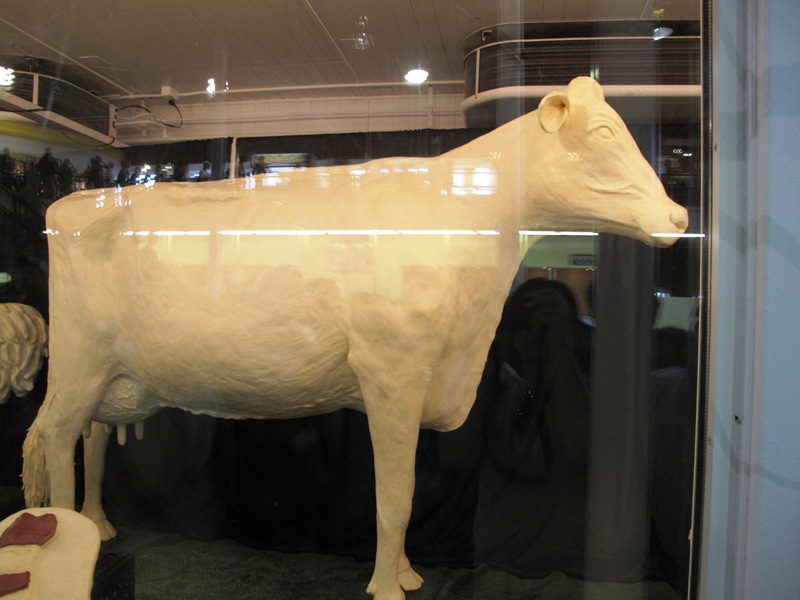
What a charming way to illustrate the Dairy industry!

We left the Iowa Pork Farmers and strolled through several of the Agricultural Buildings. Susan wanted to make sure I checked out the “butter cow,” a popular annual feature. This life-sized bovine is – yes – carved from pure butter. No wonder you have to photograph Bessie through a glass window. She is temperature-controlled due to the humid and hot Iowa summers. 

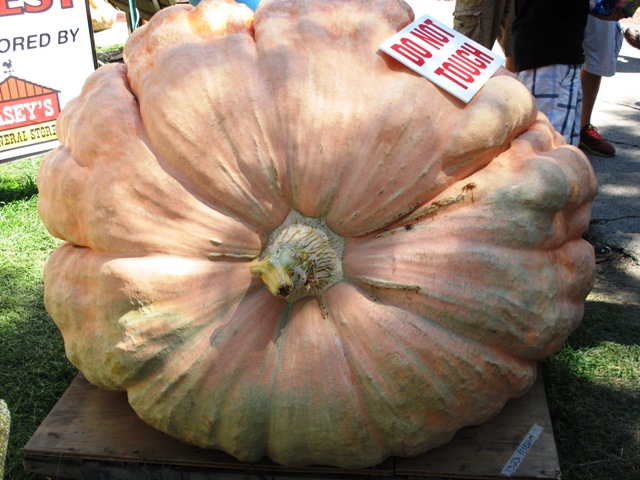
Look but don't touch!

We also checked out the produce displays and took a gander at a 1,323-lb prizewinning pumpkin. 

Other Plus-Sized highlights at the Fair included a gentle-looking steer and lots of livestock raised for everything from wool to milk to dressage. Horses large and miniature, goats wearing sweaters, baby calves, and the fair’s largest hog….what a fun tour of Iowa’s farming heritage. 

We stopped for dessert and got ourselves a cup of the famous Iowa ice-cream from an old-fashioned pharmacy. Susan recommended the homemade fresh peach ice cream, but since I couldn’t decide, I also ordered a scoop of homemade strawberry ice cream to split. 

The garden gals in the wine tent, Deb and Susan

We thought we might leave by then, but Susan’s husband Jerry and his friend were in the Iowa Winery tent. So we obliged and joined them to taste some of the really excellent offerings from local wineries. 

All in all, this was a very special visit. I loved the fair and would love to return next year. What a treat!

A true blue garden with a heart of gold

Sunday, August 8th, 2010

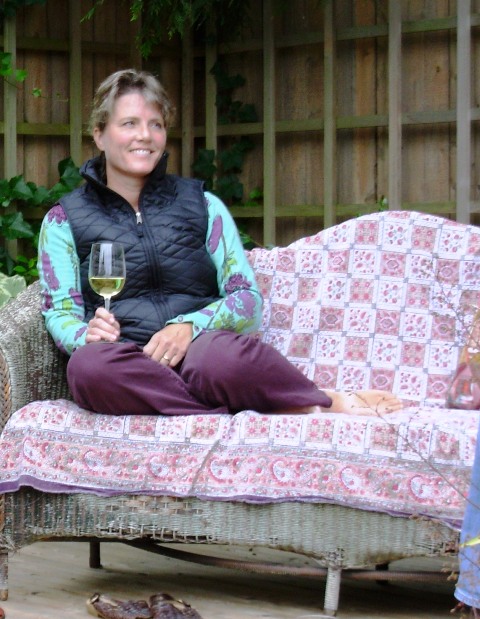
Tina sure knows how to enjoy herself in the garden! Here she is, resting on my vintage wicker in my former Seattle garden, 2006.

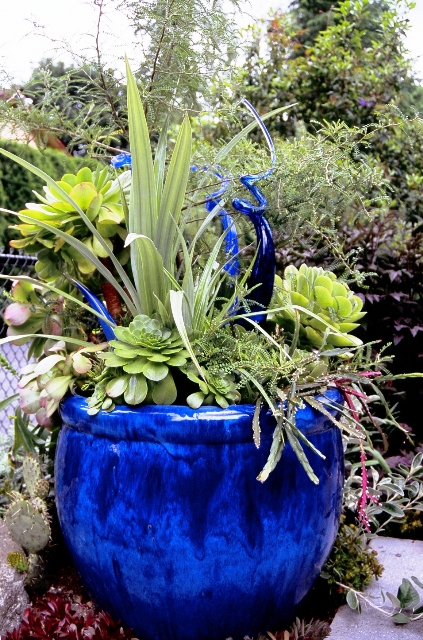
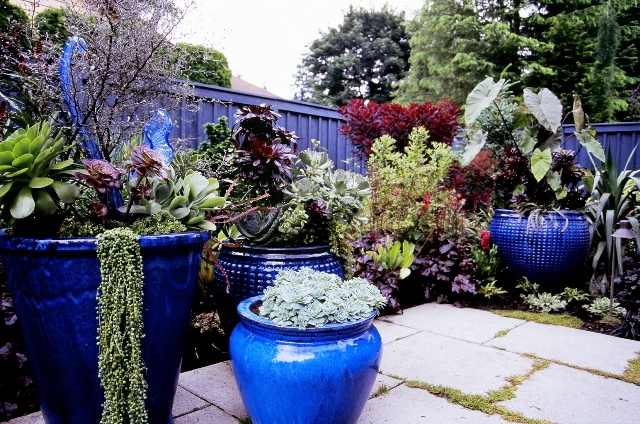
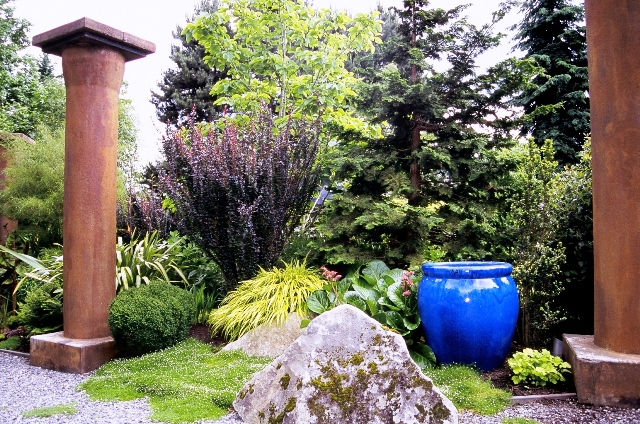
Great container design paired with whimsical glass art makes this pot a stunning focal point in Tina and Paul's garden.

I first met Tina Dixon in the early 2000’s when I was asked to join her as a judge for the Washington State Nursery & Landscape Association design awards.

Her bubbly personality and welcoming nature included me in the circle of other judges, most of whom had previously served together. Our judging session took place at her home in Bothell, just north of Seattle, allowing me to gain a better sense of just who Tina is. In short, Tina is a connector. She connects colleagues, clients and friends, helping everyone feel part of the Seattle horticultural community. You can’t help but have fun when she’s in the room (or on the tour bus or in the garden).

Through Plants a la Cart, her container design business, Tina creates breathtakingly gorgeous planted pots for some of the Seattle area’s poshest addresses.

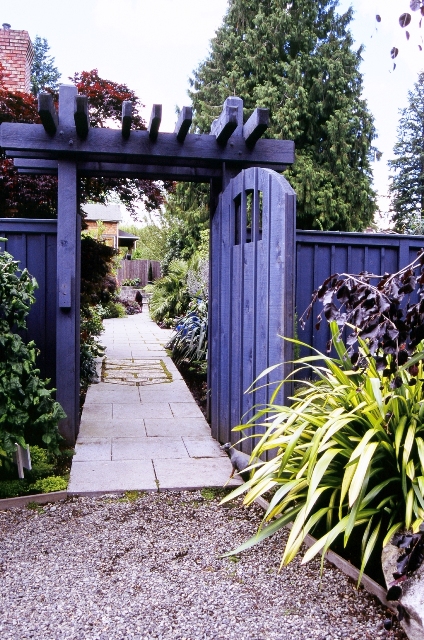
Several years ago, she turned her attention to the property she owns with her husband Paul Stredwick. Their hand-crafted garden is a vibrant, color-infused, texture-layered, art-filled spot on the map. And garden tour-goers, if they are lucky, can occasionally get beyond the denim blue-stained gate to see the surprising horticultural world inside.

The photographs shared here are ones I took in 2006 when Tina and Paul opened their Golden Trowel Award-winning garden to the Hardy Plant Study Weekend participants. I served on the event’s planning committee that year, so I knew what a treat was in store for the several hundred participants who flocked there during the Open Garden schedule.

In 2007, Garden Design magazine awarded Tina and landscape designer Mike Jeppesen the Golden Trowel Award for this gorgeous Blue-Themed landscape

Since then, I know that Tina and Paul have received numerous requests to add their garden to area tours. They recently decided to open the property to benefit a cause that they personally support, Hopelink. Hopelink is an United Way agency that offers an array of programs that enable families in crisis to make progress toward and achieve self-sufficiency.

You can see the garden next Sunday, August 15th, at two different events. An evening Garden Party (6-8 p.m.) includes wine, hors d’oeuvres and music by The Chromatics. Knowledgeable docents will be on hand to answer questions during the festivities. Tickets to the private garden gala are $150 with a portion tax-deductible. Register online or call 425-897-3703.

The Dixon-Stredwick garden is also open earlier in the day, Noon-5 p.m. for a $50 donation to Hopelink. You can pre-order tickets for the tour here. Or call the number above.

For some background on this garden, here is the story I wrote in April 2007, which appeared in Seattle Homes & Lifestyles magazine. Subsequently, their garden has been featured by other publications, so I feel pleased that Tina said “yes” to me first!

True Blue: Designed with a harmonious blue-hued palette, a Bothell garden shows off art, architecture and plants

Written by Debra Prinzing

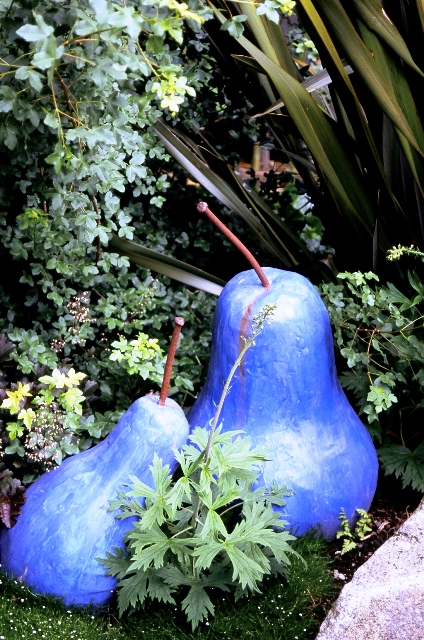
Painted periwinkle, two concrete pears by Woodinville artist Judy Thomas continue the color story.

If, as color theorists say, blue has therapeutic qualities, then Tina Dixon is a very healthy woman. Whether it’s a bright or subdued blue, Tina thrives on the hue.

Owner of Plants a la Cart, a successful container-garden design service, Tina considers the serene hue her signature color. Although she doesn’t limit clients to her preferred palette, Tina is well known for filling azure- and cobalt-glazed urns with dazzling combinations of leaf shapes, textures and colors.

Her penchant for blue infuses her own landscape, giving it a cohesive theme. “Blue is my favorite color,” she proclaims.  

When they bought a one-third-acre Bothell pasture in 1983 (previously inhabited by a lone calf), Tina and her husband, Paul Stredwick, were in their late 20s and intent on building their first home, a gray, barn-shaped Dutch colonial, trimmed in blue. Landscaping was not on their minds or in their budget.

By 1987, Tina abandoned an office job for a horticultural career. She studied landscape design at Lake Washington Technical College and launched Plants a la Cart. The pasture was by then home to two rambunctious golden retrievers.

Occasionally, Tina and Paul had time to tackle their own backyard. They renovated a deck and planted an 80-foot-long mixed perennial border against the south fence. “Paul and I were trying to pick away at the landscape,” she recalls. “Wherever we stopped one year, we started there the next. It wasn’t quite flowing.”

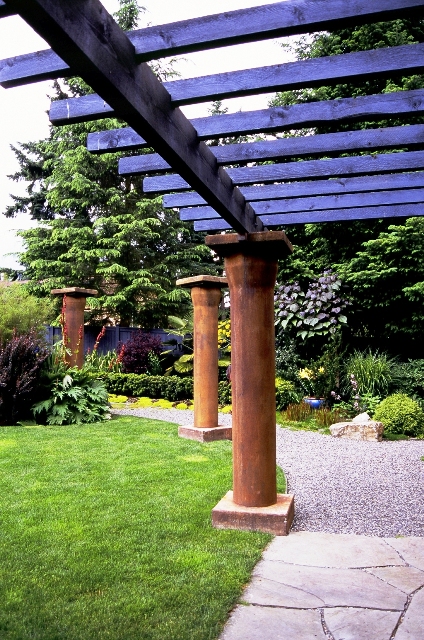
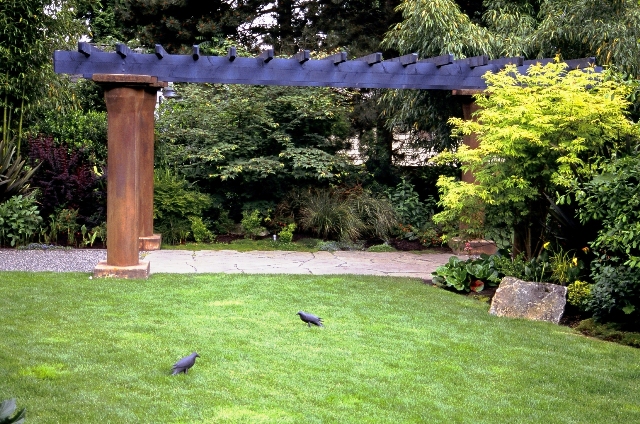
The blue-stained arbor is supported by DIY columns.

In 2002, knowing they wanted lighting, irrigation and hardscaping in the garden, Tina and Paul agreed to ask a landscape designer for an overall plan.

It was almost inevitable that Mike Jeppesen of Sammamish Landscape would help the couple create their blue-themed dream garden, since he and Tina had collaborated earlier that year on a gold-medal “Blue Garden” for the Northwest Flower & Garden Show. With a blue-stained gate and arbor, Pennsylvania bluestone pavers, blue Asian pots and collections of blue-tinged conifers, the designers made a rare statement with this cool palette. The design also earned them the Pacific Horticulture Award.

“Like Tina, I prefer to deal with foliage—this garden is virtually a tapestry of texture and leaf color,” Jeppesen says. “I also knew that even though Tina and Paul and the dogs needed to enjoy the garden, it also had to be a space for her to show off what she does best—it’s a garden that people will visit.”   

Tina and Paul’s garden invites visitors to enter along a charming walkway, pass through an oversize blue gate and pause at a dramatic “foyer” where one of eight ochre-stained concrete columns appears as a focal point.

From here, a 4-foot-wide strolling path meanders clockwise around the garden’s perimeter. An irregular section of lawn is reserved at the center for playing ball with the dogs. More free-standing columns punctuate the heavily planted borders, drawing the eye through the landscape to a four-column pergola in the distance.

A grouping of blue Asian pots presents Tina’s favorite container designs, incorporating bear’s breech (Acanthus mollis), golden smoke bush (Cotinus coggygria ‘Golden Spirit’) and Canna ‘Tropicanna’.

“Columns were on my wish list but were killing the budget,” Tina admits. Jeppesen suggested using concrete waste-water pipes, set on end, to serve as columns. At $80 each, the 8-foot-long pipes were a perfect solution. Tina asked artist Johnny Ward to transform the ordinary concrete with a rich gold-brown patina. Blue-stained lattice boards and rafters form the pergola, complementing a Pennsylvania bluestone terrace beneath.

To give the landscape the feeling of maturity, Jeppesen and his crew placed boulders, large rocks and stone steps throughout the landscape. He also encouraged Tina and Paul to incorporate large trees and shrubs into the design. “Even though Tina deals more with perennial-style plants, I wanted her to use trees and shrubs to provide interest when there are no flowers in bloom,” he says. “They give substance to this landscape.”

Tina and Paul agreed and headed to Oregon, where they used Tina’s wholesale connections with a tree farm. They selected trees to complement the scale of their house, including several hinoki false cypress (Chamaecyparis obtusa>‘Gracilis’), plume cryptomeria (Cryptomeria japonica ‘Elegans’), weeping copper European beech (Fagus sylvatica ‘Purpurea Pendula’) and a flowering dogwood (Cornus x rutgersensis ‘Constellation’).

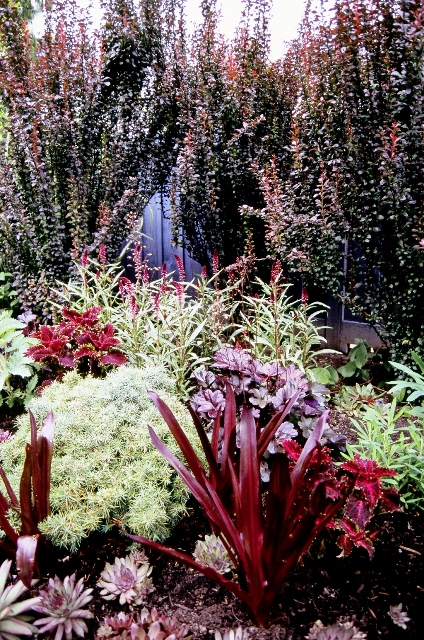
Wine, burgundy and maroon foliage are great complements to blue tones.

One-color gardens are appealing because of their simplicity, allowing plants and constructed elements to speak a common design language. Tina recognized that gold, lime, wine and silver foliage plants gain a visual boost when placed near blue pots and architecture.

She adapted container design techniques when planting the landscape. “Because I work on such a small scale, it was an overwhelming thought at first,” she says, “but you just have to take the principles of putting the right leaf shapes and textures together and use them in the larger context.”

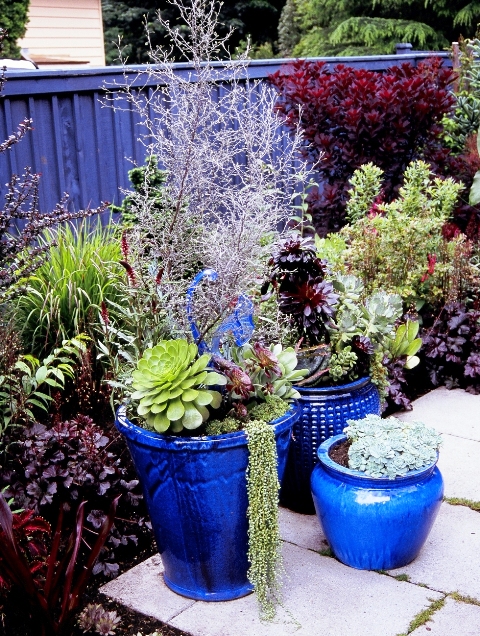
Blue-glazed Vietnamese pots hold everything from gold-leafed ornamental trees and striped tropical plants to exuberant vines and silvery succulents. Tina’s adventurous designs rely on attention-grabbing plants that look even better when paired with blue. “I’ve been really tempted to use other container colors,” she says. “But that would feel like a mixed jar of jelly beans. Instead, I decided to be bold and consistent. The blue pots make sense and tell a story.”
Landscape designer-contractor: Mike Jeppesen, Sammamish Landscape, (360) 435-3769 or amjeppesen@earthlink.net

Container designer: Tina Dixon, Plants a la Cart, (425) 481-2194 or stredson@aol.com

Carpenter (pergola, entry arbor and fence): Cliff Chatel, Woodmark Construction, (425) 827-5242

More photos to delight – and tempt you to attend next Sunday’s tour and garden party:

There is a small patch of dog-friendly lawn in this garden, yet Tina can't resist placing sculptural black crows on its surface.

Another detail shot revealing Tina's incredible container design talent and her color sensibility.

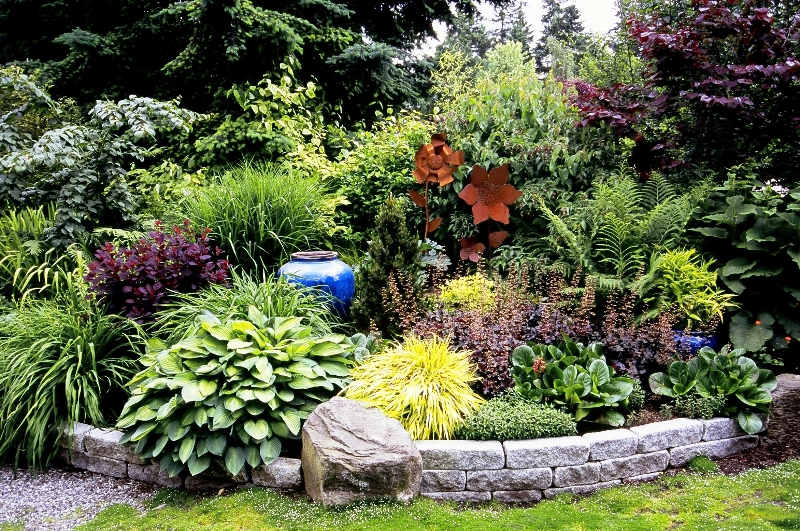
A brilliant, blue-glazed urn is a delightful counterpoint to trees, shrubs and rock.

Playful “hopscotch” pavers guide visitors to the blue-stained entry gate (a hand-painted sign nearby reads “All who enter must hop” and another, inside the garden, asks “Did you hop?”).

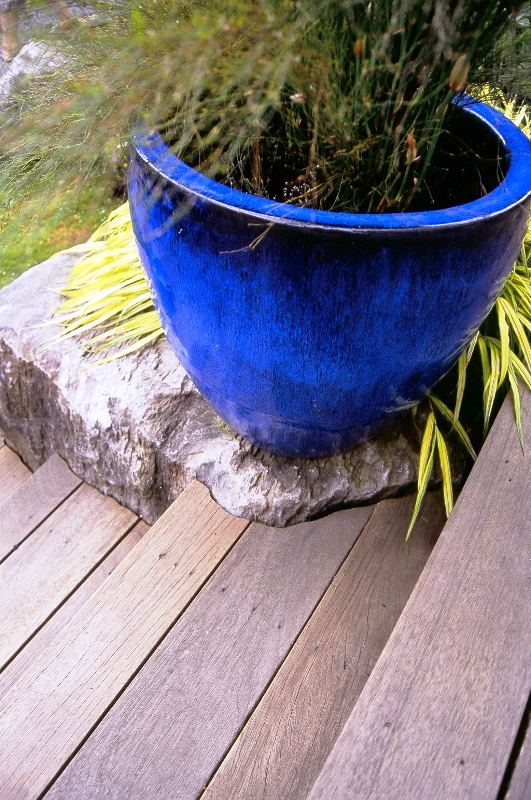
Here's a cool detail showing how Tina and her landscape cohort Mike Jeppesen carved the decking around a piece of basalt - just like a puzzle piece.

Not much to say but: "Feast your eyes on this tapestry of texture and color"

Chocolate flowers for your garden

Tuesday, August 3rd, 2010


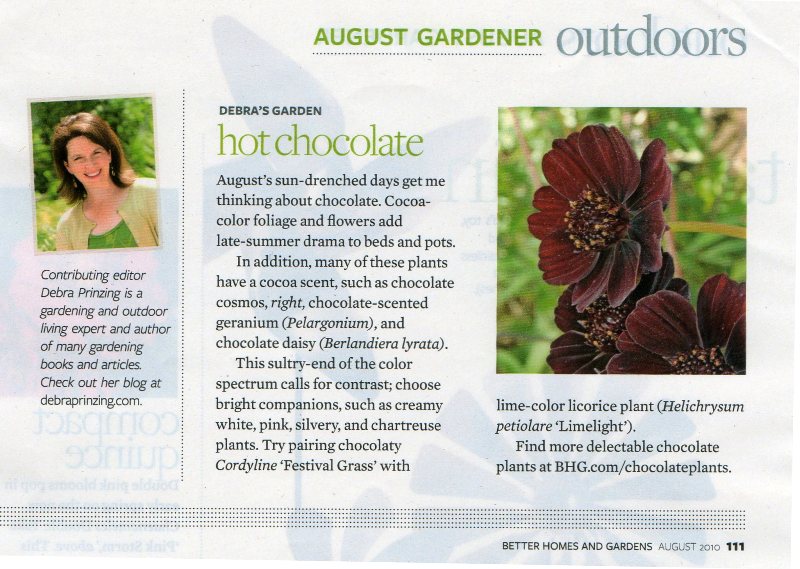
BH&G's August issue features my "Debra's Garden" column about "hot chocolate" plants

Chocolate flower and plant update:

Better Homes & Gardens readers who see this month’s “Debra’s Garden” piece on cocoa-colored and chocolate-scented plants might be interested in reading my post from last July. You can find it below.
Just last summer, I visited the famed Chocolate Flower Farm in Langley, Wash., on Whidbey Island – and wrote about my tour of the charming and inspiring nursery with owner Marie Lincoln.
Several readers have already contacted me to mention Chocolate Flower Farm as a great source for dark-colored and sweet-fragranced plants, including the chocolate cosmos, featured above right.
 
In fact, if you turn to the Resource section in the August issue, you’ll discover that we did indeed feature this great resource for all things chocolatey. The web site is: www.chocolateflowerfarm.com.
As with the edible kind of chocolate, one can never have too many yummy, delicious chocolate plants. Enjoy – and please let me know how you are using this sultry color in your own garden.
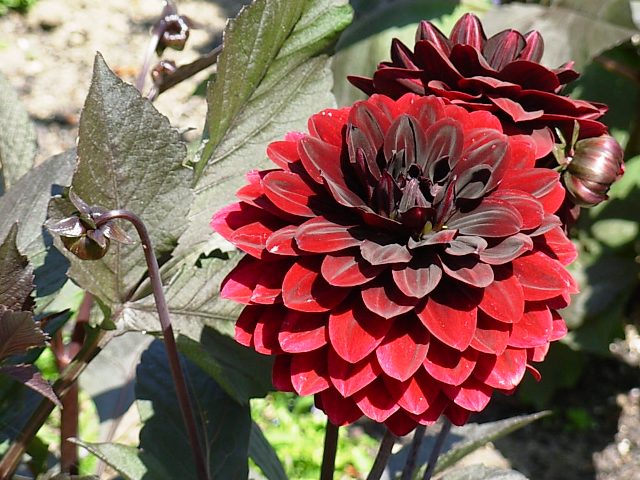
Dark chocolate brushes the tips of this multi-petaled dahlia called 'Karma Choc'

Dark chocolate brushes the tips of this multi-petaled dahlia called 'Karma Choc'

chocolategardenThe flowers that Marie Lincoln and Bill Schlicht cultivate at their Whidbey Island nursery specialty nursery are good enough to eat. That’s because Chocolate Flower Farm’s mocha, bittersweet chocolate, cinnamon, cocoa and espresso-hued blooms and foliage plants are as satisfying to the senses as a Fran’s caramel-filled chocolate sprinkled with grey sea salt (well, almost).

My friend Stacie Crooks, of Seattle-based Crooks Garden Design, was my escort to Whidbey last Tuesday. We’d only slightly recovered from our late night festivities in her superb, often-photographed drought-tolerant  garden, where a gaggle of garden gals gathered (isn’t that alliterative?) for a lovely sunset soiree.  I spent the night at Stacie’s and we set off the next morning for the ferry from Mukilteo to Clinton on Whidbey Island.

The ferry crossing was short – 20 minutes – but beautiful in its grey-blueness with sunlight pushing through the morning haze. I breathed Seattle’s maritime air and that made me happy.

I had a lovely visit to Marie Lincoln of Chocolate Flower Farm on Whidbey Island outside Seattle

I had a lovely visit to Marie Lincoln of Chocolate Flower Farm on Whidbey Island outside Seattle

After visiting one of Stacie’s inspiring and impressive design projects, the subject of which I hope will soon appear in one or two of my articles, we drove to Chocolate Flower Farm to meet Marie. I first met this dark-plant purveyor by telephone when I called her last December to request an interview. I wanted to include her “sweet” plant passion in my February “In the Garden” column for 805 Living.

Like most of my writing efforts, there’s a back story on the piece, entitled “Brown is Beautiful: Sweet Tips for Growing a Chocolate Garden.”  Last fall, my editor Lynne Andujar made an off-the-cuff comment to me: “Oh, our February issue is going to be the CHOCOLATE issue, but I’m not really sure if there’s a fit for the gardening column,” she said.

“You bet there’s an angle,” I replied. “We’re going to feature chocolate-scented and chocolate colored plants!”

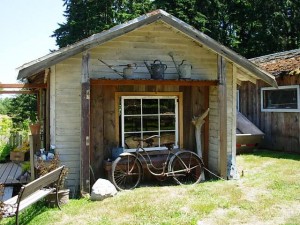
A little shed houses the nursery sales area

A little shed houses the nursery sales area

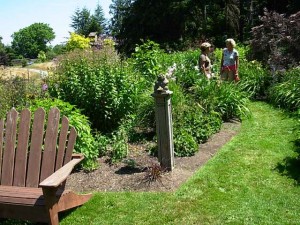
Marie Lincoln shows off her plants to garden designer Stacie Crooks

Marie Lincoln shows off her plants to garden designer Stacie Crooks

Marie and Bill started the Chocolate Flower Farm in 2005 to grow and promote dark-colored plants. 

The display beds and nursery area have expanded around their 1923 farmhouse and outbuildings (sheds!) to the former horse pasture.

As the “hot chocolate” trend grew, the couple searched for even more plants on the dark end of the spectrum, selecting unusual sports to propagate and sell as exclusive named cultivars. Marie jokes that her nursery reflects “a collision of two passions,” as it introduces new and veteran gardeners to the beauty of chocolatey colors in the landscape (not to mention a few very special chocolate-scented plants that invoke memories of grandmother’s Nestle Toll House cookies coming out of the oven).

READ MORE…

Circles, spheres, orbs, and globes in my garden

Monday, June 14th, 2010

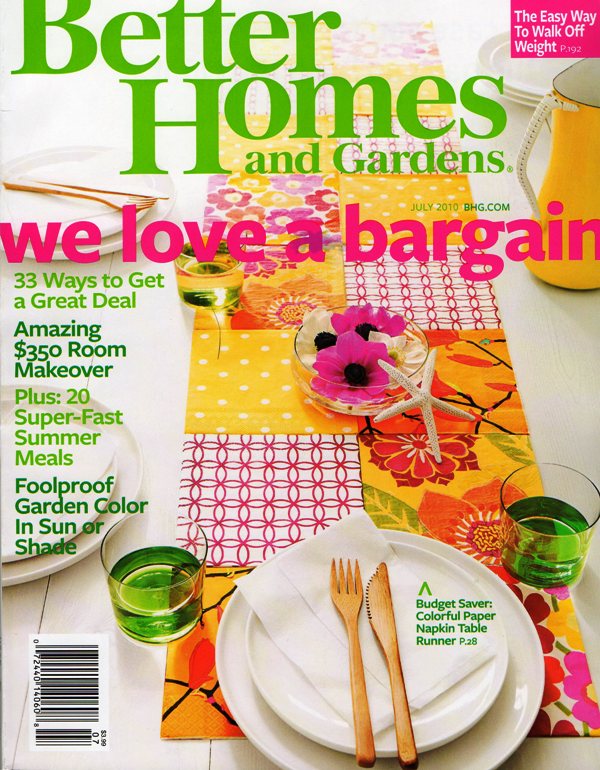
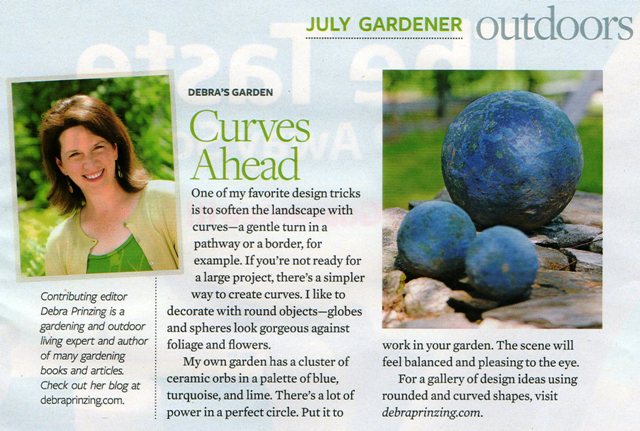
In the July 2010 issue of Better Homes & Gardens, I wrote a short item for my “Debra’s Garden” column called “Curves Ahead.” It could also have been titled “Three Cheers for the Circle.”

I am obsessed with round shapes — balls, spheres and orbs — and I love to dot the garden with these forms. This design trick relates to one of those basic lessons anyone who studies the art of landscape design is taught: Choose an idea and repeat it frequently.

My eye is naturally drawn to orbs and globes. They are so pleasing to me – in fact, I wrote about this passion previously – in an earlier blog post, “Zen of the Circle.”

Ornamental globes, obelisks and balls have taken up residence here in my Southern California backyard — check out the photograph below.

And it’s not just the three-dimensional geometry that puts a smile on my face. Curved outlines, such as the edge of a perennial border, patch of lawn or a turn in the path echo the orbs and reappear as arcs or crescents in the garden.

My interest in the sexy, organic globe shape has come “full circle” (pun intended) from a single idea to a cohesive design theme and a nice way to use ornamentation. Look around your own garden. Wherever you see a bare spot, perhaps it’s calling out for an orb or two.

I included a post-script note in my BH&G piece, promising to share my gallery of rounded and curved design ideas with our readers. Here it is – enjoy! Please send me your own photos and I’ll include the best ideas here, too. Check the bottom of this post for some of my favorite shopping resources.

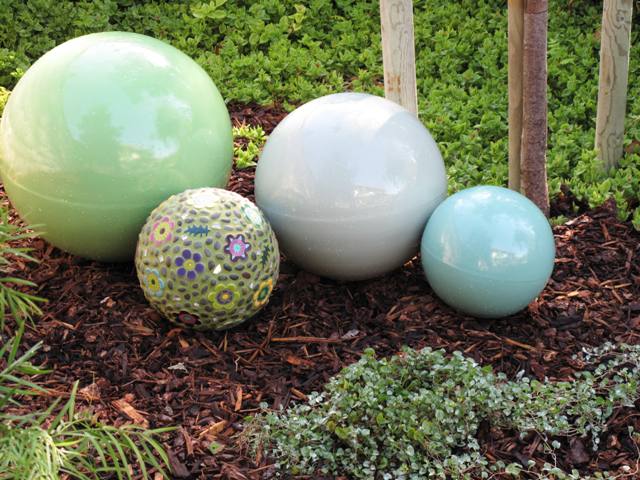
My cluster of orbs in a dreamy palette of green, blue, and teal - with a wonderful mosaic orb by Vashon Island, Wash., artist Clare Dohna

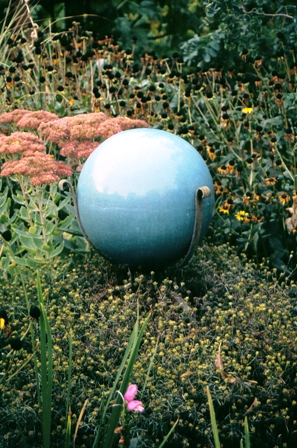
A stunning, cool blue ceramic globe in a Yakima, Wash., garden. You can tell it is mounted on a pedestal to elevate it above the foliage.

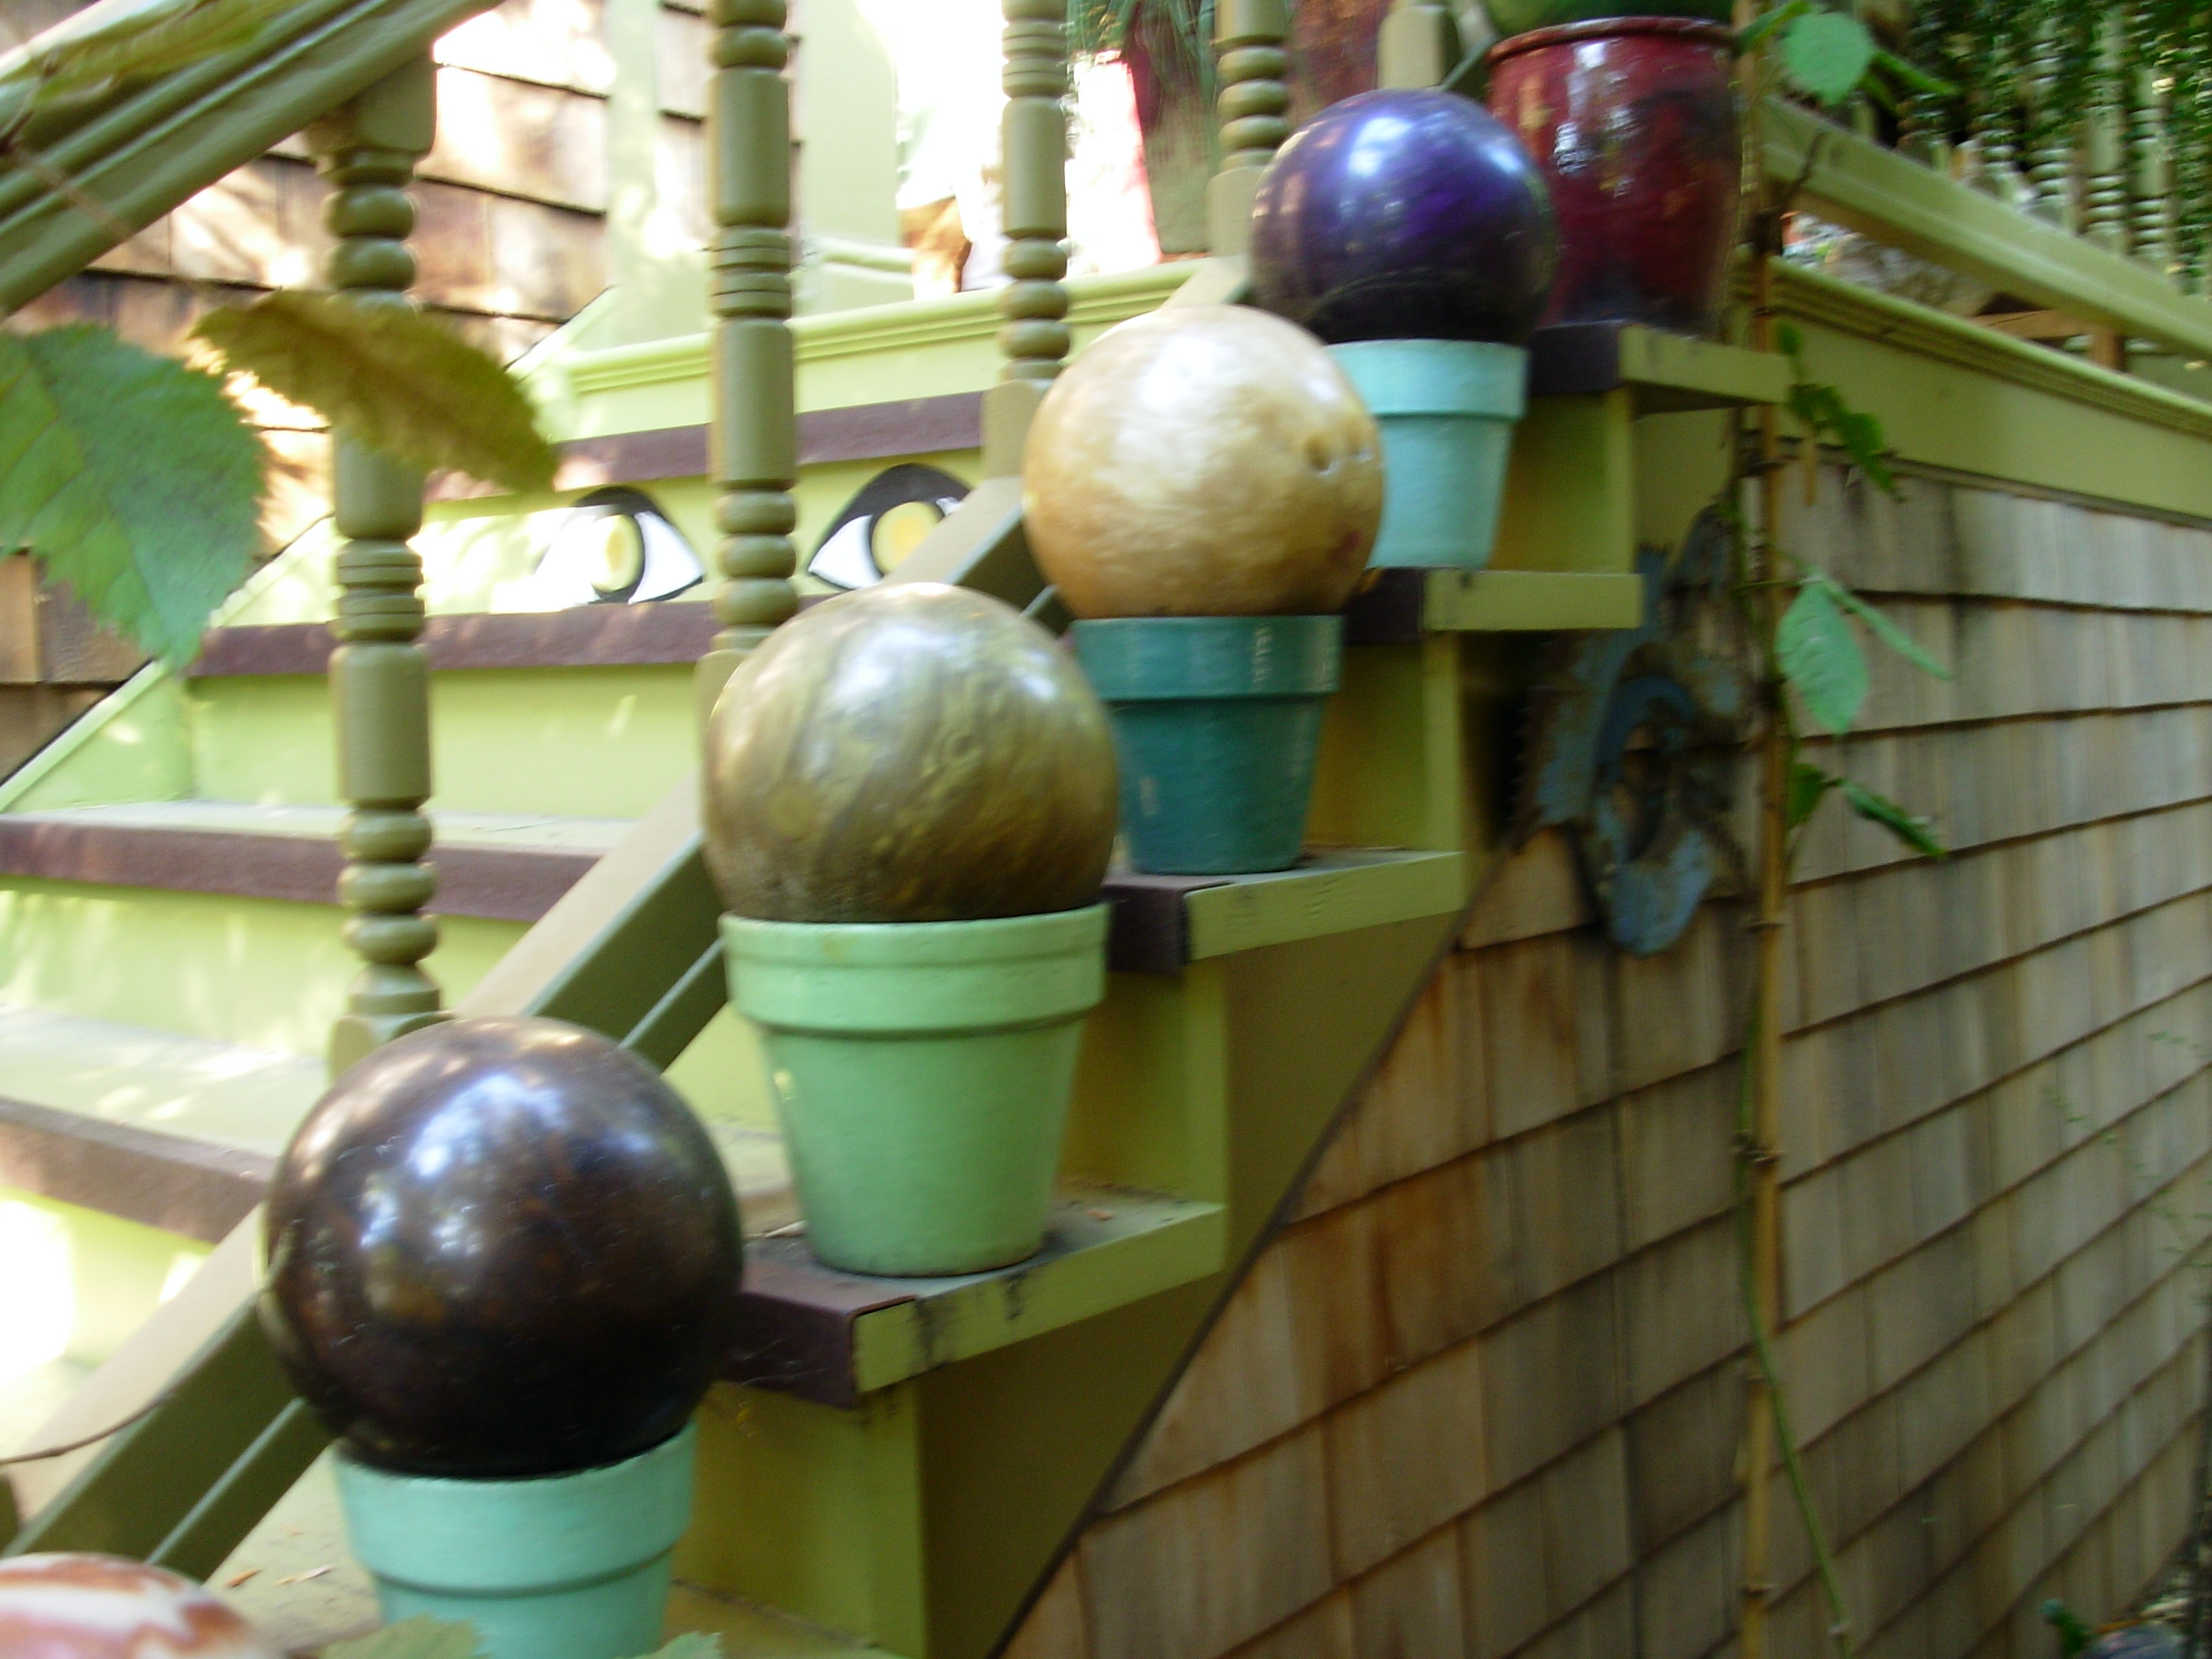
Yes, these awesome orbs are actually vintage bowling balls. Each one rests on a painted flowerpot and is stair-stepped outside the porch of Berkeley, Calif., artist Marcia Donohue.

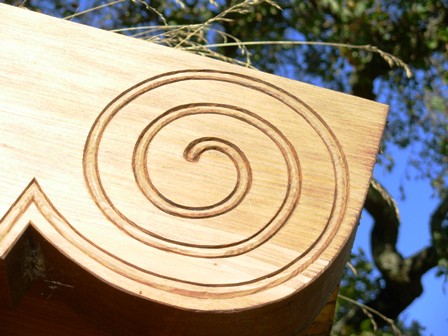
A finely-carved spiral woodworking detail appears at the end of a beam that forms the roof of a dining pavilion in our book, Stylish Sheds and Elegant Hideaways.

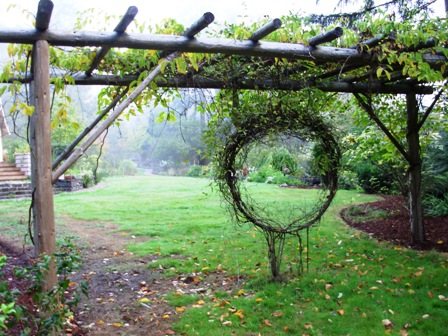
The open circle - a "moon window" or "dreamcatcher" - provides a beautiful perspective in my friend Mary-Kate Mackey's Eugene, Ore., garden. It is mounted beneath an arbor where a hard kiwi grows.

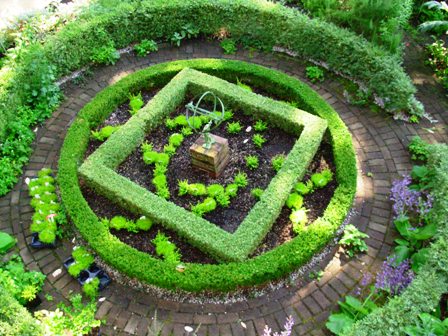
My friend Kathy Fries designed a square-in-a-circle knot garden in her Seattle area landscape.

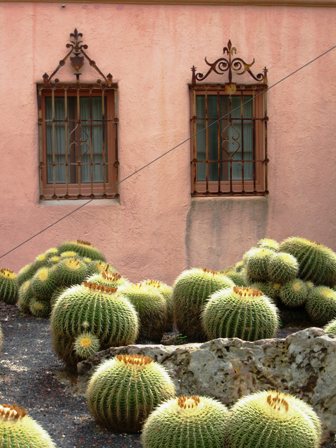
Plants like these golden barrel cactuses are naturally orb-like. You can see these at Lotusland, an estate garden in the Santa Barbara area.

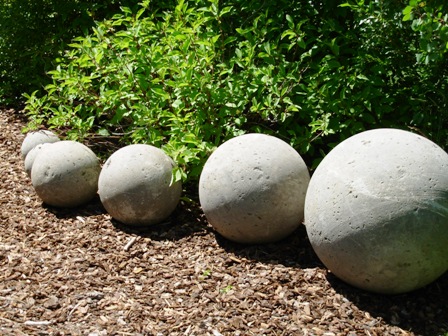
This graduated set of concrete orbs just knocked me out when I first saw it in Sun Valley, Idaho a few summer's back. Thanks to my friend Mary Ann Newcomer, I got to visit some pretty amazing landscapes there.

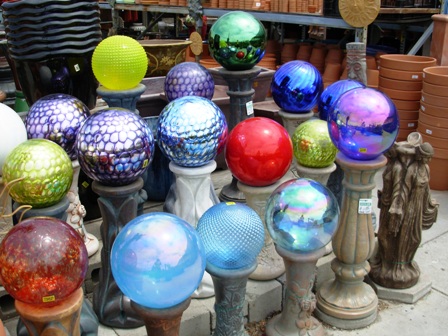
A visit to any well-stocked garden center is likely to showcase the myriad choices of balls. I spotted a rainbow of gazing balls at Green Thumb Nursery in Ventura, Calif.

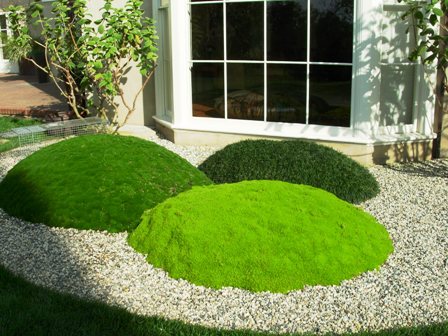
Restful, zen-like. Three types of moss are sculpted into a gravel garden display designed by Southern California landscape architect Graham Stanley.

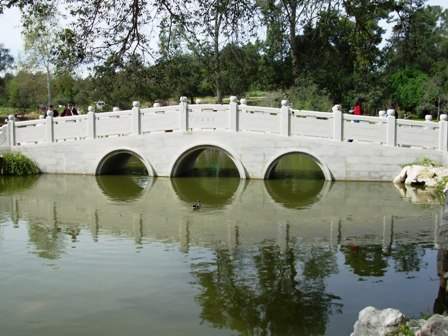
Look for circular forms in public gardens - you'll find them. The arches of a lovely stone bridge are reflected in this pond to create an almost perfect circle. This bridge is at the classical Chinese Garden, recently opened at the Huntington Library, Art Collection and Botanical Garden in San Marino, Calif.

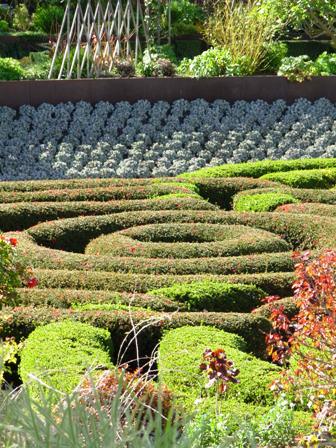
Artist Robert Irwin sculpted flowering azalea shrubs into a circular maze at the Getty Center in Los Angeles. The clipped, concentric circles bloom in white, pink and magenta flowers.

The pebbles in a path detail, arranged on edge and curved into an eye-pleasing pattern.

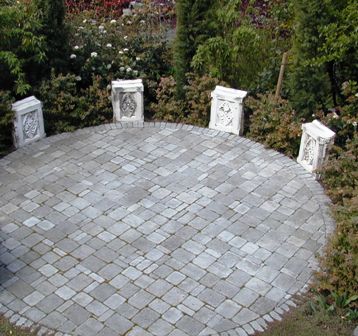
A round "carpet" laid with sand-set concrete cobble-style pavers. Designed for my Seattle friends Rand Babcock and Tony Nahra by Daniel Lowery of Queen Anne Gardens.
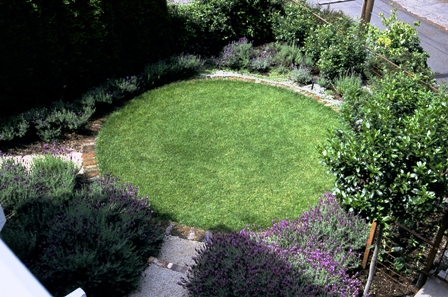
If stone isn't your thing, try turf. This tiny grass "throw-rug" appears in the Seattle backyard of landscape architect Erik Wood and designer Carina Langstraat

Wow! Metal obelisks - powdercoated in orange (or turquoise), designed by Annette Guttierez and Mary Gray from Potted, in Los Angeles (see ordering details below)

Best resources for spherical garden ornamentation:

Pot-ted Store: Three graduated sizes of balls made from steel strapping will lend a lovely moment of architecture to the landscape. I have the medium-sized one in weathered steel (my preferred material). Annette and Mary, owners of Los Angeles-based Pot-ted, now sell a series finished with bright orange and turquoise powder-coating – their fav hues. Oops – I mean “aqua” and “tangerine.” Inquire about custom colors! Prices: $98 (18-inches); $139 (24-inches); and $169 (30 inches). Shipping available.
Bauer Pottery Garden Orbs: My friend Janek Boniecki has revived the classic California earthenware known as Bauer Pottery. In addition to making reproduction urns, dishes and serving pieces (in that awesome, sun-drenched palette), Janek and crew also create ceramic garden orbs glazed in Bauer colors. Yellow, dove gray, French blue, Federal blue, chartreuse, lime green, midnight blue, parrot green, turquoise, white, black and aqua (for some reason, the Bauer orange pieces are slightly more expensive, perhaps because of the glazing involved).

I am a bit addicted to these “globally admired” orbs, thanks to the company’s occasional factory outlet sales in Los Angeles. I have five or six of these gumball-shaped objects, which look tres-bien in and among foliage, flowers, blades and stems. Prices: $75-$82 (8-inch); $100-$110 (12-inch); and $150-$165 (15-inch). If you think you’ll be in the Los Angeles area sometime, make sure to check the Bauer web site to see the warehouse sale schedule. You will definitely find great prices and maybe even an orb or two (if I don’t get there first!).

Clare Dohna, Mosaic Artist:  Based on Vashon Island, Wash., artist Clare Dohna makes vibrant mosaic tiles in dazzling botanical shapes (flowers, bugs, leaves and more). She uses these tiles to adorn the surfaces of all sorts of wonderful garden sculpture and art, such as bird baths, bird houses, egg shapes and — my favorite – mosaic spheres. You can see one of her pieces at the top of this page; it plays nicely with the solid-colored Bauer orbs. Contact Clare directly (from her web site) to inquire about color schemes and prices.

Plant your summer centerpiece

Wednesday, May 26th, 2010

On location in my own backyard with BH&G senior art director Shelley Caldwell

One perk that comes with my new gig as contributing garden editor for Better Homes & Gardens was recently producing a photo shoot in my garden. Some of the shots from our March session, photographed by the very talented Jack Coyier, appear in the June 2010 issue of BH&G (on newsstands now).   

The story idea came from the Home Design department rather than the Garden Group, but I got involved because this design/entertaining story included plants.    

This is my tale of what happens with a great story idea and how it takes the journey from something pretty HUGE to something fairly modest. I’m learning that it’s all about the creative process, not just the end game.   

It all started when I was asked to come up with three planted container ideas that could look good outdoors all summer long. That sounds easy, doesn’t it? The editor asked:   

As part of a larger summer outdoor entertaining guide, we want to give some ideas for summer-long living centerpieces. Wondered if you would have some thoughts on that and be interested in designing 3 centerpieces. 

I sent her several suggestions featuring foliage plants. Here they are: 

  1. Wood window box planted with edibles: Herbs (chives, flat-leaf Italian parsley, oregano, thyme, and strawberries)
  2. Galvanized zinc or aluminum containers with bold foliage – such as Rex begonias (dark green and burgundy) with creeping jenny or helichrysum (lime foliage that drapes over the edge of the planter)
  3. Terra cotta pots with air plants (silver-blue tillandsias); This is to show a low-maintenance alternative to succulents; tillandsias do not require planting and can be arranged on gravel or pebbles that fill the containers (and misted over the summer to keep alive).
  4. Glazed pottery with grass (or grass-like) plantings; Planted with tufts of green mondo grass or seeded with wheat grass, fill the shallow, Asian-style containers for fresh, summer-long lawn on your table. The grass can be embellished with clear glass votive holders or peppered with cut flowers inserted in the grass with stakes (for single events). This is Jack Coyier’s idea and I think it’s cute!

One of the tabletop designs shot in my backyard - featured in BH&G's June issue

The feedback? Where are the flowers? This is the editor’s reply:   

Something to think about . . . how can we tweak these to be a little more decorative and festive, and a tiny bit less about foliage? Can we get one of them centering on a beautiful bloomer?   

Yikes! I forgot the flowers. Actually, I didn’t really forget them; I just selected foliage plants thinking they would be lower maintenance than flowers (which might require regular dead-heading, fertilizer, etc.) and be guaranteed to look pretty from Memorial Day to Labor Day. Turns out, BH&G readers really LOVE their blooms. There can never be too many flowers, remember?   

I refocused my brainstorming to include more, more, more blooms. The story planning went through several iterations until I was told this might be a feature spread with five different planted centerpieces. I went to town – actually sourcing plants and containers from as far north as Ventura to as far south as Hollywood, logging 200-plus miles on my Volvo’s odometer as I pulled pots, plants and accessories for the March 9th prep day and March 10th photo shoot.   

From left: Jack Coyier, Char Hatch Langos and Shelley Caldwell

The plan was to photograph all five tabletop looks. Thank goodness for the very talented Char Hatch Langos, an LA-based stylist who logged even more hours and miles in her car hunting down props than I did!   

She arrived on Tuesday with BH&G senior art director Shelley Caldwell. Between the two of them they had a condo’s worth of patio furniture, textiles, vases, dishes, flatware, napkin rings – you name it – crammed into two cars! All of this for five different looks!   

The looks related to five themes that we had worked out: Romantic; Asian; Edible/Herbs; Citrus Mix-n-Match; and Tabletop Tray of Collectibles.   

So it was a fun two days, with a lot of fine-tuning, adjusting for the sunlight bouncing off of my California Gold crushed gravel garden, unseasonably low temperatures and brisk winds.   

READ MORE…

My sedum-planted wicker chair

Sunday, May 23rd, 2010

Take a seat. A succulent seat, that is.

Voila! My sedum-planted wicker chair as garden art

If you’ve ever admired the charm and whimsy of a planted chair, you’re not alone. I’ve always liked plants combined as a design element with furniture. When my mom passed along Grandma’s 1940s wicker porch set, I knew that the slightly unraveled rocking chair was destined for a new role in my garden. So two weekends ago, on Mother’s Day, I started creating a sedum seat for the cherished rocker.

After giving Grandma’s wicker chair a fresh coat of herbal green paint, I was ready to turn the family hand-me-down into an ornamental garden feature. Here’s Part Two of my Mother’s Day gardening project, which illustrates how to prepare and plant the chair. 

Step One

Step One: Using a sheet of 1/4-inch wire mesh and a pair of wire clippers, I cut out a seat-sized section to fit into the chair’s base. A staple gun came in handy to secure the mesh to the piece of wood bracing.

Step Two: I layered sections of dry Angel Moss over the mesh. A highly-absorbent variety of sphagnum moss, Angel moss is a nifty product that I discovered last month while teaching four container and hanging basket design classes for Gardening How-To magazine. The moss hails from the bogs of New Zealand and, because of the way it is farmed and harvested, is considered a renewable resource. You can purchase pre-formed liners to fit into wire hanging baskets or flat sheets to use for projects such as mine.

Step Two

As dry as a piece of brittle cardboard, Angel moss changes its character dramatically when exposed to water. It’s a fabulous medium for baskets, window boxes and the mesh seat of my wicker chair because the moss proves itself to be an excellent material for holding soil and plants. It doesn’t dry out as quickly as the kind of coco-fibre or woodland moss we’re used to here in North America.

Step Three: On top of the Angel moss I spread approximately 3 inches of my planting medium. I’ve learned that the best environment for growing succulents (especially in containers) is to mix equal parts organic potting soil with cactus mix. Erin Taylor, owner of Botanik, a great garden emporium in Summerland (near Santa Barbara) taught me this recipe soon after I moved to Southern California. One look at her shop’s awesome succulent containers and I knew she was speaking from experience.

Step Four: My friend Jean Zaputil, who I call my garden muse for the 25 years of design, horticulture and landscaping knowledge she’s shared with me, was visiting from Seattle last weekend (along with our mutual friend Jan Hendrickson).

We had a little free time on Sunday morning so Jean offered to do the planting layout for my chair. She worked with about 14-16 small succulent plants of varying colors (ranging from silvery-white to lime green to red-burgundy).

Step Four

Before planting the “seat,” we tackled the tricky gap in one of the chair’s rolled arms.

Plants in the "arm"

A total negative from my mother’s point of view (the shredded wicker arm reminded her that a childhood dog had gnawed on the arm and practically ruined it for comfortable use), I decided to use the gaping void as a spot for more succulents.

Jean fashioned a shallow tray with the 1/4-inch wire mesh sheeting. We fit it under the arm and wired it into place. Just as with the seat, we inserted some pieces of Angel moss and poured in some soil. The chewed-away openings now hold three succulents, including the very pretty Sedum rupestre ‘Angelina’. Its chartreuse-color and fluffy form will drape over the arm and soon obscure the mesh tray.

Jean Zaputil, as always, my garden muse

Jean arranged the sedums, sempervivums and other succulents to create the planted seat.

Even though the root space appears shallow, these plants will do just fine. They are ideally suited for my project – able to withstand extended periods of drought.  A quick “shower” every week or so will give the plants enough moisture to take root in the soil/Angel moss and begin to spread, eventually filling in the seat.

And pretty soon, I’ll have a lush, succulent “cushion” for my grandmother’s wicker chair.

Now I’m looking at a modern wicker chair – a Pier One version with leg bent from too many teenagers leaning back in it while playing X-box games – and thinking about giving that chaise a new life in the garden. It’s currently natural colored, but maybe a coat of paint and a new planting theme will give it the necessary style to move outside.

Wonder what plants belong in that chair? Maybe I’ll paint it peacock blue and do an all-white flowering scheme! Stay tuned.

My Mother’s Day gardening project

Sunday, May 9th, 2010

A sedum armchair. Lush and fluffy. Makes you want to sink right in. I love that the lime green arms have been painted to pick up the bright foliage.

Ever since I can remember, I was in love with a 3-piece set of wicker furniture that stood inside the enclosed porch of my grandmother Helen Winslow Ford’s home in Hammond, Indiana. 

After I wrote the above paragraph, I started asking myself “what was it about the wicker porch furniture that tugged at my heart?” Vintage wicker somehow symbolizes all the feelings of comfort, care and love that I always felt at Grandma’s house. Those emotions continued with my own mother and the home she created and kept for her family. And now, maybe I can emulate those traits here in my grownup life, for the husband and sons I care for.

That timeworn wicker – a love seat, arm chair and rocking chair – made its way from Grandma’s home on Florence Street to my mother Anita Ford Prinzing. I first remember seeing the pieces in our Portland, Ore., house (perhaps Mom inherited the furniture after Grandma passed away – I’ll have to ask her).

Mom updated the 1940s seafoam green wicker with a coat of 1970s chocolate brown paint. She replaced the aging seat covers with cushions of a quilted rust-orange-sunflower yellow patchwork print. 

Soon after Bruce and I married in 1984, Mom gave me the rocking chair. I took off the curved “rocker” sections and converted the piece into an armchair. I painted the woven wicker a soft blue-gray. The new cushion was covered in a tiny blue-and-raspberry polished cotton print. I also gathered and piped a cover to hide one of the chewed up arms.    

The shredded weft and warp of the wicker was the fault of mom and her brother’s childhood dog. Consequentially, the chair was always considered a bit junky because you couldn’t sit in it without your sweater sleeve snagging on the bits of wire sticking in every direction.    

Later, my parents shipped me the wicker love seat. I am not sure how I got so lucky because I know my brother Scott and his wife Kris used it for a while. But somehow my teenage “request” to inherit the piece lodged in my mom’s memory and she sent me the brownish wicker love seat in 1997, after she had owned it for more than two decades.

That was the year we lived in a 2-bedroom apartment with a newborn (Alex) and a 5-yr-old (Benjamin) in Seattle’s Madison Park while building our dream house in nearby Seward Park. I remember the enormous box arriving from UPS or some other shipping service. I had to open it in the courtyard outside, because there simply was no space in our apartment to do so.    

My yummy green paint choice - a perfect garden color!

Recently, after downsizing, my parents arrived to see us in Southern California while en route to their place in Mesa. The “good” wicker armchair (the one the dog didn’t eat!) was wedged into the back seat of their car. Personally delivered by my folks, the chair has joined its love seat companion on our back patio. Both pieces now need a face lift but they are in good shape considering they are at least 70 years old. I’m thinking of painting them glossy black and adding lime green cushions with black piping. Won’t that look modern?!   

Mom told me, “I’m going to give you the nice chair but only if you promise to get rid of the one that’s unraveling.”    

I said, “Okay, I’ll stop using it to entertain garden guests. But is it okay if I find a spot for it as a piece of art in the garden?”    

She couldn’t say no!    

Today I started the makeover of my Grandmother’s wicker chair

Last fall, I removed the disintegrating cushion and seat, and placed the bottomless chair out in the garden. Yup, it’s in the right place. For months, I’ve wanted to paint it lime green and “plant” the seat and torn-up arm section with sedums and other succulents.   

I have admired planted chairs before. Last summer I saw a peacock blue chair in a garden display at the Ventura Co. Fair. Its seat and back were planted with succulents. Luscious! [see my photo – above]    

So today, my Mother’s Day gift to myself was to dig out the electric paint sprayer, clean off the chair’s wicker framework, and head to the hardware store for paint. I came home with an outdoor-ready semigloss in a color I can only think to call guacamole green.    

The painting is finished. Doesn’t it look great? Perhaps it needs a second coat after this one dries. I’ll do that tomorrow, before the demands and deadlines of the coming week take over my calendar.    

The new-leaf green, aka “guacamole green” will transform the old wicker

Next: I want to fill the empty seat area with a panel of 1/4-inch mesh sheeting. I have a piece lying around from a planting project a few summers ago. I  used it to anchor some succulents into a path and stop some critters (rabbits? possums?) from digging up the plants each night.    

The mesh will create a supporting base for moss, which will be covered with a shallow layer of potting soil-cactus mix as my planting medium. Into that, I’ll plant a new “cushion” of all sorts of sedums. Voila! My long-awaited planted chair.    

I’ll post photos as I go along. I’m also thinking of using the mesh to contain soil behind the gaps created by Mom’s hungry dog so I can plant a few more succulents there.

I don’t remember much about her family pet other than that the dog’s name was Sue-Sue. According to Mom, my grandfather used to open the front door and call out to the dog: “Oh, Susanna!”    

That’s a silly story, but I remember it made me laugh as a girl.