Debra Prinzing

Get the Email Newsletter!

Archive for the ‘floral design’ Category

Flowers, friends and fun in Colorado

Thursday, May 26th, 2011

Here I am with Arthur Williams, talented floral designer from Babylon Floral in Denver.

Where have I been lately? Last week, I hopped on an airplane and flew to Denver, which surprisingly is only 2-1/4 hours away from Seattle.

At the invitation of the Denver Botanic Gardens, my collaborator David Perry and I spent three lovely days giving talks and workshops about some of our favorite topics. We met some wonderful new friends and were inspired by the DBG’s beauty as a public space for all of Denver to enjoy.

Last Wednesday evening, I spoke about the “Personal Outdoor Dwelling,” aka “stylish sheds,” featuring many of Bill Wright’s gorgeous photos from our book Stylish Sheds and Elegant Hideaways.

Then on Thursday, David and I made a joint presentation on “A Year in Flowers: Seasonal, Local and Sustainable Ingredients.” We split the talk into two parts, an illustrated lecture and a flower design demonstration.

My arrangement from the demonstration, featuring Colorado-grown flowers and choke-cherry foliage from the Denver Botanic Gardens.

I was so fortunate that Denver floral artist and designer Arthur Williams, of Babylon Floral, helped procure locally-grown cut flowers for me to work with. Not only that, but he lent me some vases to use. We so enjoyed meeting Arthur and visiting his colorful shop (he’s pretty colorful, too – check out his arms!).

The following morning, Dave taught a hands-on photo workshop that wowed his students with new-found skills for their point-and-shoot digital cameras.

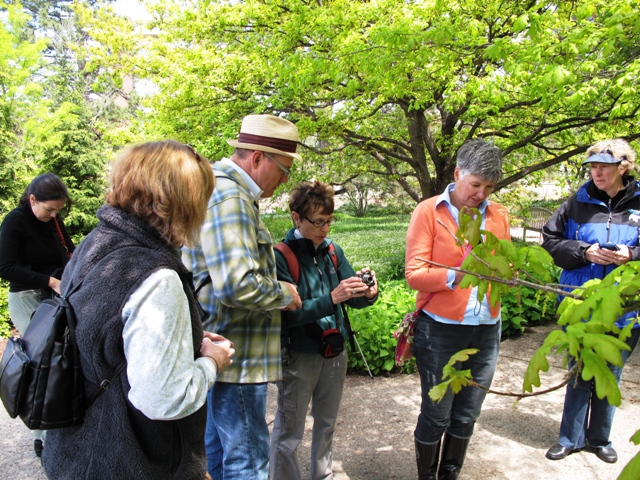
David's photography talk included practical, hands-on training at the botanic garden.

While Dave was with his students, I wandered along the Botanic Garden paths and through the various themed displays, taking in early Rocky Mountain spring day.

We found that the pace of spring’s unfolding in Denver is quite similar to Seattle’s this year. In other words, cooler than normal and later than normal. You’ll see what I mean in the photos I took.

On Friday, we spent a delightful afternoon with my friend and former editor Marlene Blessing. Marlene was my editor on The Abundant Garden and she also created the Pacific Northwest Garden Survival Guide and asked me to write it in 2004. She is an awesome writing coach and an encouraging advisor from whom I learned a lot about storytelling and book creation. I gained much confidence as a writer while working with this dear woman.

Marlene is presently the editor-in-chief of Interweave Press Books. After all the hue and cry about the publishing world falling apart, we took great comfort in the inspired, aggressive and confident approach to niche publishing embodied by this Loveland, Colorado-based imprint. With an emphasis on fiber arts and craft books, Interweave is led by a highly creative and innovative group, including Marlene. You can only imagine the compelling topics we covered during dinner later that evening. Marlene calls Interweave Press founder and creative director Linda Ligon her “Sensei,” but we kinda want to call Marlene our very own Sensei — what a breath of fresh air in a world of book-making!

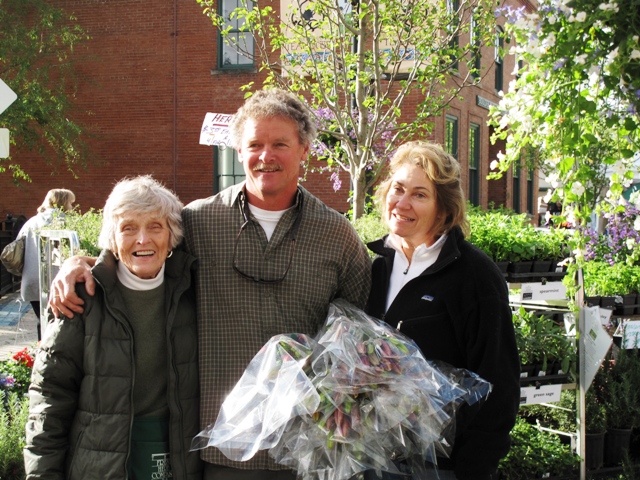
Chet Anderson (center), with his mom Belle (left) and wife Kristy (right) at their Boulder County Farmer's Market booth.

After eating a delicious meal at Sugarbeet, a hip Longmont restaurant, we retired rather late and incredibly satisfied with our productive day. Bright and early Saturday morning, I picked Dave up at his hotel and we drove about 30 minutes to Boulder. There, we met up with Chet and Kristy Anderson, owners of The Fresh Herb Co., at their Boulder County Farmer’s Market booth.

Chet and Kristy’s farm is actually in Longmont, and they sell most of what they grow through Whole Foods and other retail outlets, but they still bring herb plants, hanging baskets and cut flowers to this market every Saturday. It is the only market in this part of Colorado that requires its vendors to sell what they produce. No dealers or re-sellers here. You meet the growers, purveyors and farmers who have raised or produced their goods – from amazing mushrooms to colorful Easter egg-colored radishes, to beautiful bouquets and more.

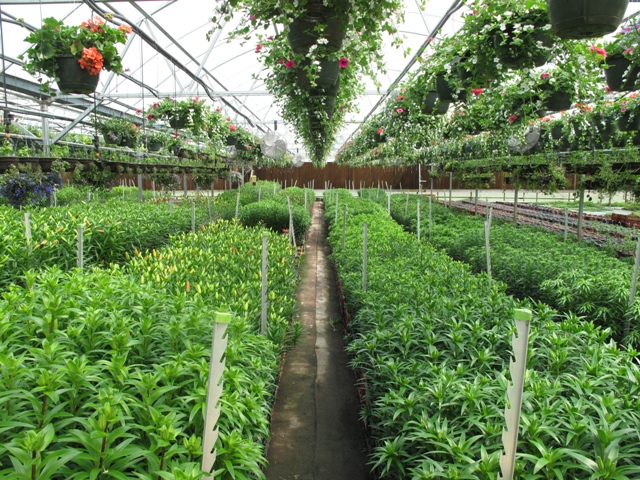
Rows and rows of luscious lilies fill 15,000-square-feet of covered growing area at The Fresh Herb Co.

It was fun to walk the market with Chet, who, I swear, could easily be called the “mayor” of the Boulder County Farmer’s Market. His popularity seems second only to his mother Belle’s popularity. She is there every week, helping at The Fresh Herb Co. booth, talking with new and returning customers, and greeting other vendors as longtime friends. It was fun to meet her!

David, Leesly Leon from the Denver Botanic Garden, me, Kristy and Chet Anderson - a group portrait at The Fresh Herb Co.

We followed Chet back to the family’s homestead and farm so that David could do some photography before a tour group from Denver Botanic Garden arrived. Leesly Leon, the DBG’s adult program coordinator, lined up the field trip so that some of the students in our workshops could have a first-hand visit to a flower farm. Chet and Kristy are very successful at what they do, but they are also passionate and humble about their role in bringing flowers from their fields to the customer’s vase.

 “When you know and meet the grower, and when the flowers are fresh and locally grown, there’s no better flower bargain,” Chet told the group. We couldn’t agree more!

Here are some more photographs from our trip – I loved every moment, every visual impression, and the great people we met.

When lilacs meet hellebores . . . and play with fritillaries

Friday, April 29th, 2011

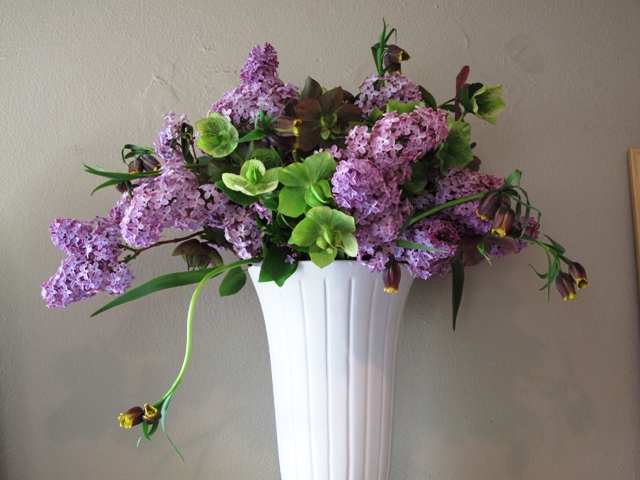
A yummy spring bouquet - straight from local farms and fields

 Springtime is embodied in this vase, isn’t it?

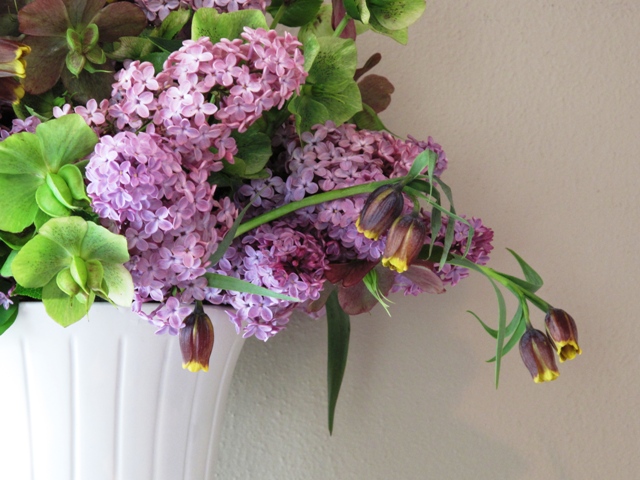
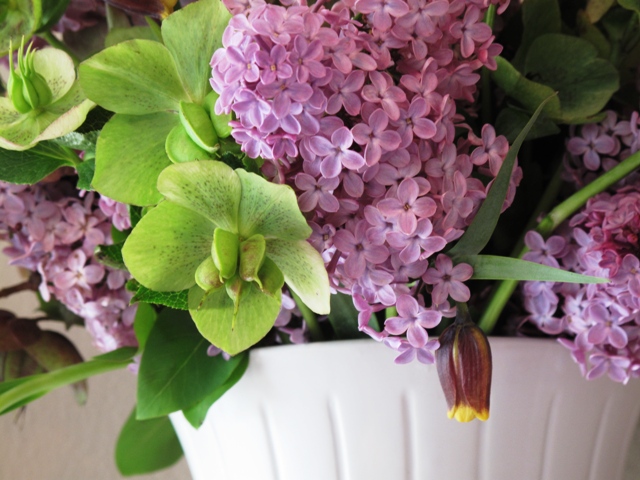
Take a visual "whiff" and enjoy this combination of three lovely flowers.

You can almost smell that heady perfume associated with Syringa vulgaris, or the common lilac. To me, the fragrance is associated with my lifelong relationship with flowers. 

We lived in rental house in Connecticut when I was in elementary school; the backyard was home to an overgrown lilac that drew me to its blossoms (we loved playing underneath the flower-laden branches and smelling spring). 

Later, when I was a teenager, I remember secretly harvesting armloads at a city park and carrying them to school in May, as if I was in a pageant! 

When we planted our former Seattle garden in the late 1990s, I asked my friend Karen to select a lilac for the border. She chose one called ‘Sensation’ – it has deep purple florets and each petal is rimmed in white. That shrub never disappointed. . . and I waited for its blooms each year until we moved away. 

And most recently, while living in Southern California, I nearly fainted when I happened upon a lilac farmer at my local market. I was so fascinated to learn lilacs can grow there at a high elevations, such as in Lancaster, Calif., north of LA. I even had to run back to my car for my camera so I could interview her about those unforgettable flowers

Another closeup - I can't resist!

Today’s bouquet features the addition of several Jadeite-green garden hellebores and a few sultry plum-and-yellow Fritillaria assyriaca. These companions turn two bunches of just-cut lilacs into a sweet bouquet for my fireplace mantel. 

And the best thing about these blooms? They’re from local Northwest flower farmers – yeah! 

The lilacs were grown by Oregon Coastal Flowers in Tillamook, Ore. 

The hellebores were grown by Jello Mold Farm in Mt. Vernon, Wash. 

The fritillarias were grown by Choice Bulb Farms in Mt. Vernon, Wash. Check out David Perry’s gorgeous still life of this unusual flower at our blog, A Fresh Bouquet

If you’re a floral, event or wedding designer, be sure to meet these fabulous farmers at Seattle Wholesale Growers Market. If you’re a customer, be sure to ask your designer to patronize this amazing cooperative of local growers. Their motto is awesome: From Farm to Florist.

Here’s a link to a little post and gallery from my visit earlier this week.

Inspiration comes in many forms

Wednesday, March 30th, 2011

A spring bouquet in a Mason Jar inspires . . .

The other day, while talking with my friend Lorene (one of the most creative people I have known since we were college classmates together), I described some of the cool design ideas I’ve spotted in the past few weeks. My own enthusiasm for all this visual stimulation made me realize my “list” could be a blog post here.

After seeing these ideas in Seattle, Los Angeles and New York, my own idea-bank has been rekindled. Witnessing the talent of others doesn’t ever make me envious. No, it makes me want to up my own game and push myself further to do something wonderfully better as a writer, a gardener, a designer.

The type of inspiration I’ve seen lately has been truly exquisite. Great design is great design, whether in the garden, the home, or the restaurant. When you see it, you know it!

There may be no other response than to gaze in awe and say – WOW. But if your muse can be stirred or awakened by these ideas, by all means, use them as a starting point for your own artistic expression. I hope you enjoy where all this beauty takes you!

A TEENAGER WINS
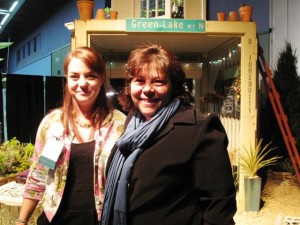
17-year-old garden designer Courtney Goetz won a Gold Medal at the Northwest Flower & Garden Show. Her mom, designer and writer Sue Goetz, is one of her influences.

At last month’s Northwest Flower & Garden Show, one of my most favorite annual events, I was invited by Julie Chai of Sunset Magazine to help “judge” the Sunset Outdoor Living Award.

We were smitten by a small but extremely innovative garden called “Paradise (to be) Regained . . . borrowing Thoreau,” which we honored with the Sunset award.

The critera recognizes a garden that exemplifies “fresh, useful and achievable ideas.” In this instance, the designer was 17-year-old Courtney Goetz.

Courtney, the daughter of garden designer and writer Sue Goetz, grew up in the garden-making business. In 2005, when she was 11, Courtney helped mom Sue design a display garden named “A Child of the Garden Grows .  .  .  .” for this same show. Now, she has made a garden herself – and guess what? In addition to the Sunset Award, the show judges honored Courtney with a Gold Medal.
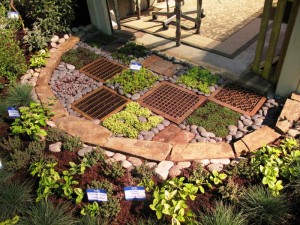
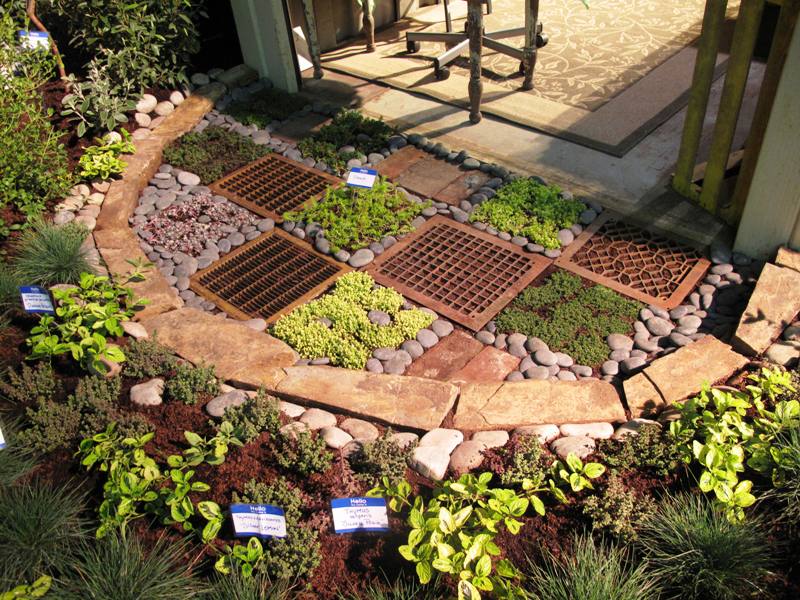
This half-circle garden floor treatment by Courtney Goetz shows how to pair salvaged metal grates with colorful groundcovers to create a "welcome mat" at the entry to a garden shelter.

As her Senior Thesis Project for Gig Harbor High School, Courtney wanted her design to be all about “recycling, re-purposing, and ‘re-characterizing’ used materials for use in the garden,” she says. “My goal and intent for this garden is to have green ideas for everyone to instill in their lives. I want the message to get out that not everyone can buy solar panels or hybrid cars, but anyone can and will make a difference by using a little bit less and utilizing what we already have.”

One of the many wonderful – and really clever — details of Courtney’s display garden was the checkerboard “floor” treatment, combining recycled metal grates with ground covers and rocks.

We loved this idea as a modern twist on a “welcome mat.” Courtney selected varieties of sedum and sempervivums in gold and dark green, as well as smooth rocks and the metal grates. It all adds up to a really gorgeous detail in the garden.

Look for exciting things to come from this young talent. We can’t wait to see more!

ROUGH AND SMOOTH TEXTURES
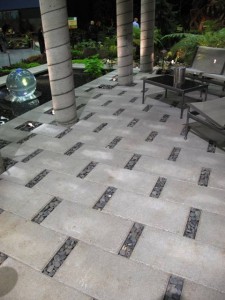
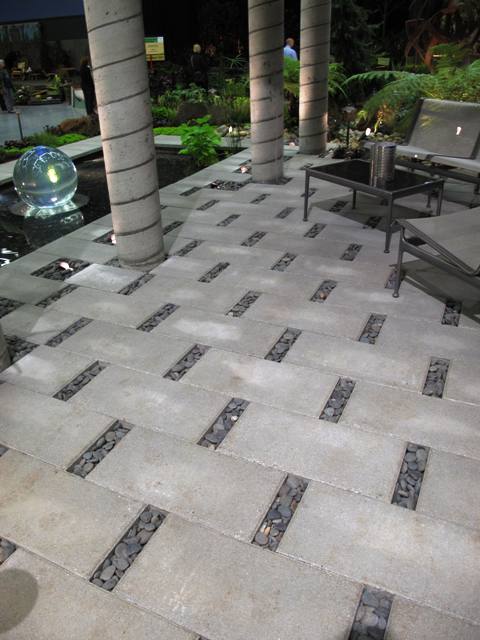
Openings between each paver makes room for a permeable detail of smoth stones.

Design detail

Another wonderful “floor” treatment appeared in a garden called “Wrinkle in Time,” designed by Karen Stefonick of Karen Stefonick Design. Her garden won the Best in Show Award, also called the “Founder’s Cup.”

Since I was able to tour it up close during the judging, I realized how truly creative Karen is when it comes to working with landscaping materials. She devised a patio using two simple ingredients: Concrete Pavers and Tumbled Stone.

Look closely at this pattern created by the slightly offset 1-by-2 foot concrete pavers. By staggering their placement and filling a 2-inch gap at either end of each paver with small rocks, Karen has accomplished two things.

First, she uses the texture of stone to contrast with the smooth concrete, which results in an attractive pattern. Second, this treatment turns a patio into a permeable surface for collecting rainwater into the ground rather than allowing it to stream down to the curb and disappear. Very cool!

BIRTHDAY BOUQUET
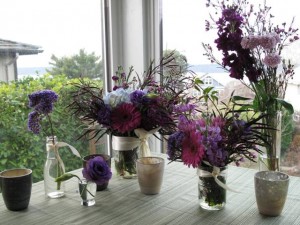
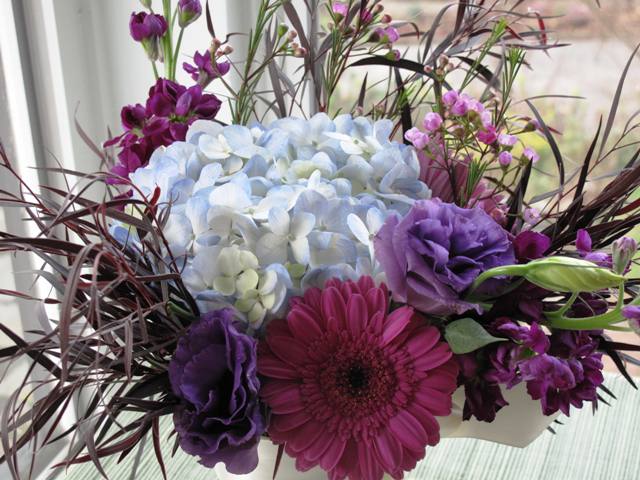
What a gorgeous grouping of flowers and vases!

During all the Flower Show activity, including giving three talks in two days, I almost forgot to celebrate my birthday. But thankfully, my friends and family didn’t forget.
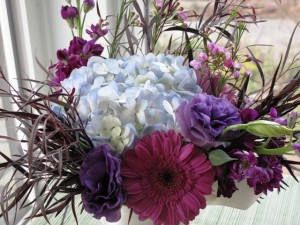
Flower detail

One of the best surprises was the delivery of flowers from a local West Seattle shop called Fleurt Studio.

The gift-giver was my sister-in-law Sandra B. Henriquez. Her touching gesture of sending flowers was made more amazing because instead of resorting to the generic, 1-800 route, Sandi did her homework to find a local flower shop that offers unique, one-of-a-kind gift bouquets. She called (long-distance from Washington, DC) and spoke with Samantha, the owner, and discussed exactly what would be included in the delivery.

And here’s what arrived: A “floralscape,” an eclectic grouping of five differently-sized vases holding mostly purple and plum ingredients. I loved the whimsical inclusion of two canning jars, a bud vase, a vintage bottle and a miniature glass cup. Together, they created a floral display that no single bunch could equal. Magical, huh?

LOS ANGELES VIBE
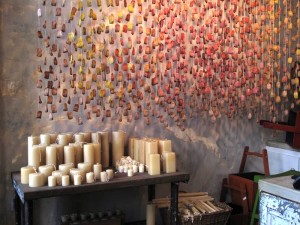
Stunning!

After February’s Flower Show madness, March welcomed a trip to Los Angeles, my former home town. Living there for the past four years was an amazing adventure, especially when it comes to learning about design with new eyes. The city, and in fact all of Southern California, was for me a big design graduate school – with lessons in architecture, industrial design, sculpture and history.

While living in LA, I spent a lot of time scouting homes and gardens for the Los Angeles Times HOME section, as well as visiting retail sources for plants, furniture, gardening accents and more.

Rolling Greens Nursery in Hollywood is one of my favorite haunts. It was the site of our Garden Design magazine Hollywood Issue party last April – one of those exciting moments when I said to myself: I can’t believe I’m living here and doing this type of work I love!
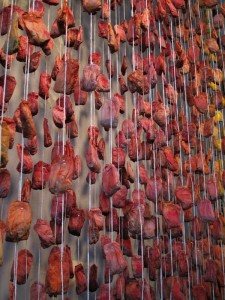
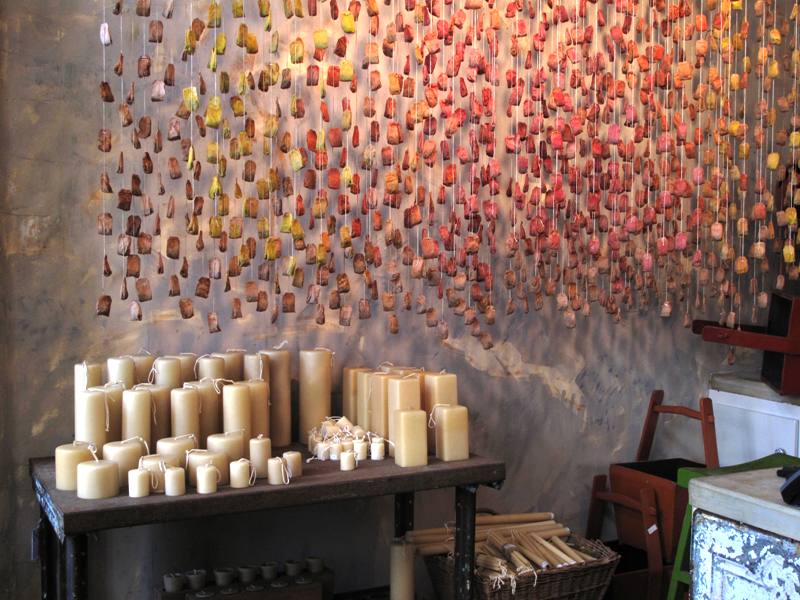
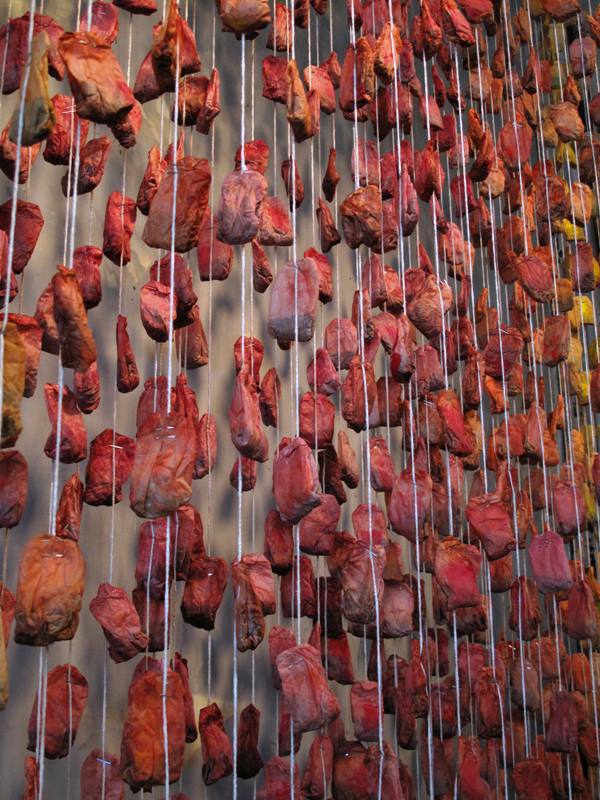
Teabags, thousands of them!

When I returned to LA last week to work on a photo shoot for Better Homes & Gardens, I took our art director Scott Johnson to visit Rolling Greens. I wanted him to see several of the area’s cool nurseries. We stocked up on some plants for the next day’s shoot, and poked around buying ourselves tiny agaves to bring home to our colder climes (Seattle for me; Des Moines, Iowa, for Scott – yes, I know. It’s really futile, but we try).

But the wow-factor occurred when I walked into the large space where cookbooks and culinary/gourmet products are typically sold. There along the far wall hung a new installation that I can only describe as a Tea Bag Curtain. One of the staffers told me that the artful treatment had just been hung by Rolling Greens creative director Angela Hicks and her crew.

Hundreds (maybe thousands!) of hand-dyed tea bags, attached to long strings create a beautiful semitransparent cascade, suspended from rods attached at the ceiling. I can only imagine how much time and care was taken to create this rosy-melon masterpiece.

Organic and delicate, this “curtain” is so charming. I am eager to figure out how to replicate it somehow. Simple ingredients paired with masterful execution . . . it adds up to something truly remarkable. This Tea Bag Curtain isn’t “selling product,” but who cares? It goes miles at saying to Rolling Greens customers: we care about design and we’re a place where you can be inspired.

ON TO NEW YORK CITY
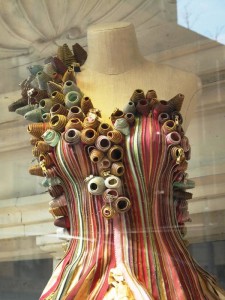
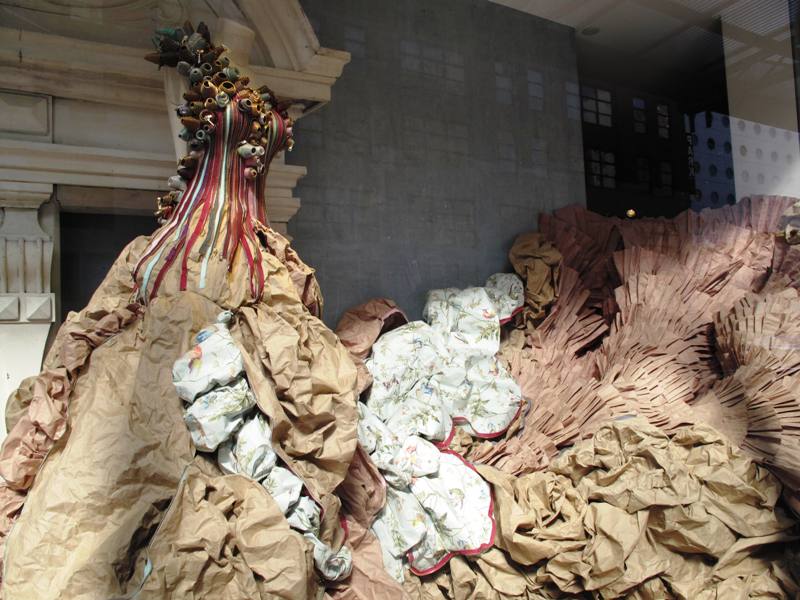
Anthropologie's lavish zipper gown - look close and see how it was made with straight pins!
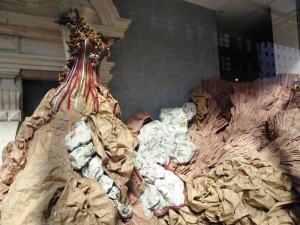
Here's how the crushed paper skirt emerges from the tight, pastel-colored bodice....

Only days after spending 48 hours in Los Angeles, I flew to New York City. I’ve previously written about visiting the awesome High Line Park, but here’s another visual treat, shown purely for its beauty and innovation.

I turned the corner on my way to the Chelsea Market, a huge warehouse-turned-hipster food mall, and there on the corner was a gorgeous Anthropologie window display.

Some super-creative designer turned a dressmaker’s form, yards of zippers, straight pins and crushed butcher paper into a fanciful ball gown. The way the separated zippers form the bodice so the gold and silver metallic zipper teeth sparkle in the light . . . dazzling. But at the top of each zipper, the “end” has been spiraled into a little rosette.

Just take a look and feast your eyes on the charming way a few simple ingredients become Cinderella’s new gown!

Now, go out and do something uninhibited and artistic today. I dare you! I’m going to try it myself.

Bouquet-making with spring bulbs

Friday, March 4th, 2011

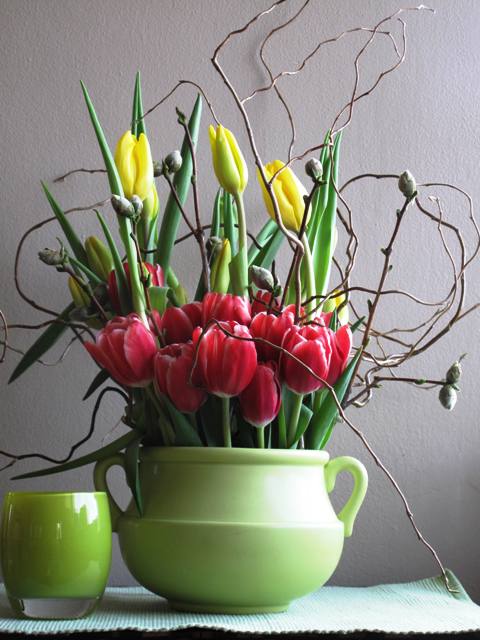
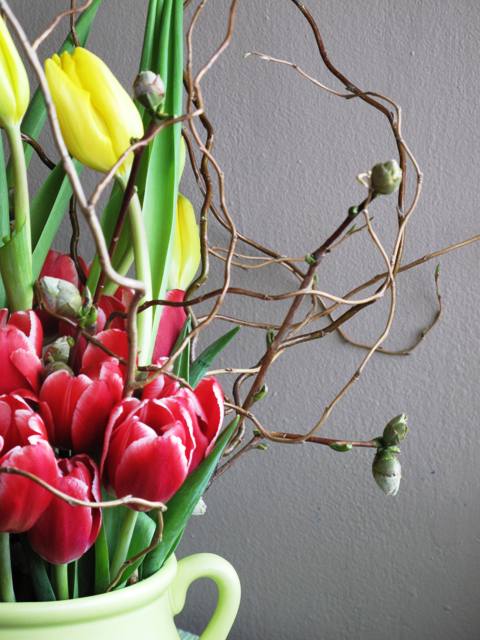
A textural display of two colors of tulips with curly willow and camellia buds on stems fill this vintage green urn.

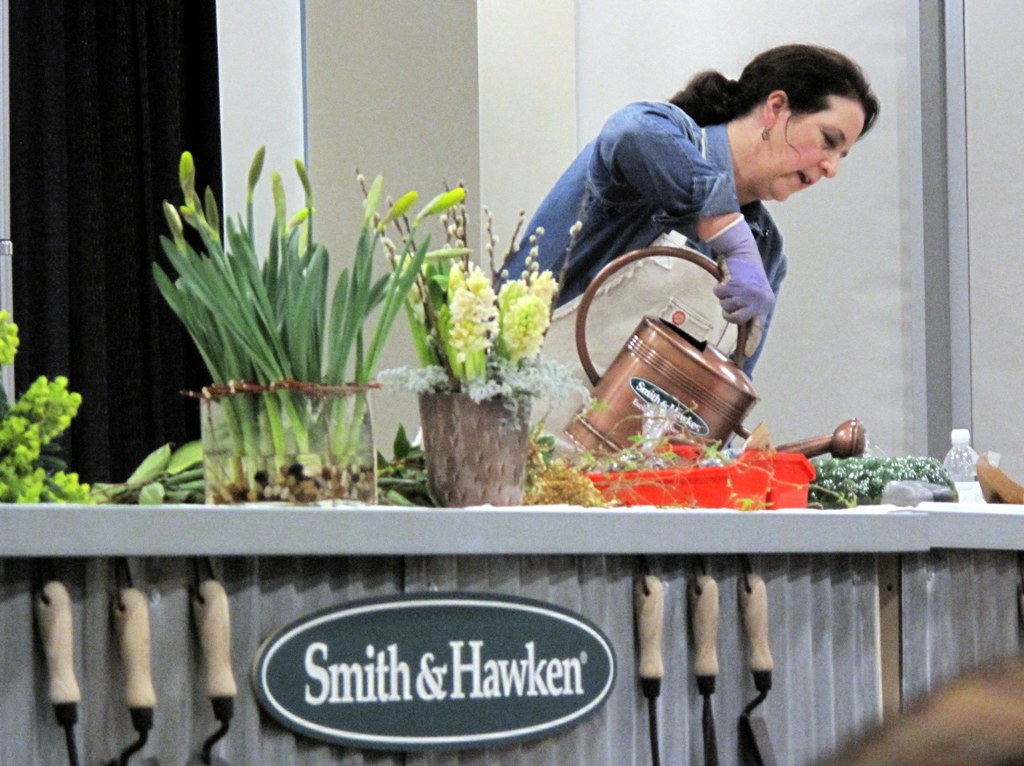
The Northwest Flower & Garden Show, the country’s second-largest indoor flower show, was staged last week. It was a great show and I’m sure I’ll be posting future stories about some of the wonderful design ideas, plants and speakers that inspired me. But right now I want to show off some of my floral design projects with simple instructions. The arrangements are from my talk and demonstration last Thursday on the Smith & Hawken DIY Stage. 

Here in Seattle the crocuses and snowdrops are only just now blooming. Daffodil foliage is just a few inches out of the soil. So my talk on “Floral Design with Spring Bulbs” was geared to the flower-lover who seeks out local blooms from growers in his or her own backyard. 

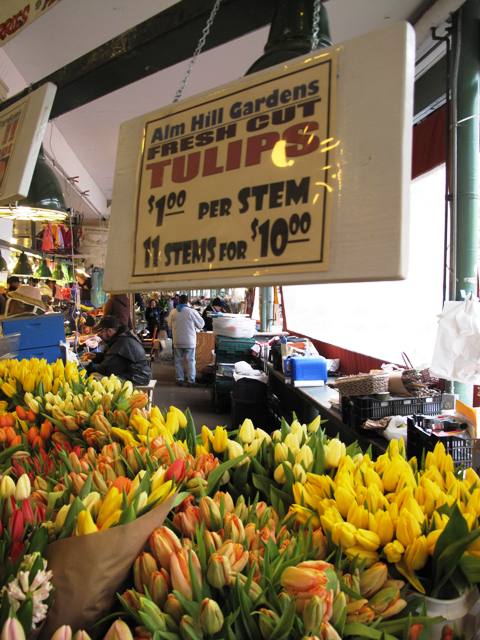
One such grower is Alm Hill Gardens, owned by Gretchen and Ben Hoyt. You can find Alm Hill flowering bulbs and other cool crops like lilacs and peonies year-round at the Pike Place Market and at weekly outdoor farmer’s markets including Ballard, University District and West Seattle.  I encourage you to always ask questions about where and how the flowers you buy were raised. There is nothing better than meeting the farmer who actually grew your bouquet.  

Fun on the Smith & Hawken DIY Stage

For a few weeks prior to last week’s flower show I had fun playing with tulips, daffodils and narcissuses, and hyacinth flowers to come up with the techniques I wanted to teach. 

The detail photos you see here are from those samples, so the tulips (sadly) are not Alm Hill’s, although they are still fresh and locally grown. During my demonstration I was too busy to stop and photograph each project, but perhaps someone who attended will surprise me with their pics, as my friend Lorene Edwards Forkner did yesterday when she showed up with a CD of a few photos from the talk (THANK YOU!). 

For each of these projects, my goal was to use an organic method of stabilize the blooms, rather than the conventional green foam blocks called “florist oasis.” That product, I have learned, is a carcinogen that contains formaldehyde (why would you want to touch or breath it?); and furthermore, it does not break down in landfills. I do understand why designers have used it for years. So far, there really isn’t an organic alternative to organizing and arranging flower stems to maintain the perfect form or angle. Yet increasingly, I am meeting and interviewing floral designers who consciously shun the green foam and use alternate materials to stabilize flower stems.

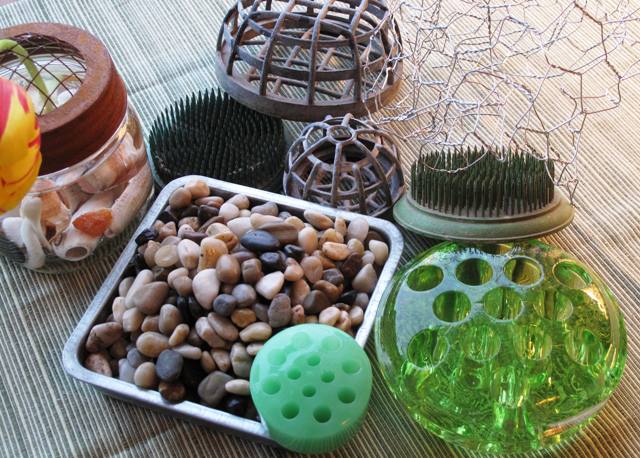
Here's a selection of my flower-stabilizing options, including lots of vintage glass and metal "frogs"

Here are a few options: 

  1. Pebbles, sand, gravel or marbles in the  base of a vase
  2. Pliable twigs wrapped around the inside of a vase to create a basket weave-like framework. One designer who David Perry and I interviewed uses shredded wood shavings called Excelsior inside her vases. This is the type of material used to ship wine bottles, and it’s biodegradable.
  3. Good, old-fashioned flower frogs in ceramic, glass or metal. I’ve been picking these up for a few bucks at weekend flea-markets. One of my favorite is a half-dome cage. It is heavy so it sinks to the bottom of the vase; and it has 3/4-inch square openings, which is ideal for woody stems. These are the arranging tools of the past, seriously useful for the present!
  4. Foliage. I often start an arrangement using soft, fluffy foliage as the “base” that peeks out over the top of the rim. For winter/early spring arrangements, Dusty Miller is a nifty option. It is lacy and soft – and it lasts for up to 2 weeks in water once cut. Once you fill the vase with the foliage, all the other flower stems can poke through the foliage and they will remain in place.
  5. Balled up chicken wire is another time-honored trick for stabilizing especially larger arrangements. It also works well for wide-mouthed vases. Get a roll at the hardware store (my local hardware store told me the proper name for this stuff is “Poultry Cloth” – whatever). You will need use wire cutters to trim off the length you want. Use gloves to protect your hands from wire scratches and create an open “ball.” After inserting into the container, make sure that a portion of the wire emerges above the rim so your design looks fuller.

All these fresh spring details play so well together, especially the sprouting willow branches and the camellia buds.

Design One:  Tulips (2 colors) with curly willow and camellia buds. I used a 4-1/2-inch diameter x 2-inch high dome-style metal flower frog in a vintage lime-green urn with handles.

  • Note that the curly willow is starting to sprout tiny green leaves. That’s what happens when willow stands in H20 for a few weeks inside a warm home.
  • As for the camellias, these are branches left over from a photo shoot last month. The dried leaves were crunchy and unattractive, but the buds were plump and interestingly shaped. So I grabbed my floral shears and clipped away the leaves. The chubby buds on the branches are a nice architectural accent.
  • I first inserted the willow and the camellia branches, forming an open “nest.”
  • Next, I inserted 10 red tulips, cutting their stems short so the flowers are close to the opening of my vase.
  • Finally, I added the yellow tulips, cutting the stems longer. You will note that none of the short or tall tulips are the same height. I like to stagger them so there is a less formal feeling to the design. As I inserted the tulips, I used the framework of the branches to also help support their flowerheads, especially the tall ones.

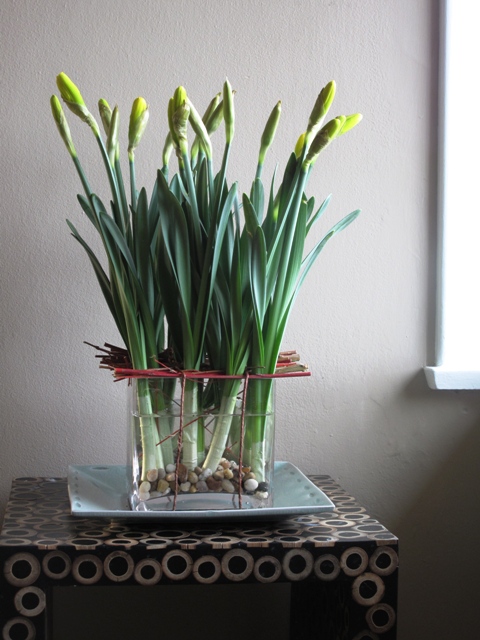
Flower stems, shrub twigs, pebbles and twine. Deceptively simple!

Design Two: Daffodils and red-twig dogwood branches. I used a 6-by-6-by-6 inch glass “cube” vase and filled the bottom 1/4 with medium-sized pebbles. 

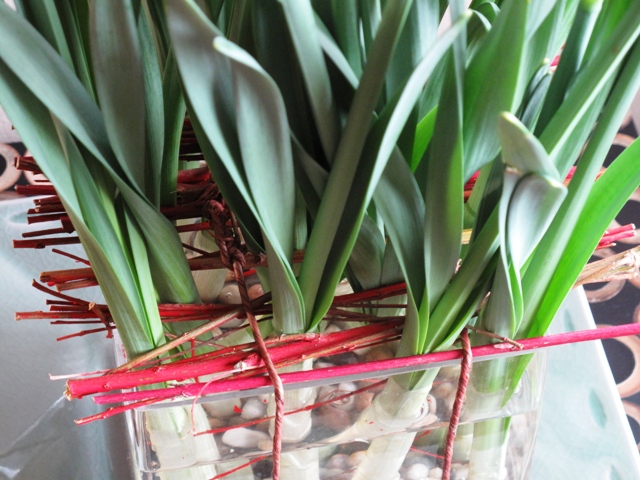
  • The inspiration for this design comes from a Winter 2008 edition of by Design, which is published by The Flower Arranging Study Group  of the Garden Club of America. In the article, Cres Motzi demonstrated a way to layer a row of cut branches over the opening of a rectangular container and “strap” them on with twine to create a framework for inserting branches. Her design also used floral foam inside the container, but I find that completely unnecessary here.
  • Detail of the twigs as they are strapped onto the vase.

    I cut 9-inch lengths of pinkish dogwood branches, lining them up in parallel rows across the opening of the vase. Available at craft stores like Michael’s, twine-wrapped wire is an ideal material to strap around the bottom of the glass vase and over the twig arrangement. It can be twisted taut and secure. There is a band of twine on either end of the twig arrangement.

  • This design is so simple and serene that it called for a singular flower. Fifteen just-picked daffodil stems look great here. I inserted them into openings between twigs and twine, staggering them in an informal arrangement. You can see how well these stems stay upright, aided by the pebbles in the base of the vase.

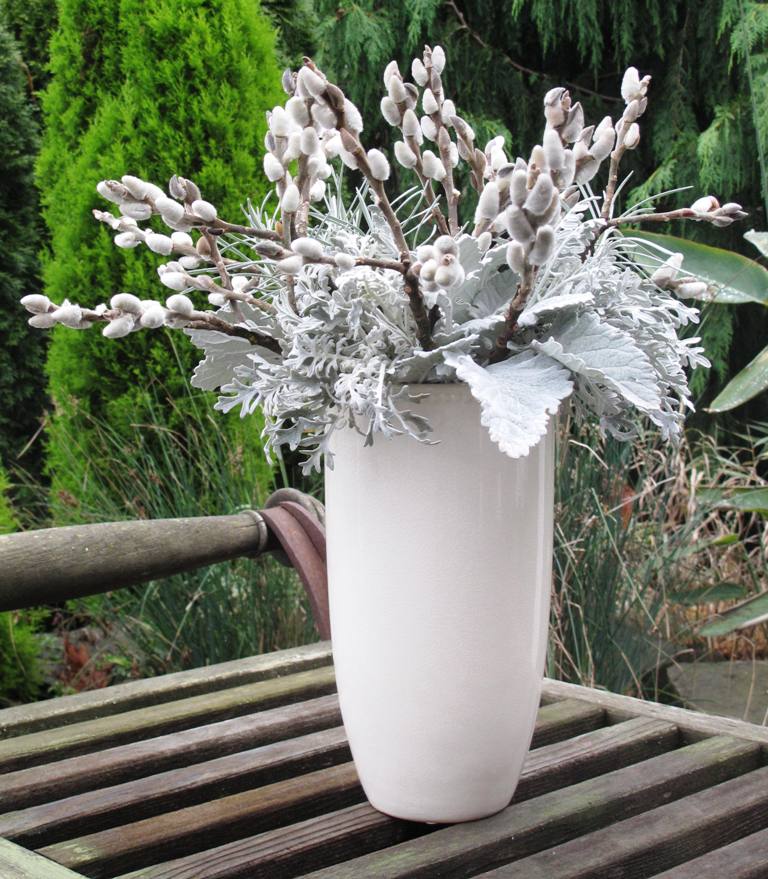
Shades of white, silver and pewter make for a pretty wintry floral palette.

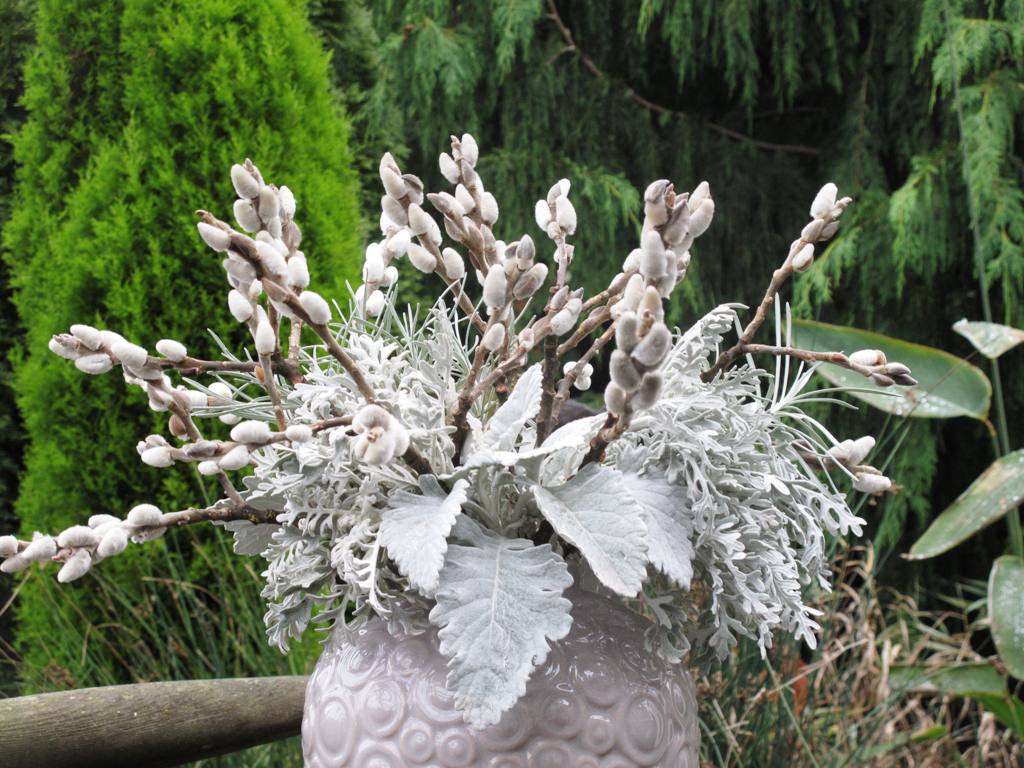
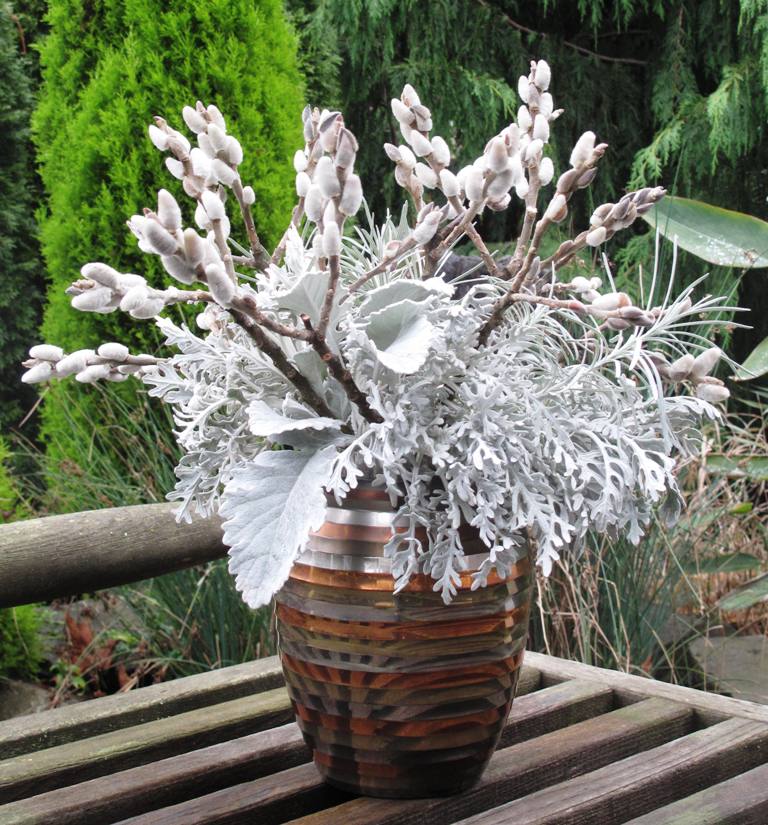
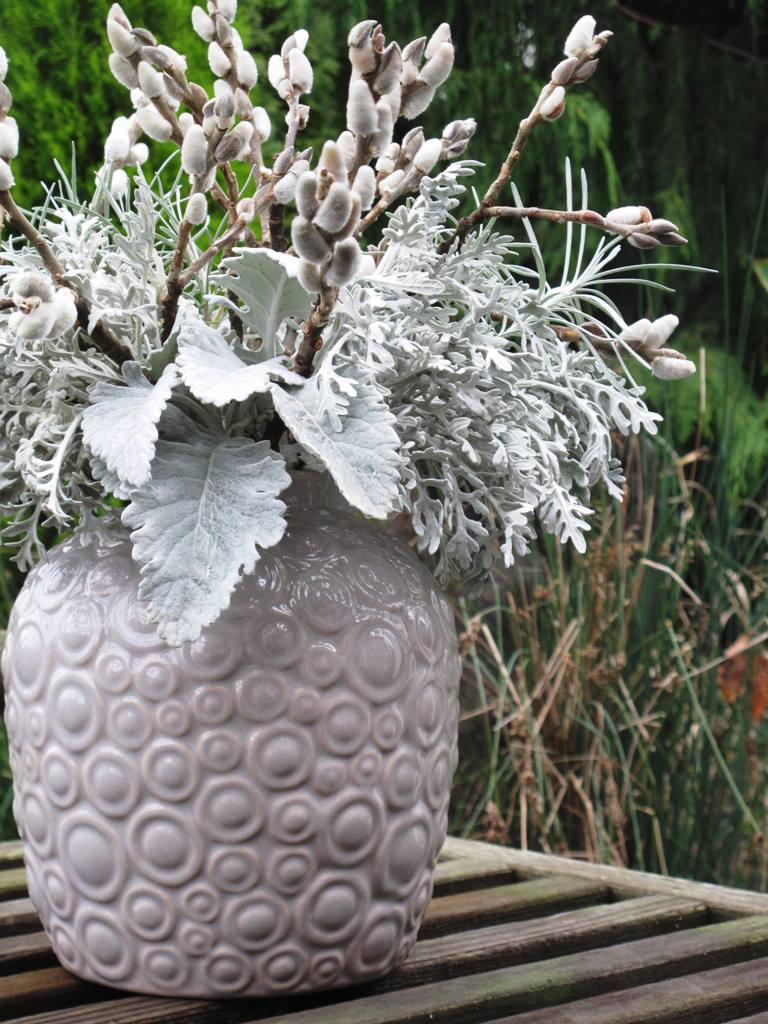
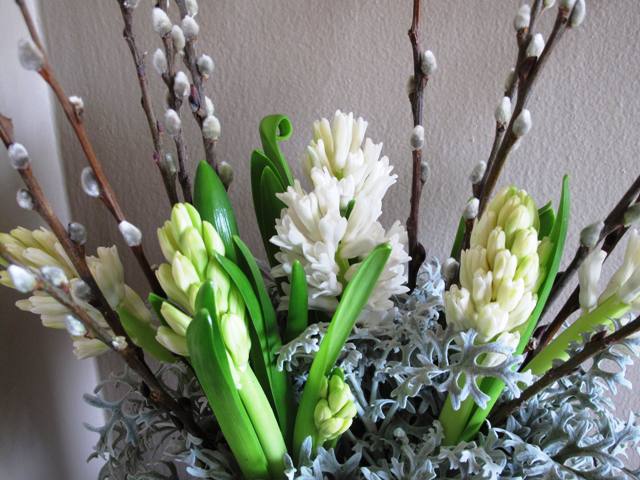
Design Three:  Hyacinths, Dusty Miller and pussy willow branches in a vintage oval vase. Here, the Dusty Miller foliage is the stabilizing element for the other stems. The vase is a 6-inch high vintage 1940s piece. The opening is an oval, approximately 7 inches long x 4 inches wide. I love this vase! It came from a visit to Old Goat Farm in Orting, Wash., owned by my friends Greg Graves and Gary Waller. Their nursery and shop is filled with surprises, including some vintage pieces like this.

  • Even here in the dead of winter, good old Dusty Miller (Senecio cineraria), a shrubby perennial from the Mediterranean region, is holding its own. Gray and kind of ubiquitous the rest of the year, Dusty comes in handy when one needs a soft foliage ingredient to contrast with darker greens. I robbed this batch (with permission) from my friend Nancy Finnerty’s Madison Park garden two weeks before I used it in the flower show demo. This stuff is pretty ironclad. Cut the stems as long as possible and start filling up the vase with them. The leaves are deeply cut and lobed; when used in a floral arrangement, they take on a lacy profile.
  • Insert 5 or 7 long-stemmed hyacinth flowers. Right now, Alm Hill Gardens is selling

    Ready for a close up!

    creamy white, dark pink and deep purple varieties – and the scent is truly intoxicating! Gretchen explains that she gets the longer-than-normal stems by starting the bulbs in the dark. Those poor babies are reaching for light during their growth phase, so that’s why their stems are much longer than the ones you or I would grow in the ground. Pretty gorgeous stuff. Again, notice that the stem lengths are staggered.

  • Finally, insert 7 or 9 pussy willow branches, also at varying heights. These are from a grower in Oregon and I like how they resemble floral exclamation points in this wintry white arrangement. This design is long-lasting. If the hyacinths decline (yet they still look great and this arrangement has been finished for 8 days!), you can always replace them, cuz the pussy willow and Dusty Miller will keep on keepin’ on for at least twice as long.

During my demonstration, I was so pleased that Gretchen Hoyt was in attendance with her assistant, as well as several other seasoned growers and designers – and they offered lots of suggestions and tips. One tip from Lorene’s bag of tricks os how to refresh H20 in a vase with so many complicated parts like the branched framework and the curly willow. Her technique is to first put the vase in the kitchen sink. Using the spray nozzle on the faucet, gently spray fresh water into the vase until the existing H20 starts spilling up and over the edge. If you continue for a minute or so, you will have completely replaced old, dirty water, with new, fresh water. Voila!

I'm working with locally-grown flowers and garden ingredients at the Northwest Flower & Garden Show.

If you are wondering about some of my other resources you see, here is a list:

  • Smith & Hawken copper watering can and other accessories are now available exclusively through Target stores.
  • The wonderful canvas work apron I’m wearing (right) was designed by my friend Janna Lufkin, who is a popular home organizing authority and stylist for Better Homes & Gardens and other outlets. Janna’s products are made locally in Seattle and available through her blog Be it Ever so Humble.
  • Tulips in February, grown locally in Northwest Washington by Alm Hill Gardens.

    Alm Hill Gardens can also be contacted for tulip deliveries. You can order any number of stems (there is a one-dozen minimum) of your favorite tulip colors and have them shipped via overnight or 2nd-day air.

  • To order or for more information, contact Alm Hill at almhillgardens@gmail.com or call toll-free at 855-ALM-HILL (855-256-4455). I took lots of photographs at their Pike Place Market booth last week and thought I’d share some of the yummy shapes and colors of these fresh, local and sustainably grown blooms. 

Finally, a special thank you to my partner-in-flowers, David Perry. The projects you see here will be featured in our forthcoming book, A Fresh Bouquet. And I can promise you that the photos he takes will be dazzling beyond belief.

We invite you to follow along with us on this journey at our blog, A Fresh Bouquet.

Notes from: A Year in Flowers

Thursday, February 10th, 2011

Nothing warms the heart of a speaker more than to pull into the venue and see a sign like this! Thank you Diane Threlkeld, chair of the Yard & Garden Lecture Series - how thoughtful!

Last Saturday, I traveled to Port Townsend, Washington, to speak at the Yard and Garden Series 2011, an educational program produced by the WSU Jefferson County Master Gardeners. Such a great audience of enthusiastic kindred spirits.

After my talk and floral design demonstration on Sustainable Flower Growing and Design, I promised to post some of the resources for seasonal, local, and sustainable flowers. Here they are:

California Organic Flowers (www.californiaorganicflowers.com); Here’s a link to our post about visiting this cool farm in Chico, California

Jello Mold Farm (www.jellomoldfarm.com); Our friends Diane and Dennis grow sustainable cut flowers in Mt. Vernon, Washington. Read their list of “where to buy” (including Farmer’s Market, CSA orders and Seattle area retail shops)

Peterkort Roses (www.peterkortroses.com), a fabulous, family-owned rose farm in Hillsboro, Oregon. Their roses are grown sustainably in hoop houses year ’round. The colors are pure, the scents are not cloying, and the flowers are totally fresh. While Peterkort sells wholesale only, you can ask your local florist to order from them directly. Demand for locally-grown ingredients will help give flower consumers more choices and eventually replace those steroidal mega-rose imports. ReadSandra Peterkort Laubenthal’s blog for news and updates on the rose-growing world.

Wild Ridge Organics (www.wildridgeorganics.com); Specializing in Australian and South African cut flowers, based in Salinas, California. These are the awesome exotics used in my arrangement that one lucky audience member took home with her.

Upcoming: My collaborator, photographer David Perry, and I are hitting the lecture circuit in 2011 – spreading the word about their passion for locally-grown flower crops and the designers who use these ingredients. 

If you are in the Seattle area, come hear from and meet us at the Northwest Flower & Garden Show, February 23-27, 2011. Our appearance details (click on the links below for lengthier course descriptions):

Thursday, February 24th

  • 12:15 p.m. Hood Room: “Conquering Your Digital Camera: Making Beautiful & Memorable Garden Photos,” with David Perry
  • 2:30 p.m. DIY Stage: “Floral Design with Spring Bulbs: Bring Spring Indoors with Beautiful Blooming Bouquets,” with Debra Prinzing

Friday, February 25th

  • 12:15 p.m. Hood Room: “A Year in Flowers: Seasonal, Local & Sustainable Floral Ingredients,” with David Perry
  • 2:00 p.m. DIY Stage: “The Winter Bouquet: Sustainable Floral Designs From Winter’s Bounty,” with Debra Prinzing

A winter bouquet: arranging flowers from the January garden

Sunday, January 9th, 2011


By borrowing this lovely cream urn from my friend Lorene, and by clipping ingredients from her garden and that of Jean Zaputil's, I created a dramatic winter bouquet.

Earlier this week, my collaborator David Perry and I were the “program” for Woodinville Garden Club’s first meeting of 2011. It was an auspicious beginning for what we anticipate to be a great year gathering stories both visually and with words for our book project, A Fresh Bouquet.

Frequently, the feedback to our “seasonal, local and sustainable” mantra has to do with the argument that one can only follow this practice in the peak growing seasons when annuals and perennials are in their glory (you know what we mean – roses, peonies, dahlias, even sunflowers….they don’t usually sing in January!)

That’s true, but living in the seasons means that of course you don’t want a vase filled with August bloomers in the dead of winter. That’s like eating a mealy hothouse tomato out of season. Yes, it’s red in color, but that’s about as much in common the January grocery store tomato has with the off-the-vine, warm, juicy, flavorful heirloom you grow in the garden and add to your late summer salads.

So after our illustrated lecture on “A Year in Flowers,” featuring some pretty incredible images that Dave has captured on our joint and his solo excursions, we set out to design and demonstrate some great ideas for winter bouquets. Suffice it to say, David created an uniquely “David” arrangement. Yes, it involved power tools and an unexpected combination of leaves and blooms. When he blogs about it, I’ll add the link here.

This detail shot shows how the oakleaf hydrangea adds wine to the bouquet, showcased against the hellebore foliage; a glimpse of the yellow-and-green acuba foliage is in the upper right corner.

For me, I wanted to fill a vase with winter beauty. Some of you may know that our family is in a bit of transition. We finally sold our house in Southern California, but we are still living in a rental house in Seattle, while house- and garden-hunting for a permanent residence.

I yearn for my previous Seattle garden where I could gather more than enough ingredients for any impromptu bouquet (does this come close to admitting that I’m an over-planter? YES! But I don’t own that garden anymore, sadly). I’m a bit limited with the offerings at our rental house and I don’t want to denude all the plants my landlords consider theirs!

So, on Tuesday, I went “flower shopping,” which means I visited the amazing gardens of two friends, clippers in hand. It was sunny out, and very cold. Some of the shrubs showed signs of frost damage. After all, It was January 4th! But I was not disappointed and my garden designer friend Jean Zaputil walked me around her backyard and entry garden, encouraging me to take a little of this and a little of that.

Her bounty included Fatsia, which has huge, palm-like foliage. Green and glossy, this is good stuff – perfect for adding drama to a vase. We clippped branches of green Boxwood, another hardworking shrub that is just as hardworking in an arrangement. Oh, and the Sarcococca, or sweet box – divine. If you have never grown this evergreen shrub, which has little pointed leaves and hard-to-see, super fragrant white winter flowers, think about planting it now. It’s hardy in the Pacific NW….not in the midwest, unfortunately, according to my friend Danielle.

I also left with a few stems from Jean’s Acuba shrub, which is another one of those plants you sometimes ignore in the summertime when everything else looks so swell. But even the famed Christopher Lloyd admired this plant – its bright yellow foliage is splashed with green flecks. And there’s nothing like something golden to offset all that greenery. It ended up as one of the magical ingredients that perked up my bouquet. I also talked Jean into letting me clip two branches from her about-to-bloom Helleborus argutifolia – with its leathery, serrated, olive-green foliage and the pale green flower in bud.

Here's how the honeysuckle vine looks, wrapping around the base of the urn.

After leaving Jean’s, I headed to Lorene Edwards Forkner, plantswoman, designer, blogger and fellow writer — another incredibly talented friend (I am blessed with many of them!). Lorene’s garden is very close to Puget Sound, which is often a bit milder than the rest of Seattle. That’s the only reason I can come up with to explain why her Oakleaf Hydrangea shrub was still hanging onto several deep burgundy leaves in pretty sets.

Like the golden Acuba, the wine-colored Hydrangea foliage added great contrast to the bouquet. Oh- and the ‘Jelena’ witch hazel – yes, this glorious, fragrant shrub is just beginning to flower in Lorene’s front yard, so she allowed me to clip a few branches. The blooms of the witch hazel are little puffs of burgundy-copper – and it doesn’t take many of them to perfume a room. I made this bouquet on Tuesday and four days later, the dining area where I set the urn was still heady with the scent.

You can look closely to see most of these ingredients in the photos here. One more thing I want to share about this abundant bouquet. Notice the draping vine? That’s a cascading and twining length of a rugged honeysuckle, also from Lorene’s property. I wanted it to spill elegantly from the mouth of the cream-colored urn, but it was a little too stiff to give me the look I envisioned. So I started wrapping it around the base of the urn and – well, that looked better. I employed a trick I learned from a Portland floral designer we recently interviewed, Jennie Greene. She uses tiny lengths of twine-wrapped wire to secure branches and stems in place. Easy t0 find at craft stores, I pulled out a roll of the wire, cut off a couple inches and secured the honeysuckle in place.

Now who says there’s nothing to put in a vase in January? This creation illustrates just one way to gather from the winter garden. Go see what you can create!

Hoe, Hoe, Hoe: Vintage Garden Tools as Holiday Decor

Wednesday, December 15th, 2010

A Gardener's Holiday Welcome at Old Goat Farm

If you’re like many of my gardening friends who can’t resist the charming character of old farm implements or tools, you probably have a few elderly hand-trowels in your collection. I know I’m not the only one who actually begs, buys and forages for old nozzles, flower frogs, watering cans and metal implements for digging soil! 

Whether displayed on a shelf or hanging from a wall inside the potting shed, that slightly rusted, weathered and distressed garden trowel, cultivator, hoe or rake appeals to many of us because the paint is chipping and the handle is probably made from real wood and screws rather than plastic and staples. 

You might call them our holiday elves! In the kitchen with Greg Graves and Gary Waller

My pals Greg Graves and Gary Waller, owners of Old Goat Farm in Graham, Wash., are two such hunter-gatherers. 

It helps that the men acquired a Victorian farm house and a similarly pedigreed landscape (and a barn and several outbuildings) several years ago. Greg and Gary moved from the city to the country where they have created an appealing lifestyle-business that includes raising poultry, peacocks and goats (yes, there are a few goats here, even an “old” goat), propagating and selling unusual plants, and hosting legions of visitors to their Open Garden days in summertime and to their Holiday Teas in December. 

The farm house's irresistable covered porch overlooks the garden.

Gary, an award-winning floral designer, has amassed an impressive collection of holiday decorations (that’s what the barn is for – to store everything from santas and snowmen to ribbons, ornaments and lights). 

He and Greg decorate each room of the farmhouse with a specific Christmas theme and then invite their customers, friends, local senior groups and word-of-mouth partakers to attend their Holiday Teas.

People walk from room to room (bath included!), enjoy the highly-detailed decorations, sip a warm drink and sample the mouthwatering desserts. Greg tells me that Old Goat Farm will serve tea to 450 persons this month.

Two of the teas are fund-raisers for causes they support, but basically the entire endeavor is a gesture of community outreach. “We keep the price low because we don’t want to make it too costly for the senior groups to come,” Greg says. 

Here's Lorene, studying the tiny kitchen tree that's an ode to poultry on the farm (Gary hollowed-out all sorts of the eggs and decoupaged them with hen images).

One of Gary's hand-made egg ornaments.

Greg invited fellow garden writer Lorene Edwards Forkner and me to join last Friday’s tea when a last-minute cancellation opened up two slots at the table.

We donned our festive attire and drove to Graham/Orting. If you know about the city of Tacoma, the Graham/Orting area is due east of it. The Garden Conservancy-supported Chase Garden is a nearby horticultural destination. 

Let me set the scene up on our arrival: 

Festooned in garlands, plaid ribbons and old garden implements (!) the soft yellow farmhouse greets its guests. The entry wreath hangs from the front gate with a trowel and worn wood dibble (a planting device for enlarging seed or bulb holes). 

The front gate's wreath begins the decor theme with a trowel and dibble

Who wouldn’t love a huge covered porch that wraps around three sides of the 100-year-old Victorian residence? Each post is dressed in holiday finery, a pair of rusty old tools gathered up with an enormous lodge pole pinecone and the red-and-green plaid ribbon. 

The cheerful door decor has at its center a set of vintage child’s set of play tools – a rake and a shovel. Criss-crossed with more ribbon and cones, they welcomed our arrival (see photo at top). 

Front porch decor: love it!

A galvanized watering can becomes an impromptu vase, filled with greenery gathered from the wooded landscape. And we feel transported to a century ago (almost) while touring the garden and the home. 

One of our favorite destinations at Old Goat Farm is “Linda’s Garden,” designed by Greg to memorialize the late, dear friend to us all, Linda Plato.

We lost Linda five years ago this month, a premature death brought on by breast cancer. Linda and Greg met in horticulture school as they both began their second careers. They worked together at the Elizabeth C. Miller Botanical Garden (where Greg is still on the staff as head gardener). They traveled the world to see gardens. Lorene and I were just happy to be small stars in Linda’s orbit. And we miss her. 

In Linda's garden, the double boxwood topiaries line the path that leads to the garden shed.

Linda’s garden is an homage to topiary. For you see, Greg and Gary would never have moved here to Old Goat Farm if it was not for Linda dragging Greg out there six years ago to buy topiary from the former owner who was liquidating her stock.  As Greg tells the story on his web site: 

Story of Old Goat Farm
In December of 2004, quite by accident, we found this beautiful little place while plant shopping with our good friend Linda. It is located just outside of Orting, WA, tucked below Mt. Rainier. We fell in love with this place, and by March of 2005, we were the owners of Old Goat Farm.

It is kind of a throwback to a simpler time with its 100-year-old farmhouse and cute barn and nursery. The garden is dotted with topiaries which give it a magical quality. 

“Linda once said: ‘What’s better than a row of topiaries? A double-row of topiaries!,'” Greg explains.  And that’s why you will see double-boxwood balls, pyramids, ovoid shapes and cubes lining both sides of the pathway that loops through the shaded, secluded and peaceful Linda’s Garden. Hurrah! It never fails to put a smile on my face. Please enjoy the photos of our visit to Old Goat. May we all be so lucky to have people like Greg and Gary, Lorene, and our dear Linda pass through our lives!

A small Christmas scene adorns the front porch.

A cedar garland wraps around the porch columns and each is topped with a huge pinecone and more vintage tools.

The full view of the farmhouse front door. Naturally, it's RED!

The perky old goat welcomes visitors to the garden and nursery.

Here is the "old goat," carved from wood and sipping a mug of coffee in the garden.

One of the wonderful barn strutures.

The ancient, moss-covered apple trees, backlit by the dim December sun.

A topiary bunny of variegated box, a work in progress by Greg (and an homage to Linda).

A moss-covered "bench" resting on two piles of stones. Note the mahonia that has seeded itself in the rockery.

Yes, you can grow moss lawns here in the Pacific Northwest and this is one terrific example!

For amazing drama in the winter landscape, place an evergreen fern in an urn on top of a pedestal. Wow.

A circular stone "rug" that Greg recently added at the entry to Linda's garden - the ideal place to sit and be quiet.

Stone gabion pillars guard the entry path to Linda's garden.

Merry Christmas from Old Goat Farm. This is a miniature version, complete with sign, created by Gary Waller.

New Garden Products for 2011 – Part Two

Tuesday, November 30th, 2010

Preserve the Harvest with Burgon & Ball's charming jam, marmalade, pickles and chutney jars.

Trend-spotters are reading the horticultural tea leaves these days.

It’s an annual practice that I remember so well from my newsroom career when, without fail, we reporters were asked to compile the obligatory “forecast” story. I covered retail, and you could imagine how loathe Seattle’s major retail CEOs were to tell me anything about the coming year when it was just days after Christmas and they hadn’t tallied up the current year’s performance.

But, alas, we all want a glimpse into the future. And that’s what going to industry trade shows can help reveal. A peek into the products, plants, tools and design items you may be seeing in 2011’s backyards.

This post continues with even more interesting offerings. Or the ones that caught my interest anyway. I welcome your reaction. Are these items you can see yourself purchasing for your garden? Do you even NEED more products? (That’s a long conversation, isn’t it?).

Here is the "sun" bracket from M Brace - simply brilliant!

I really enjoyed meeting Jill Plumb, a school teacher who came up with a brilliantly simple method of building raised beds.

Her product is called M Brace. It is a decorative steel corner bracket that holds lumber at a 45-degree angle WITHOUT HARDWARE (note: this is a big selling point for anyone who has dragged the electric drill and 100-foot-long orange extension cord out to the backyard to try and wrestle together a box for the tomatoes).

Here's Jill demonstrating the nifty packaging for a pair of brackets.

Jill told me that she got this “big idea” one day while re-loading paper napkins into a “slot” style napkin holder.

Something clicked and she saw in her mind’s eye how easy it would be to have a bracket that emulated that napkin holder. Just larger, more durable and also pretty. Several prototypes later, including the support of her students who she involved in the design process, packaging development and marketing, Jill’s M Brace is looking very professional and has already hit garden center shelves in some markets.

Made from recycled steel (natural or powder-coated), with decorative cut-outs including a squiggle, sun, carrot or bamboo fronds, the set of 4 brackets has a $165/set recommended retail price. Jill continues to offer new product ideas such as “edging” made from the leftover swirl pieces or plant stakes from the leftover carrot cutouts. Brilliant!

The Feeney 3-in-1 trellis, shown in a fan pattern

I spotted another clever system to corral plants – especially in this case, vines – in the Feeney Architectural Products booth.

A detail of the Somerset II Trellis

We see so much over-designed crap in the marketplace, which is one reason why I appreciated Feeney’s simple use of stainless steel cables to create a trellis for climbing plants. Feeney’s 3-in-1 Trellisis an easy-to-assemble wall-mount trellis kit with 1/8-inch diameter rods and special mounting components that can be configured into a Fan, Grid or Diamond design. This is a lightweight solution that does require measuring and drilling skills to install, but can turn a blah wall or fence into something quite beautiful. Just add a vine of your choice and voila! Something quite pretty. Suggested retail: $199.

Feeney also uses stainless steel cables in its inexpensive “It’s a Cinch” plant hanger and in a freestanding trellis panel kit. The Greenway Trellis has a frame of aluminum tubing and a square-grid pattern for the vines. The frame legs can be set in compacted gravel or concrete footings, or they can be base-mounted on a deck or patio. That square-grid pattern also shows up in the Somerset II Trellis, which has top and bottom powder-coated aluminum brackets. It is also a wall-mount system but a little larger than the 3-in-1.

READ MORE…

Meet the new generation of mums

Tuesday, November 23rd, 2010

Seatons Toffee, a 'quill' form with deep bronze petals.

I have great memories of the giant yellow chrysanthemum corsage my dad bought me for a college homecoming when I was a little girl. That curly ball of petals was so unwieldy it was hard to keep from crushing it with my chin. To me, that mum didn’t even feel real – it was like something from a fantasy world of my dreams.

My relationship with mums hasn’t really changed much since then. I’ve always kept them at arm’s length, both in garden design and in floral arranging.

The only time mums registered on my radar in the past decade was the celebrated arrival of ‘Kermit’, a lime green mum with a button-like flower that gained a huge following for its zesty color and knack for looking good in a vase for up to two weeks. But what about other mums?

Lots to learn

'Yoko Ono' is a top pompom-style mum with that awesome green hue.

Any ambivalence I’ve had about mums changed for the positive after I met two leading mum experts at the Association of Specialty Cut Flower Growers annual symposium in Tulsa, Oklahoma earlier this month.

On one of the long bus rides, I sat with Ray Gray of King’s Mums, an Oregon City, Ore.-based grower of “exhibition, specialty and vintage chrysanthemum rooted cuttings.”

Ray shared a bit of the story behind how he and his wife Kim purchased King’s Mums in 2008. The Grays are longtime wholesale nursery owners who were looking for ways to diversify their crops. They learned from Janet Foss, another grower, that King’s Mums was for sale.

'Yodogimi' is a semi-double mum with dark red petals tipped in gold.

For more than 40 years, the King family operated a huge Chrysanthemum-growing operation in Central California. The business served the amateur gardener and professional grower with more than 200 cultivars of exhibition and spray mums, one of the largest sources in the U.S.

After buying the business, Ray and Kim in January 2009 moved this amazing collection to their small family farm in Oregon City. They are carrying on the tradition begun by the Kings while also implementing new technologies and growing methods.

'Two Tone Pink' has petite pink-purple petals with white tips.

Ray gave me a copy of the King’s Mum catalog and right away I started drooling over the cultivars between the covers. As a cut flower choice, the mum is superb. The palette leans toward the warm end of the color spectrum, which is very en voguewith today’s floral designers: bronze, gold, terra cotta, salmon, champagne, orange, crimson, pink-red, lime green, apricot, burgundy, and all sorts of luscious bi-colored petal combinations. And of course, there are also pastel, cream and white flowers.

'Senkyo Kenshin' is a dark bronze 'spider' form - magical!

I know this is probably all old news to people in the National Chrysanthemum Society, and to specialty cut flower growers and their floral design clients. But I found it thrilling to meet Ray and learn how he and Kim are keeping alive this important cut flower category. Yes, I started to fantasize about growing some of these blooms in my own garden.

Note to self: King’s Mums is open to the public each October. Located about 20 minutes south of Portland (Oregon City is the end of the historic Oregon Trail), you can visit during business hours and see these yummy flowers up close and personal.

A beautiful punch of color comes from mums filling the hoop house at Bear Creek Farm.

There is another reason why mums stayed on my mind at the ASCFG conference. After meeting Ray and flipping through the beautiful flowers in his catalog, I was stunned to walk into one of Vicki Stamback’s hoop houses at Bear Creek Farms to discover rows of these very mums I’d just seen in that catalog.

I have to confess, I was a bit antisocial while skipping out of the demonstration of releasing beneficial insects in the greenhouse. But I wasn’t the only one climbing between the shoulder-high rows of mums, taking photos of these really superb blooms and making sure to jot down the name of each. These flowers were impossible to ignore as you can see here.

The following day, I sat in on “The Comeback of the Mum,” a presentation by Chehalis, Wash., grower Janet Foss. I learned enough to become a confirmed mum fanatic. You can read a summary of her presentation at A Fresh Bouquet.

I’ve got to share the rest of these incredible specimens:

What to do with salvaged shutters

Thursday, November 18th, 2010

Read on to learn what I'm going to do with these amazing shutters!

I recently spent the morning at a cool local flea market in Seattle. I was up early and out the door by 7:15 a.m., ready to get my creative juices going.

My mission: to discover as many castoffs from others that could make their way home with me.

The destination: 2nd Saturdayz, a popular flea market where vendors, dealers and designers come together to do business with salvage-savvy shoppers.

The apt motto: A Saturday Market of Fine Tastes and Curious Treasures.

Once inside the doors of a huge hangar (yes, the flea market is held at a decommissioned Naval base), I met up with Jean and Gillian. But not too much socializing is encouraged at these events. That is, IF you want to get the best deals. First-come, first-serve is the motto. Or: Every woman for herself.
I shouldn’t limit this endeavor to the female salvager because there were many men in attendance at 2nd Saturdayz. But still, you know what I mean. It’s a gal’s paradise.
Galvanized chicken feeder. 30 sizeable oval openings. A succulent planter or a flower holder? Or both?

Lately, I’ve been collecting vintage flower frogs, which makes sense since I’m living and breathing floral design. But this time, instead of finding glass and metal frogs, cages and stem-holders to displace the dreaded florist’s Oasis, I picked up a galvanized metal chicken feeder.

Think of a loooong ice-cube tray with oval cutouts. In metal. Very cool. Now that I’m looking at it again, I may just use this nifty piece as a planter for hardy succulents. It’s probably leaky so that’s going to give the drainage I’ll need.

A nearly-pristine child's typewriter complements my grown-up Underwood.

I also picked up a vintage child’s typewriter. It can play nicely with my retro black Underwood typewriter that we bought back in 1985 at the Rotary Club Auction on Bainbridge Island. I think I paid $5 back in the day.

Those old typewriters, truly relics, are now priced at $50 on up. And to think so many of them have been dismantled to make jewelry from the letter keys. I’m guilty of buying one of those alphabet bracelets, too.

When I walked into one small “booth” with my friend Jean, an awesome Seattle landscape designer, I found myself absent-mindedly stroking the frame and spindles of a cast iron baby crib. The vendor had taken off one of the crib’s side-rails and piled pillows and cushions on the springs and against the three remaining railings.

Here's the end of the baby crib. Next time you see this, I'll be lounging against some cushy pillows, perhaps under a shade tree. This crib will become my garden bench.

What did it recall? Yes, a very fashionable garden daybed or bench. And for $100, I totally lucked out. My friend Gillian, who is a pro at this sort of buying-and-selling of antiques and vintage items at Ravenna Gardens, pulled me aside to share the secret that she’s seen other dealers selling cast iron baby cribs for $600. I don’t have a “garden” in which to place this bench right now, since I’m in a rental house and I’m not yet ready to invest energy on land I don’t own. But . . . I did decide to bring this crib home and store the pieces in the garage until the next garden comes along. Luck-ee me!!!

I couldn’t ignore the central element inside the warehouse – a little hamlet of potting sheds. Their perky corrugated metal roofs, topped with finials created from shiny bits and pieces, stood high above the flea market’s landscape.

While gazing at the rustic but stylish potting sheds, I met designer/builder Bob Bowling. Owner of Bob Bowling Rustics of Whidbey Island, this engaging shed artist greeted me and generously shared his story.

Turns out, like some of the talented folks we featured in Stylish Sheds and Elegant Hideaways, Bob makes unique structures using reclaimed and recycled materials. Whimsical and playful, and finished off with salvaged windows, doors and other artifacts, the Rustics sheds are each a delight to see.

Bob's cool garden shed was hard to miss.

The "stripes" come from variously-stained boards.

The prices are reasonable, too. I should know. For $3200, you can get this “Rasta” shed. It measures about 7-by-7 feet in diameter (plus or minus) and features cool details, like the exterior of alternating stripes of differently-stained boards and the window boxes, door hardware and towering finial.

You could easily spend this much for a pre-fab storage or tool shed on the lot of your local big-box store. Which would add more art and style to your life, while also being quite functional?

All this thrifty flea-market shopping had energized me and made me feel quite artistic.

And then I met that shutter duo that called my name. Loudly. They appear to be half-circle crowns or eyebrow tops from a set of plantation shutters.

Wooden, with 2-inch deep slats, these pieces were displayed separately. Once I noticed both of them, I was not going to leave with just one! I don’t think I got a huge bargain, since I paid $28 apiece (but the seller insisted she had just cut the price in half). Whatever. When you spy something so uncommon, you have to act.

Other than changing the depressing buff-colored paint job to something more lively, what on earth do you suppose I will do with these crescent-shaped pieces?

Hello! You two are pretty darned cute. That Baylor Chapman is uber-talented!

Here's another small shutter-turned-wall garden, compliments of Baylor Chapman.

For inspiration, I hearkened swiftly to my visit to Baylor Chapman, a talented San Francisco floral and garden designer I recently profiled for A Fresh Bouquet. After my friends Susan and Rebecca took me to meet Baylor at her floral studio, the three of us accompanied her to her loft apartment in SF’s Mission District.

And there on the outside roof deck, were some pretty amazing succulent gardens – PLANTED IN SHUTTERS!!!

Naturally, I am going to draw from this incredibly clever idea and put those twin shutters to very good use with a vertical planting of hardy succulents. It may take until next spring, but stay tuned. And if you have any suggestions on what color I should use to upgrade the crappy paint color, please chime in.

The trick, according to Baylor, is to secure a layer of landscaping cloth like a little pocket or envelope behind each shutter opening. Then you can add potting soil and plant your sedums, succulents or whatever else seems fitting. You know, I really do love that chocolate brown finish on the shutters. Doesn’t it nicely offset the silver, gray, blue and green foliage of the succulents?

Well, all in day’s work. More to come as I execute these big plans.