Debra Prinzing

Get the Email Newsletter!

Archive for the ‘General’ Category

Jamie Durie’s very personal version of The Outdoor Room

Saturday, May 28th, 2011

This view takes in the two cabanas on the left and the dining pavilion at the opposite end of the pool

I joined Jamie Durie, of HGTV’s “The Outdoor Room,” for brunch and an interview in LA

I’ve been after celebrity garden designer Jamie Durie for more than a year to let me come and do a story about his personal Los Angeles backyard. I sensed he was stalling because, like many of us who make gardens (or write about them) for a living, our own outdoor environment is the LAST thing to receive our attention!

Turns out, Jamie and his producers of “The Outdoor Room” on HGTV  were cooking up big plans for his hillside property in Los Angeles’s Laurel Canyon.

Jamie reimagined the long-neglected yard, dominated by a vintage 1950s swimming pool, into a gorgeous series of outdoor living spaces. The magical transformation occurred over a three week time, and became the debut episode of The Outdoor Room’s season three, which aired earlier this year (you can see a schedule of re-runs of this episode by following this link).

In late February, I received an out-of-the-blue phone call from Jamie, saying: “The garden is finished – you’re invited to come see it!” Wow – this guy is good to his word.

Here's a bird's-eye view of the transformed outside living space - photographed from Jamie's hillside deck

We had a narrow window of a couple week’s time in which I could get down to LA for a photo shoot and interview, since Jamie was about to fly back to Australia for several weeks to shoot another show there. Whew. That guy lives a marathon life and makes it all look effortless. But we made it work. Here is my profile of Jamie’s project, which appears in today’s print and online editions of The Los Angeles Times.

The Los Angeles Times sent one of its very best photographers, Irfan Khan, to document the beautiful landscape. You can check out his web gallery of gorgeous shots here. I also took lots of reference photos to use while writing the story, and thought I’d post some of my favorites below.

Jamie asked me to include the many great resources he used to pull together this extreme garden makeover. So in case you’re curious, here is that list:

Resources & Materials

Bath: “The Outdoor Room” craftsman Steve Zimpel created the bath using recycled cedar from Durie’s original design.

Decking: Fiberon composite decking

Doors: LaCantina bi-fold doors

Fire: Escea outdoor gas fireplace; Durie Design Fire Pit

Furniture: Walter Lamb for Brown and Jordan reproduction chairs and chaises from Design Within Reach; all-weather wicker sectional, Durie Design.
Kitchen: Fuego modular kitchen.
Plants: Monrovia

Vertical garden system: Woolly Pockets

Pool Makeover: Jamie worked with Aric Entwistle of Los Angeles-based H2o Development Inc. to replace a conventional chlorine system with Spectralight, which uses ultraviolet light to kill pathogens and waterborne bacteria. The renovated pool is solar heated with a system from Suntopia Solar. A new infinity edge was fabricated over the original coping using carbon fiberglass, resin, high-tensile adhesives and several coats of waterproofing. It’s finished with Bisazza glass mosaic tiles.  

Like a raft floating over the garden, the upper deck provides excellent glimpses of the garden below.

Here's a bird's-eye view of the transformed outside living space - photographed from Jamie's hillside deck

I love this view from above, which shows how the box-beams form planting channels, and how the Roman shades create a canopy roof for the cabanas.

Here's the exterior of two pivoting planted "walls." When opened, they connect Jamie's bedroom to the garden.

A gorgeous detail of the stacked stone contained by one of two 7-foot gabion tree planters that Jamie designed

Here's a nice detail shot from inside the dining pavilion. You can see how the concrete retaining walls hold the hillside back and also form the interior walls where planters are hung and pillow-backs are rested.

A dreamy morning shot of the outdoor living room, featuring Jamie's own all-weather sectionals and a custom fire pit.

Inside the dining pavilion.

A detail showing how the Woolly Pockets vertical wall system adds foliage and flower texture behind the cabana.

The full-size view of the gabion tree planter - one of two in the garden.

At the end of my interview with Jamie, he talks about how much he enjoys living here. And it’s a perfect way to sum up the feelings I also had being in the highly personal garden environment: 

“Life just seems a whole lot more hectic in Sydney,” Durie says. “You can’t say that about Laurel Canyon. All I ever hear are birds. I’ve got squirrels running along the top of my green wall. An owl moved in once I finished the garden, and we’re starting to be visited by a ton of hummingbirds. I may not have kangaroos and koalas, but it’s kind of fun telling my mates back home that I’ve got coyotes in the canyon.”

Thank you for sharing your garden, Jamie. It was a treat! I hope you slow down long enough to really enjoy it~

Flowers, friends and fun in Colorado

Thursday, May 26th, 2011

Here I am with Arthur Williams, talented floral designer from Babylon Floral in Denver.

Where have I been lately? Last week, I hopped on an airplane and flew to Denver, which surprisingly is only 2-1/4 hours away from Seattle.

At the invitation of the Denver Botanic Gardens, my collaborator David Perry and I spent three lovely days giving talks and workshops about some of our favorite topics. We met some wonderful new friends and were inspired by the DBG’s beauty as a public space for all of Denver to enjoy.

Last Wednesday evening, I spoke about the “Personal Outdoor Dwelling,” aka “stylish sheds,” featuring many of Bill Wright’s gorgeous photos from our book Stylish Sheds and Elegant Hideaways.

Then on Thursday, David and I made a joint presentation on “A Year in Flowers: Seasonal, Local and Sustainable Ingredients.” We split the talk into two parts, an illustrated lecture and a flower design demonstration.

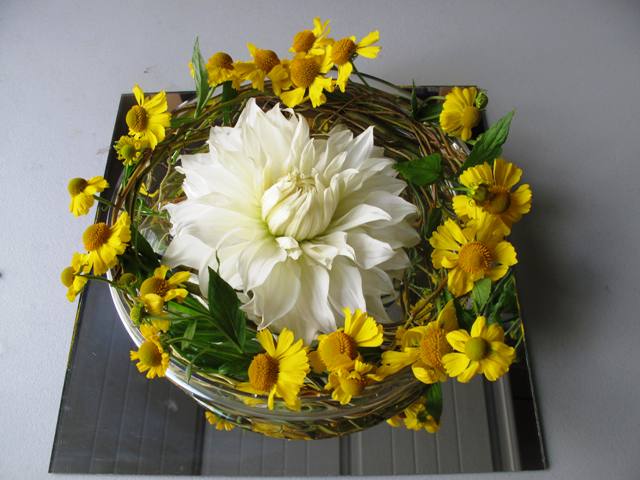
My arrangement from the demonstration, featuring Colorado-grown flowers and choke-cherry foliage from the Denver Botanic Gardens.

I was so fortunate that Denver floral artist and designer Arthur Williams, of Babylon Floral, helped procure locally-grown cut flowers for me to work with. Not only that, but he lent me some vases to use. We so enjoyed meeting Arthur and visiting his colorful shop (he’s pretty colorful, too – check out his arms!).

The following morning, Dave taught a hands-on photo workshop that wowed his students with new-found skills for their point-and-shoot digital cameras.

David's photography talk included practical, hands-on training at the botanic garden.

While Dave was with his students, I wandered along the Botanic Garden paths and through the various themed displays, taking in early Rocky Mountain spring day.

We found that the pace of spring’s unfolding in Denver is quite similar to Seattle’s this year. In other words, cooler than normal and later than normal. You’ll see what I mean in the photos I took.

On Friday, we spent a delightful afternoon with my friend and former editor Marlene Blessing. Marlene was my editor on The Abundant Garden and she also created the Pacific Northwest Garden Survival Guide and asked me to write it in 2004. She is an awesome writing coach and an encouraging advisor from whom I learned a lot about storytelling and book creation. I gained much confidence as a writer while working with this dear woman.

Marlene is presently the editor-in-chief of Interweave Press Books. After all the hue and cry about the publishing world falling apart, we took great comfort in the inspired, aggressive and confident approach to niche publishing embodied by this Loveland, Colorado-based imprint. With an emphasis on fiber arts and craft books, Interweave is led by a highly creative and innovative group, including Marlene. You can only imagine the compelling topics we covered during dinner later that evening. Marlene calls Interweave Press founder and creative director Linda Ligon her “Sensei,” but we kinda want to call Marlene our very own Sensei — what a breath of fresh air in a world of book-making!

Chet Anderson (center), with his mom Belle (left) and wife Kristy (right) at their Boulder County Farmer's Market booth.

After eating a delicious meal at Sugarbeet, a hip Longmont restaurant, we retired rather late and incredibly satisfied with our productive day. Bright and early Saturday morning, I picked Dave up at his hotel and we drove about 30 minutes to Boulder. There, we met up with Chet and Kristy Anderson, owners of The Fresh Herb Co., at their Boulder County Farmer’s Market booth.

Chet and Kristy’s farm is actually in Longmont, and they sell most of what they grow through Whole Foods and other retail outlets, but they still bring herb plants, hanging baskets and cut flowers to this market every Saturday. It is the only market in this part of Colorado that requires its vendors to sell what they produce. No dealers or re-sellers here. You meet the growers, purveyors and farmers who have raised or produced their goods – from amazing mushrooms to colorful Easter egg-colored radishes, to beautiful bouquets and more.

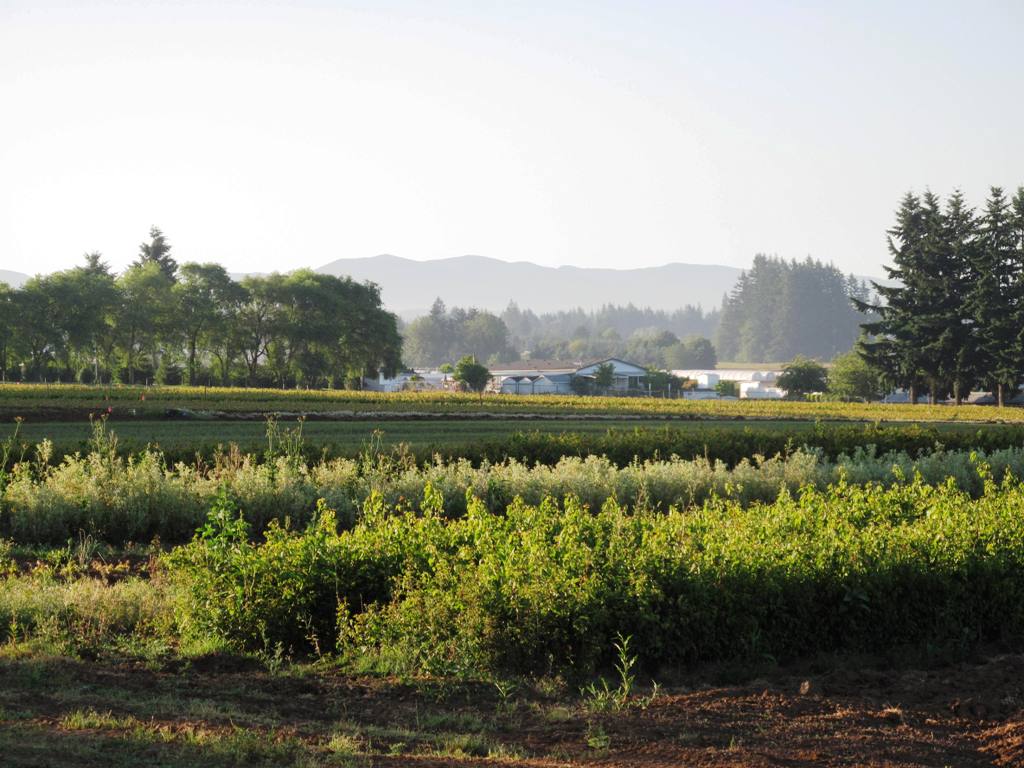
Rows and rows of luscious lilies fill 15,000-square-feet of covered growing area at The Fresh Herb Co.

It was fun to walk the market with Chet, who, I swear, could easily be called the “mayor” of the Boulder County Farmer’s Market. His popularity seems second only to his mother Belle’s popularity. She is there every week, helping at The Fresh Herb Co. booth, talking with new and returning customers, and greeting other vendors as longtime friends. It was fun to meet her!

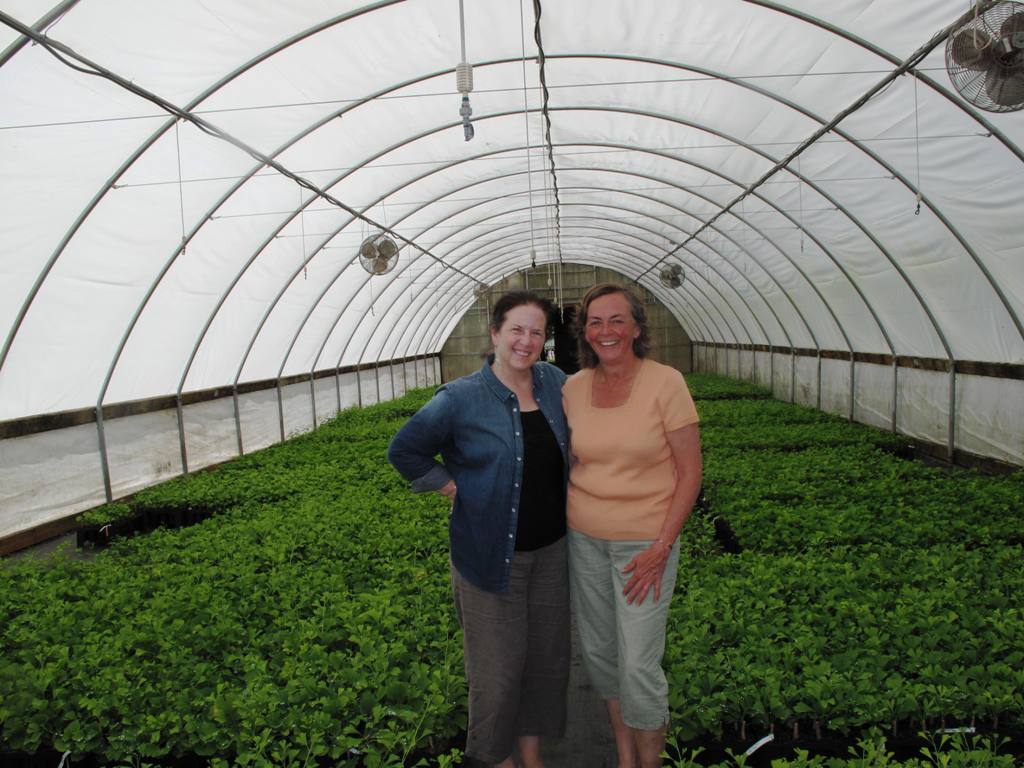
David, Leesly Leon from the Denver Botanic Garden, me, Kristy and Chet Anderson - a group portrait at The Fresh Herb Co.

We followed Chet back to the family’s homestead and farm so that David could do some photography before a tour group from Denver Botanic Garden arrived. Leesly Leon, the DBG’s adult program coordinator, lined up the field trip so that some of the students in our workshops could have a first-hand visit to a flower farm. Chet and Kristy are very successful at what they do, but they are also passionate and humble about their role in bringing flowers from their fields to the customer’s vase.

 “When you know and meet the grower, and when the flowers are fresh and locally grown, there’s no better flower bargain,” Chet told the group. We couldn’t agree more!

Here are some more photographs from our trip – I loved every moment, every visual impression, and the great people we met.

Friday garden field trip

Thursday, May 12th, 2011

Sigh. What else can you say in response to these gorgeous, white bleeding hearts?

Well, this field trip was LAST Friday, but you’ll enjoy my photos all the same. If you don’t know about the July 22-25th Garden Bloggers Seattle Fling, then check it out here.

My pals Lorene, Marty and Mary Ann  and I were persuaded to “host” this horticultural free-for-all that can be best decribed as a weekend of garden touring and networking for bloggers around the globe.

Lorene and I headed out last Friday to scout a couple amazing residential gardens that we want to include on the tour, as well as the Bellevue Botanical Garden. It’s truly still spring here in Seattle; I’ve been away for four years, living and gardening in Zone 10-+, but I don’t remember this persistent rain, wet, gray, chilliness as late as mid-May. So when you see the photos I took on May 6th, you might be surprised! They look very April-ish, don’t they?

Even still, it was exhilarating to have a glimpse of the soon-to-arrive “season” of blooming and unfurling. Please enjoy along with me:

What a sultry combo, spotted at Michelle and Christopher Epping's garden in Newcastle. This will be a stop on the Bloggers' Fling. Yummy Rodgersia + sooty-black Mondo grass.

I love this modern, see-through, cube-planter at BBG. I want one, preferably in this gorgeous weathered steel.

More steel, this time in an orb, suitably displayed in a bed of tumbled riverrock.

Stone totems paired with grasses create a lovely entrance at the Bellevue Botanical Garden.

A Foraged Dinner at The Herbfarm

Saturday, May 7th, 2011

The Herbfarm Restaurant

Last weekend I was a guest at The Herbfarm, the only AAA 5-Diamond restaurant west of Chicago and north of San Francisco, rated number 1 in the Pacific Northwest for both food and service by the Zagat Guide

Dining there is a true “culinary experience” that draws food aficionados from around the world. I’ve been fortunate enough to eat at The Herbfarm Restaurant on three prior occasions dating back to 1995 when I dragged Bruce there to celebrate his appointment as Seattle’s deputy mayor. Our friends Jenny Ulum and Tim Gleason actually flew to Seattle from Eugene, Oregon, in order to join us at that meal. 

The menu cover reads: "What was Paradise? But a garden. . . "

The Herbfarm Restaurant proprietors Carrie Van Dyck and Ron Zimmerman hosted fellow writer Robyn Cannon and me for an unforgettable meal last Sunday evening. We’re talking a four-and-a-half-hour, nine-course extravaganza that celebrates locally grown ingredients prepared with innovation and ingenuity. I say unforgettable, in that years after an evening at The Herbfarm, one can instantly recall tasting (perhaps for the very first time) a specific dish or uncommon ingredient. Oh, and did I mention that each course is paired with a Northwest libation selected by Sommelier Tysan Dutta? The wines are chosen to complement and enhance every bite. 

The Herbfarm’s history is long and not without drama (including a fire that destroyed the original Herbfarm location in Fall City, Washington, that was started by Ron’s parents in 1974 as a small nursery, followed by challenges trying to gain permission to rebuild). 

I have such fond memories of the old-timey Herbfarm. When my oldest son Benjamin was little, I used to take him out there to see the herb garden and a few farm animals. We still have the lavender-filled stuffed bunny rabbit, which we found in the gift shop. Those expeditions usually involved bringing along another mom and child to have a picnic in the herb garden. 

Carrie Van Dyck begins each meal with a tour of the garden.

The Herbfarm Restaurant’s current location in Woodinville dates back to 2001 when Ron and Carrie had to pick up and move the entire restaurant. They constructed a charming English-Tudor style cottage that houses antiques, a vintage fireplace, and tables that overlook the kitchen-as-theatre all night long. 

Robyn and I were staying at the adjacent Willows Lodge where we attended the Pacific Northwest Travel Writers Conference. And that’s how we ended up sneaking out of the proceedings late Sunday afternoon to join Carrie as she hosted the pre-dinner tour. The Herbfarm and Willows Lodge share a vegetable and herb garden where raised beds and clipped boxwood balls are interconnected by crunchy hazelnut shelled pathways. 

Carrie picked and passed around some of the edible ingredients that diners might expect to taste that evening — tulip petals, sweet cicely, sorrell, lovage, thyme, fennel and lemon verbena. We stopped to visit the resident pair of Vietnamese potbelly pigs named Basil and Borage, who reside in a pen next to the composting area. That seems appropriate, doesn’t it? 

Once we followed Carrie indoors and were seated for dinner, Ron took the stage to explain a bit more about the menu development. The Herbfarm creates 26 different themed menus each year, based on the seasonal availability of ingredients and the culinary whims of the chef Chris Weber and his team. By the way, Chef Chris is one of the youngest 5-star chefs in the country. Possibly THE youngest. What a talent!

READ MORE…

When lilacs meet hellebores . . . and play with fritillaries

Friday, April 29th, 2011

A yummy spring bouquet - straight from local farms and fields

 Springtime is embodied in this vase, isn’t it?

Take a visual "whiff" and enjoy this combination of three lovely flowers.

You can almost smell that heady perfume associated with Syringa vulgaris, or the common lilac. To me, the fragrance is associated with my lifelong relationship with flowers. 

We lived in rental house in Connecticut when I was in elementary school; the backyard was home to an overgrown lilac that drew me to its blossoms (we loved playing underneath the flower-laden branches and smelling spring). 

Later, when I was a teenager, I remember secretly harvesting armloads at a city park and carrying them to school in May, as if I was in a pageant! 

When we planted our former Seattle garden in the late 1990s, I asked my friend Karen to select a lilac for the border. She chose one called ‘Sensation’ – it has deep purple florets and each petal is rimmed in white. That shrub never disappointed. . . and I waited for its blooms each year until we moved away. 

And most recently, while living in Southern California, I nearly fainted when I happened upon a lilac farmer at my local market. I was so fascinated to learn lilacs can grow there at a high elevations, such as in Lancaster, Calif., north of LA. I even had to run back to my car for my camera so I could interview her about those unforgettable flowers

Another closeup - I can't resist!

Today’s bouquet features the addition of several Jadeite-green garden hellebores and a few sultry plum-and-yellow Fritillaria assyriaca. These companions turn two bunches of just-cut lilacs into a sweet bouquet for my fireplace mantel. 

And the best thing about these blooms? They’re from local Northwest flower farmers – yeah! 

The lilacs were grown by Oregon Coastal Flowers in Tillamook, Ore. 

The hellebores were grown by Jello Mold Farm in Mt. Vernon, Wash. 

The fritillarias were grown by Choice Bulb Farms in Mt. Vernon, Wash. Check out David Perry’s gorgeous still life of this unusual flower at our blog, A Fresh Bouquet

If you’re a floral, event or wedding designer, be sure to meet these fabulous farmers at Seattle Wholesale Growers Market. If you’re a customer, be sure to ask your designer to patronize this amazing cooperative of local growers. Their motto is awesome: From Farm to Florist.

Here’s a link to a little post and gallery from my visit earlier this week.

Got twigs? Branch out and decorate your garden

Monday, April 25th, 2011

As you’re tidying up the spring garden with pruning, trimming and other projects, inevitably you will end up with a pile of twigs. Yes, they can go into the chipper or the compost bin, but these pliable, young branches can also be pressed into service in the garden.

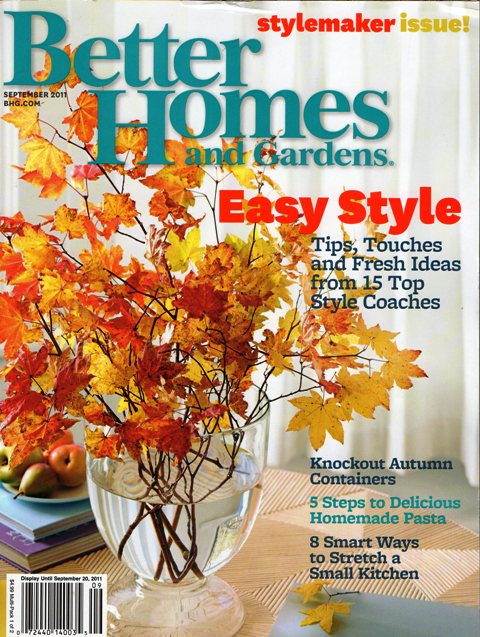
I wrote about “saving twigs” for my Debra’s Garden column in the upcoming May issue of Better Homes & Gardens (you can already find it on newsstands). All you need is a clean, sharp pair of secateurs (pruners) or loppers and a pair of gloves to protect your hands while working.

Spring pruning projects usually produce armloads of branches and twigs. Give those cuttings a new purpose and build simple, natural-looking plant supports. Use twigs to stake young seedlings — just poke sticks into the soil a few inches to anchor them. Lash three or more branches together at the top to form a tee-pee trellis for sweet peas or edible peas. I also curve thin branches into a half-circle shape — stick both ends into the soil and overlap several of them to create scalloped edging for veggie and herb beds.

Here are some photos to inspire your next pruning project:

Designed by landscape architect Joseph Marek, these zesty veggie garden teepees are made by painting twigs Chinese red and lashing them together.

Twigs are bent into a half-circle, with each tip inserted into the ground; when these "scallops" overlap each other, they create a tidy edging along a path or planting bed.

P.S., someone asked about my reference to “lashing together” on my Facebook page. I do not know exactly how the teepee was lashed together, but having made similar structures in the past, I can say that I’ve used anything handy – twine, garden twistie ties, wire and even rubber bands. Use your ingenuity!

Inspiration comes in many forms

Wednesday, March 30th, 2011

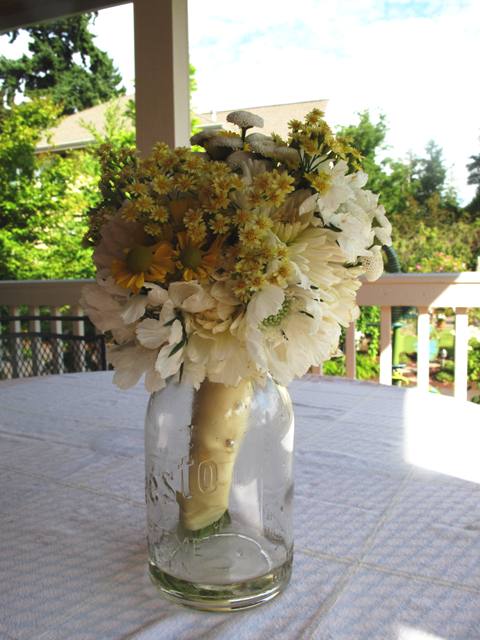
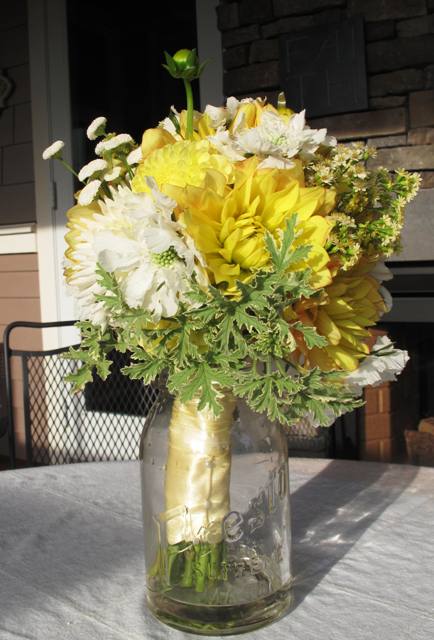
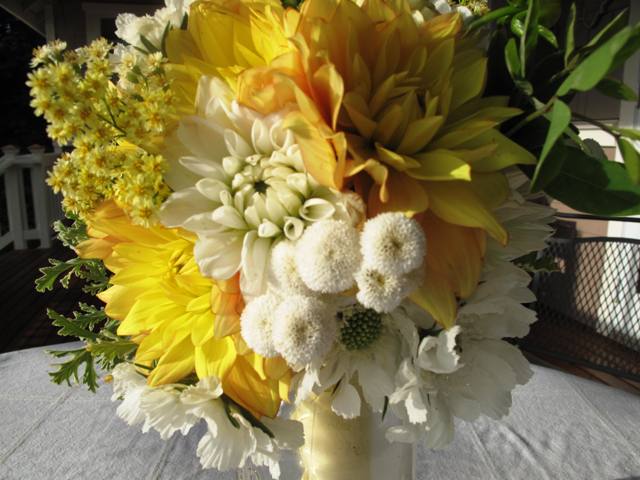
A spring bouquet in a Mason Jar inspires . . .

The other day, while talking with my friend Lorene (one of the most creative people I have known since we were college classmates together), I described some of the cool design ideas I’ve spotted in the past few weeks. My own enthusiasm for all this visual stimulation made me realize my “list” could be a blog post here.

After seeing these ideas in Seattle, Los Angeles and New York, my own idea-bank has been rekindled. Witnessing the talent of others doesn’t ever make me envious. No, it makes me want to up my own game and push myself further to do something wonderfully better as a writer, a gardener, a designer.

The type of inspiration I’ve seen lately has been truly exquisite. Great design is great design, whether in the garden, the home, or the restaurant. When you see it, you know it!

There may be no other response than to gaze in awe and say – WOW. But if your muse can be stirred or awakened by these ideas, by all means, use them as a starting point for your own artistic expression. I hope you enjoy where all this beauty takes you!

A TEENAGER WINS

17-year-old garden designer Courtney Goetz won a Gold Medal at the Northwest Flower & Garden Show. Her mom, designer and writer Sue Goetz, is one of her influences.

At last month’s Northwest Flower & Garden Show, one of my most favorite annual events, I was invited by Julie Chai of Sunset Magazine to help “judge” the Sunset Outdoor Living Award.

We were smitten by a small but extremely innovative garden called “Paradise (to be) Regained . . . borrowing Thoreau,” which we honored with the Sunset award.

The critera recognizes a garden that exemplifies “fresh, useful and achievable ideas.” In this instance, the designer was 17-year-old Courtney Goetz.

Courtney, the daughter of garden designer and writer Sue Goetz, grew up in the garden-making business. In 2005, when she was 11, Courtney helped mom Sue design a display garden named “A Child of the Garden Grows .  .  .  .” for this same show. Now, she has made a garden herself – and guess what? In addition to the Sunset Award, the show judges honored Courtney with a Gold Medal.

This half-circle garden floor treatment by Courtney Goetz shows how to pair salvaged metal grates with colorful groundcovers to create a "welcome mat" at the entry to a garden shelter.

As her Senior Thesis Project for Gig Harbor High School, Courtney wanted her design to be all about “recycling, re-purposing, and ‘re-characterizing’ used materials for use in the garden,” she says. “My goal and intent for this garden is to have green ideas for everyone to instill in their lives. I want the message to get out that not everyone can buy solar panels or hybrid cars, but anyone can and will make a difference by using a little bit less and utilizing what we already have.”

One of the many wonderful – and really clever — details of Courtney’s display garden was the checkerboard “floor” treatment, combining recycled metal grates with ground covers and rocks.

We loved this idea as a modern twist on a “welcome mat.” Courtney selected varieties of sedum and sempervivums in gold and dark green, as well as smooth rocks and the metal grates. It all adds up to a really gorgeous detail in the garden.

Look for exciting things to come from this young talent. We can’t wait to see more!

ROUGH AND SMOOTH TEXTURES

Openings between each paver makes room for a permeable detail of smoth stones.

Design detail

Another wonderful “floor” treatment appeared in a garden called “Wrinkle in Time,” designed by Karen Stefonick of Karen Stefonick Design. Her garden won the Best in Show Award, also called the “Founder’s Cup.”

Since I was able to tour it up close during the judging, I realized how truly creative Karen is when it comes to working with landscaping materials. She devised a patio using two simple ingredients: Concrete Pavers and Tumbled Stone.

Look closely at this pattern created by the slightly offset 1-by-2 foot concrete pavers. By staggering their placement and filling a 2-inch gap at either end of each paver with small rocks, Karen has accomplished two things.

First, she uses the texture of stone to contrast with the smooth concrete, which results in an attractive pattern. Second, this treatment turns a patio into a permeable surface for collecting rainwater into the ground rather than allowing it to stream down to the curb and disappear. Very cool!

BIRTHDAY BOUQUET

What a gorgeous grouping of flowers and vases!

During all the Flower Show activity, including giving three talks in two days, I almost forgot to celebrate my birthday. But thankfully, my friends and family didn’t forget.

Flower detail

One of the best surprises was the delivery of flowers from a local West Seattle shop called Fleurt Studio.

The gift-giver was my sister-in-law Sandra B. Henriquez. Her touching gesture of sending flowers was made more amazing because instead of resorting to the generic, 1-800 route, Sandi did her homework to find a local flower shop that offers unique, one-of-a-kind gift bouquets. She called (long-distance from Washington, DC) and spoke with Samantha, the owner, and discussed exactly what would be included in the delivery.

And here’s what arrived: A “floralscape,” an eclectic grouping of five differently-sized vases holding mostly purple and plum ingredients. I loved the whimsical inclusion of two canning jars, a bud vase, a vintage bottle and a miniature glass cup. Together, they created a floral display that no single bunch could equal. Magical, huh?

LOS ANGELES VIBE

Stunning!

After February’s Flower Show madness, March welcomed a trip to Los Angeles, my former home town. Living there for the past four years was an amazing adventure, especially when it comes to learning about design with new eyes. The city, and in fact all of Southern California, was for me a big design graduate school – with lessons in architecture, industrial design, sculpture and history.

While living in LA, I spent a lot of time scouting homes and gardens for the Los Angeles Times HOME section, as well as visiting retail sources for plants, furniture, gardening accents and more.

Rolling Greens Nursery in Hollywood is one of my favorite haunts. It was the site of our Garden Design magazine Hollywood Issue party last April – one of those exciting moments when I said to myself: I can’t believe I’m living here and doing this type of work I love!

Teabags, thousands of them!

When I returned to LA last week to work on a photo shoot for Better Homes & Gardens, I took our art director Scott Johnson to visit Rolling Greens. I wanted him to see several of the area’s cool nurseries. We stocked up on some plants for the next day’s shoot, and poked around buying ourselves tiny agaves to bring home to our colder climes (Seattle for me; Des Moines, Iowa, for Scott – yes, I know. It’s really futile, but we try).

But the wow-factor occurred when I walked into the large space where cookbooks and culinary/gourmet products are typically sold. There along the far wall hung a new installation that I can only describe as a Tea Bag Curtain. One of the staffers told me that the artful treatment had just been hung by Rolling Greens creative director Angela Hicks and her crew.

Hundreds (maybe thousands!) of hand-dyed tea bags, attached to long strings create a beautiful semitransparent cascade, suspended from rods attached at the ceiling. I can only imagine how much time and care was taken to create this rosy-melon masterpiece.

Organic and delicate, this “curtain” is so charming. I am eager to figure out how to replicate it somehow. Simple ingredients paired with masterful execution . . . it adds up to something truly remarkable. This Tea Bag Curtain isn’t “selling product,” but who cares? It goes miles at saying to Rolling Greens customers: we care about design and we’re a place where you can be inspired.

ON TO NEW YORK CITY

Anthropologie's lavish zipper gown - look close and see how it was made with straight pins!

Here's how the crushed paper skirt emerges from the tight, pastel-colored bodice....

Only days after spending 48 hours in Los Angeles, I flew to New York City. I’ve previously written about visiting the awesome High Line Park, but here’s another visual treat, shown purely for its beauty and innovation.

I turned the corner on my way to the Chelsea Market, a huge warehouse-turned-hipster food mall, and there on the corner was a gorgeous Anthropologie window display.

Some super-creative designer turned a dressmaker’s form, yards of zippers, straight pins and crushed butcher paper into a fanciful ball gown. The way the separated zippers form the bodice so the gold and silver metallic zipper teeth sparkle in the light . . . dazzling. But at the top of each zipper, the “end” has been spiraled into a little rosette.

Just take a look and feast your eyes on the charming way a few simple ingredients become Cinderella’s new gown!

Now, go out and do something uninhibited and artistic today. I dare you! I’m going to try it myself.

Field trip: New York’s High Line Park

Thursday, March 24th, 2011

The High Line is NYC's newest public space.

I spent about 48 hours in New York City last week, staying at my favorite bed and breakfast at West 81st Street and Columbus Avenue on the Upper West side.

I mistakenly scheduled the visit to coincide with St. Patrick’s Day, one of the many days when people in Manhattan go crazy, whether they are Irish or not.

Yet, the weather was “pure spring” – certainly milder than we have had in Seattle lately – and my spirits were lifted just getting off the subway from JFK to the city.

My objective for stopping through NYC on my way to speak in Toronto was to meet some editors face-to-face and to spend time with some very dear friends. I had a half-day “free” and unscheduled, so last Thursday morning I hopped the downtown C Train across the street from Central Park and rode it to West 23rd Street. My destination: the nearly two-year-old public park called The High Line.

You’ve probably read about this amazing public-private endeavor – an elevated park that runs along 10 to 12 blocks on a former 1930s freight track high above Tenth Avenue between Chelsea and the Meat Packing District. I’ve read lots about it, too. But for a landscape design and horticulture observer like me, nothing compares to the first-person tour.

A true sign of spring: Viburnum x bodnantense 'Pink Dawn'

Wonderful witch hazel in bloom.

When I had dinner the night before with my talented NYC go-to-gals, Ellen Spector-Platt and Ellen Zachos, co-creators of the popular NYC gardening blog Gardenbytes, they gave me some tips on where to disembark from the subway (23rd Street Stop) and warned me that not much would be in bloom.

Blooms were not essential, yet I did enjoy spotting crocuses, witch hazel and a couple beautiful flowering ‘Pink Dawn’ viburnum shrubs showing off in the warm, spring sun.

The edgy, industrial setting was just as delightful to my eyes. The rails of this RR-in-the-sky last carried a train of frozen turkeys in 1980.

Over the ensuing decades nature has had her way with the long-abandoned site. According to the High Line web site, its designers selected plants to “echo the wild, self-seeded landscape that grew up on the structure after the trains stopped running.” The landscape was designed by James Corner Field Operations in partnership with Diller Scofidio + Renfro.

A beautiful grove of trees, planted between the rails.

The origins of this reimagined public space can be traced to 1999, when community residents founded Friends of the High Line, the nonprofit public conservancy that today operates under a license agreement with the NYC Department of Parks and Recreation.

The forward-thinking citizen group fought for preservation and transformation at a time when the historic structure was under threat of demolition. Friends of the High Line now provides approximately 70 percent of its annual operating budget and is responsible for both stewardship of the park and its public programs.

Beginning my tour at the northernmost entrance on West 20th Street, I climbed the steps and arrived to see a new view of the Hudson River and surrounding buildings. Light and airy, the park’s design has retained original crisscrossing steel tracks where groves of trees, shrubs and grasses are planted. The main walkway, which is wheelchair and stroller-friendly, appears to be formed by staggered bands of granite that emulate railroad tracks and also accommodate soft vegetation.

Even parks in major metropolises can be "QUIET"

Look up: it's a park!

Plenty of seating encourages people to rest, admire the scenery or eat a sandwich.

I happened upon a group of schoolchildren on a class tour near the bleacher-style amphitheatre where public performances often take place. A docent held a sign that read QUIET, and I smiled as I overheard her telling the children that the designers wanted to create a place where the noise of the city streets wasn’t so powerful. You know, quiet is one of the strongest sensations I experienced on my visit.

The juxtaposition of a park-in-the-sky with a city’s hustle-and-bustle down below seemed to amplify the silence. And I envy those folks in Manhattan who can visit The High Line whenever they want.

Spring bulbs, this time in planters

Monday, March 7th, 2011

A galvanized flower bucket is paired with plum-purple tulips and shimmery pink glass as a soil topper

A year ago this month, I met my photographer friend Jack Coyier and his assistant Stuart Gow at a great location perched above the ocean in Malibu. My car was filled with flats of flowering bulbs – tulips, hyacinths, daffodils, grape muscari blooms — and an assortment of perennials and annuals as their companions. Oh, and lots of pots.

Color-coded pots, selected to match or coordinate with the blooms of spring bulbs purchased in 4-inch pots and nursery flats. It was a bulb garden in a Volvo station wagon!

March 2011 Better Homes & Gardens

We photographed a feature that I created for Better Homes & Gardens, which you can find in this month’s issue.

Called “Matched Sets,” the story gives hope and design inspiration to anyone who forgot to plant bulbs last fall.

It’s not too late to buy beautiful flowering bulbs, just peeking out of their buds. In Seattle at least, we have a variety of narcissus and daffodils, grape hyacinth, a gazillion tulip choices and at least three colors (pink, white and dark purple) hyacinth.

For a few bucks, you can plant these in a container, plunk it on your front porch or patio, and look like a genius who really did think about bulb-planting last October.

When you match the pot color to the bloom color, the design packs a punch. In some examples you see here, I tweaked the rules; in others, I didn’t deviate from the palette’s theme. It was fun working with Stuart and Jack, and seeing this story in print brings back some great memories of our day together on location in Malibu.

Two of the designs we shot didn’t make it to the pages of BH&G, so I’ve included them here. The first is above right. Below is a detail shot of how perfectly the glass marbles look as a color-matched soil topper, followed by a close-up of the not-used hyacinth design:

An affordable and reusable way to add color to any pot design.

The hyacinths didn't behave well that day, but I do love the checkerboard accent of white alyssum with dark purple ajuga at the base of each container.

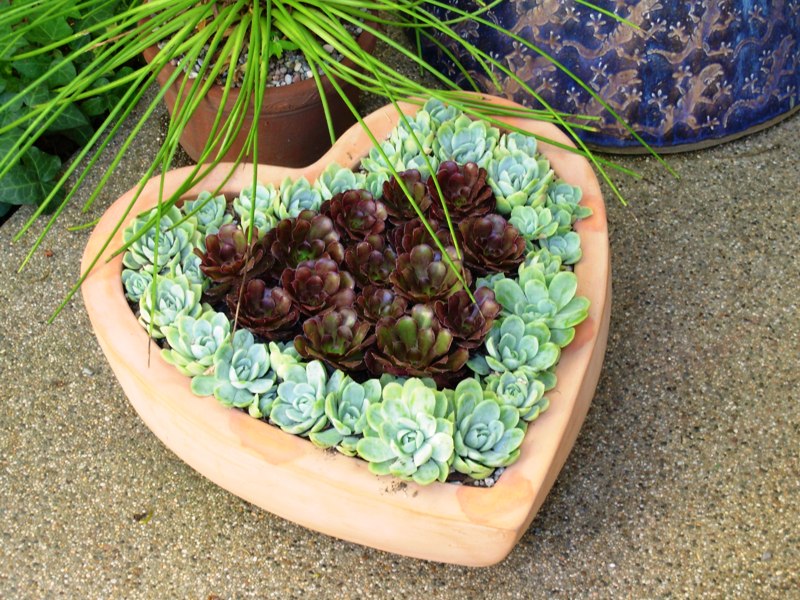
My absolutely favorite design: Oval-shaped blue-glazed pot, with blue=green echeverias and sweet blue grape hyacinth (muscari) bulbs.

Simple tips to get started:

  1. Select bulbs with blooms that match your container’s color
  2. Add cool-season annuals, grasses, succulents, or perennials that match or complement the palette
  3. Plant bulbs first, then pack other plants around them so the bulbs seem to be emerging through the plants at the base.
  4. Remember the basics: Use potting mix and a container that has proper drainage.
  5. Water regularly.

Sources: Blue pot (Sperling Nursery & Gift Shop, Woodland Hills, CA), square wood containers (Rolling Greens Nursery, Los Angeles), galvanized flower pot (Michael’s Craft Stores).

Bouquet-making with spring bulbs

Friday, March 4th, 2011

A textural display of two colors of tulips with curly willow and camellia buds on stems fill this vintage green urn.

The Northwest Flower & Garden Show, the country’s second-largest indoor flower show, was staged last week. It was a great show and I’m sure I’ll be posting future stories about some of the wonderful design ideas, plants and speakers that inspired me. But right now I want to show off some of my floral design projects with simple instructions. The arrangements are from my talk and demonstration last Thursday on the Smith & Hawken DIY Stage. 

Here in Seattle the crocuses and snowdrops are only just now blooming. Daffodil foliage is just a few inches out of the soil. So my talk on “Floral Design with Spring Bulbs” was geared to the flower-lover who seeks out local blooms from growers in his or her own backyard. 

One such grower is Alm Hill Gardens, owned by Gretchen and Ben Hoyt. You can find Alm Hill flowering bulbs and other cool crops like lilacs and peonies year-round at the Pike Place Market and at weekly outdoor farmer’s markets including Ballard, University District and West Seattle.  I encourage you to always ask questions about where and how the flowers you buy were raised. There is nothing better than meeting the farmer who actually grew your bouquet.  

Fun on the Smith & Hawken DIY Stage

For a few weeks prior to last week’s flower show I had fun playing with tulips, daffodils and narcissuses, and hyacinth flowers to come up with the techniques I wanted to teach. 

The detail photos you see here are from those samples, so the tulips (sadly) are not Alm Hill’s, although they are still fresh and locally grown. During my demonstration I was too busy to stop and photograph each project, but perhaps someone who attended will surprise me with their pics, as my friend Lorene Edwards Forkner did yesterday when she showed up with a CD of a few photos from the talk (THANK YOU!). 

For each of these projects, my goal was to use an organic method of stabilize the blooms, rather than the conventional green foam blocks called “florist oasis.” That product, I have learned, is a carcinogen that contains formaldehyde (why would you want to touch or breath it?); and furthermore, it does not break down in landfills. I do understand why designers have used it for years. So far, there really isn’t an organic alternative to organizing and arranging flower stems to maintain the perfect form or angle. Yet increasingly, I am meeting and interviewing floral designers who consciously shun the green foam and use alternate materials to stabilize flower stems.

Here's a selection of my flower-stabilizing options, including lots of vintage glass and metal "frogs"

Here are a few options: 

  1. Pebbles, sand, gravel or marbles in the  base of a vase
  2. Pliable twigs wrapped around the inside of a vase to create a basket weave-like framework. One designer who David Perry and I interviewed uses shredded wood shavings called Excelsior inside her vases. This is the type of material used to ship wine bottles, and it’s biodegradable.
  3. Good, old-fashioned flower frogs in ceramic, glass or metal. I’ve been picking these up for a few bucks at weekend flea-markets. One of my favorite is a half-dome cage. It is heavy so it sinks to the bottom of the vase; and it has 3/4-inch square openings, which is ideal for woody stems. These are the arranging tools of the past, seriously useful for the present!
  4. Foliage. I often start an arrangement using soft, fluffy foliage as the “base” that peeks out over the top of the rim. For winter/early spring arrangements, Dusty Miller is a nifty option. It is lacy and soft – and it lasts for up to 2 weeks in water once cut. Once you fill the vase with the foliage, all the other flower stems can poke through the foliage and they will remain in place.
  5. Balled up chicken wire is another time-honored trick for stabilizing especially larger arrangements. It also works well for wide-mouthed vases. Get a roll at the hardware store (my local hardware store told me the proper name for this stuff is “Poultry Cloth” – whatever). You will need use wire cutters to trim off the length you want. Use gloves to protect your hands from wire scratches and create an open “ball.” After inserting into the container, make sure that a portion of the wire emerges above the rim so your design looks fuller.

All these fresh spring details play so well together, especially the sprouting willow branches and the camellia buds.

Design One:  Tulips (2 colors) with curly willow and camellia buds. I used a 4-1/2-inch diameter x 2-inch high dome-style metal flower frog in a vintage lime-green urn with handles.

  • Note that the curly willow is starting to sprout tiny green leaves. That’s what happens when willow stands in H20 for a few weeks inside a warm home.
  • As for the camellias, these are branches left over from a photo shoot last month. The dried leaves were crunchy and unattractive, but the buds were plump and interestingly shaped. So I grabbed my floral shears and clipped away the leaves. The chubby buds on the branches are a nice architectural accent.
  • I first inserted the willow and the camellia branches, forming an open “nest.”
  • Next, I inserted 10 red tulips, cutting their stems short so the flowers are close to the opening of my vase.
  • Finally, I added the yellow tulips, cutting the stems longer. You will note that none of the short or tall tulips are the same height. I like to stagger them so there is a less formal feeling to the design. As I inserted the tulips, I used the framework of the branches to also help support their flowerheads, especially the tall ones.

Flower stems, shrub twigs, pebbles and twine. Deceptively simple!

Design Two: Daffodils and red-twig dogwood branches. I used a 6-by-6-by-6 inch glass “cube” vase and filled the bottom 1/4 with medium-sized pebbles. 

  • The inspiration for this design comes from a Winter 2008 edition of by Design, which is published by The Flower Arranging Study Group  of the Garden Club of America. In the article, Cres Motzi demonstrated a way to layer a row of cut branches over the opening of a rectangular container and “strap” them on with twine to create a framework for inserting branches. Her design also used floral foam inside the container, but I find that completely unnecessary here.
  • Detail of the twigs as they are strapped onto the vase.

    I cut 9-inch lengths of pinkish dogwood branches, lining them up in parallel rows across the opening of the vase. Available at craft stores like Michael’s, twine-wrapped wire is an ideal material to strap around the bottom of the glass vase and over the twig arrangement. It can be twisted taut and secure. There is a band of twine on either end of the twig arrangement.

  • This design is so simple and serene that it called for a singular flower. Fifteen just-picked daffodil stems look great here. I inserted them into openings between twigs and twine, staggering them in an informal arrangement. You can see how well these stems stay upright, aided by the pebbles in the base of the vase.

Shades of white, silver and pewter make for a pretty wintry floral palette.

Design Three:  Hyacinths, Dusty Miller and pussy willow branches in a vintage oval vase. Here, the Dusty Miller foliage is the stabilizing element for the other stems. The vase is a 6-inch high vintage 1940s piece. The opening is an oval, approximately 7 inches long x 4 inches wide. I love this vase! It came from a visit to Old Goat Farm in Orting, Wash., owned by my friends Greg Graves and Gary Waller. Their nursery and shop is filled with surprises, including some vintage pieces like this.

  • Even here in the dead of winter, good old Dusty Miller (Senecio cineraria), a shrubby perennial from the Mediterranean region, is holding its own. Gray and kind of ubiquitous the rest of the year, Dusty comes in handy when one needs a soft foliage ingredient to contrast with darker greens. I robbed this batch (with permission) from my friend Nancy Finnerty’s Madison Park garden two weeks before I used it in the flower show demo. This stuff is pretty ironclad. Cut the stems as long as possible and start filling up the vase with them. The leaves are deeply cut and lobed; when used in a floral arrangement, they take on a lacy profile.
  • Insert 5 or 7 long-stemmed hyacinth flowers. Right now, Alm Hill Gardens is selling

    Ready for a close up!

    creamy white, dark pink and deep purple varieties – and the scent is truly intoxicating! Gretchen explains that she gets the longer-than-normal stems by starting the bulbs in the dark. Those poor babies are reaching for light during their growth phase, so that’s why their stems are much longer than the ones you or I would grow in the ground. Pretty gorgeous stuff. Again, notice that the stem lengths are staggered.

  • Finally, insert 7 or 9 pussy willow branches, also at varying heights. These are from a grower in Oregon and I like how they resemble floral exclamation points in this wintry white arrangement. This design is long-lasting. If the hyacinths decline (yet they still look great and this arrangement has been finished for 8 days!), you can always replace them, cuz the pussy willow and Dusty Miller will keep on keepin’ on for at least twice as long.

During my demonstration, I was so pleased that Gretchen Hoyt was in attendance with her assistant, as well as several other seasoned growers and designers – and they offered lots of suggestions and tips. One tip from Lorene’s bag of tricks os how to refresh H20 in a vase with so many complicated parts like the branched framework and the curly willow. Her technique is to first put the vase in the kitchen sink. Using the spray nozzle on the faucet, gently spray fresh water into the vase until the existing H20 starts spilling up and over the edge. If you continue for a minute or so, you will have completely replaced old, dirty water, with new, fresh water. Voila!

I'm working with locally-grown flowers and garden ingredients at the Northwest Flower & Garden Show.

If you are wondering about some of my other resources you see, here is a list:

  • Smith & Hawken copper watering can and other accessories are now available exclusively through Target stores.
  • The wonderful canvas work apron I’m wearing (right) was designed by my friend Janna Lufkin, who is a popular home organizing authority and stylist for Better Homes & Gardens and other outlets. Janna’s products are made locally in Seattle and available through her blog Be it Ever so Humble.
  • Tulips in February, grown locally in Northwest Washington by Alm Hill Gardens.

    Alm Hill Gardens can also be contacted for tulip deliveries. You can order any number of stems (there is a one-dozen minimum) of your favorite tulip colors and have them shipped via overnight or 2nd-day air.

  • To order or for more information, contact Alm Hill at almhillgardens@gmail.com or call toll-free at 855-ALM-HILL (855-256-4455). I took lots of photographs at their Pike Place Market booth last week and thought I’d share some of the yummy shapes and colors of these fresh, local and sustainably grown blooms. 

Finally, a special thank you to my partner-in-flowers, David Perry. The projects you see here will be featured in our forthcoming book, A Fresh Bouquet. And I can promise you that the photos he takes will be dazzling beyond belief.

We invite you to follow along with us on this journey at our blog, A Fresh Bouquet.