Debra Prinzing

Get the Email Newsletter!

Archive for the ‘Creativity’ Category

Fancy foliage in a vase – lessons from Better Homes & Gardens

Friday, June 25th, 2010

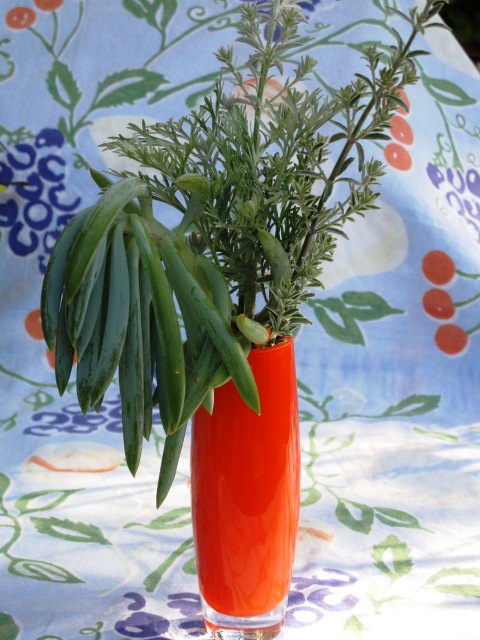
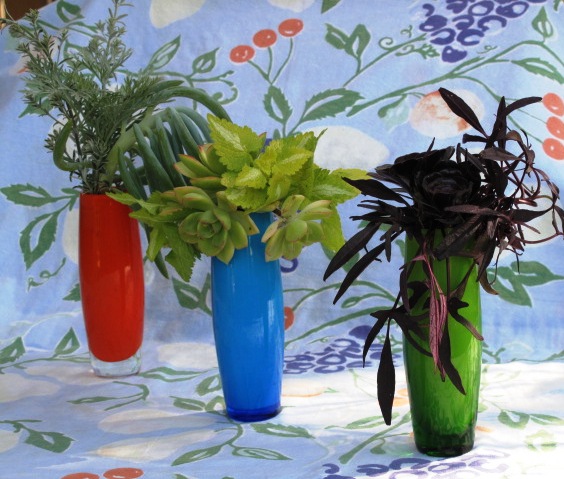
Here is my trio of vases inspired by my "Leaf it up" story in the June issue of Better Homes & Gardens. Each tiny arrangement features at least one cut succulent paired with foliage from a similarly-colored perennial.

Sometimes all you need are a few pretty leaves to conjure up a gorgeous tabletop arrangement or centerpiece. I have my talented friend Susan Appleget-Hurst, former senior associate garden editor for Better Homes & Gardens, to thank for producing a story that illustrates this idea (with several cool designs).

Susan, who now blogs at Cake in the Garden (check it out!) designed the lovely, leafy bouquets and co-produced the story with art director Scott Johnson. Then I was lucky enough to be asked to create the accompanying text. Pick up this month’s BH&G or click here for a peek at the story.

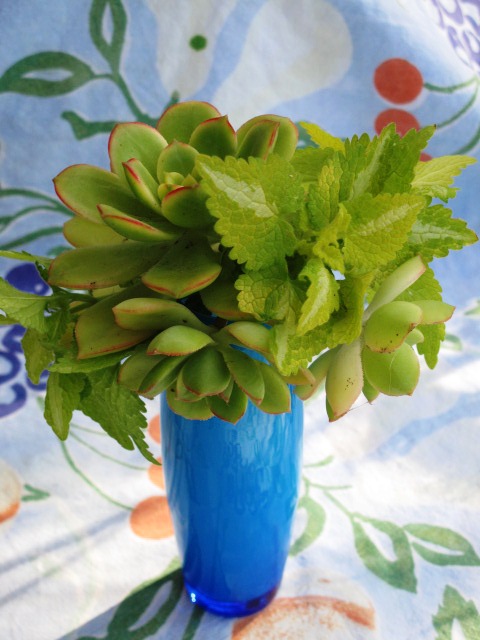
A turquoise vase gets the cool touch from lemon-lime and chartreuse ingredients.

The idea of using leaves as cut flower ingredients is nothing new. But it’s always nice to see someone else’s twist on the technique. One of the things I love about Susan’s designs is her use of white vases in several different sizes. The white really offsets the leaves and focuses the viewer’s interest on the form, texture and scale of the various cut foliage. I also loved the monochromatic and contrasting combinations of leaves.

After writing the text, I kind of forgot about this story until I opened up the June issue and saw how beautifully it turned out. I decided to try my own version of this floral design project (I can’t get more “seasonal, local and sustainable” than my own backyard!).

Looking around my landscape, I realized how many awesome succulent plants grow here. Even when a sedum, aeonium or crassula stem breaks off of the plant or gets bumped when someone pushes a chair out from the patio table, I try to “rescue” the severed piece and put it in water. Inevitably, a few roots will emerge and I can plant that cutting. So clipping a few succulent pieces for the designs you see above didn’t kill me. Once these pieces root, in water, they will be returned to the potting soil or garden bed.

My idea: To showcase the amazing color diversity of succulents. For each of three color schemes – silver-blue, maroon, and lime green – I looked for perennial foliage to match with the companion succulent. Unlike Susan’s white vases, I tried to pair the foliage hues with my slender colored-glass bud vases. I have owned this trio in green, tangerine and turquoise glass for several years. I think they came from IKEA.

These designs look sweet displayed on my block-printed cotton table cloth (it’s nice that each picks up on the botanical pattern and palette).

Here is what I included in each:

Orange vase with silver-blue ingredients.

Deep purple-maroon ingredients look dramatic against the vibrant green vase.

The Orange Glass contrasts beautifully with three silvery-blue ingredients. The succulent element is called Senecio mandraliscae. Here in Southern California, people grow this shrubby, South African succulent as a groundcover. I actually have some in a pot and I love its slightly curved blue-gray leaves. Softer textures come from my other fave silvery garden plants. First is Artemisia ‘Powis Castle’, which has lacy foliage. I clipped the taller stems from Westringia fruticosa, also called coast rosemary. It’s from Australia, has a rosemary-like texture, and looks just gorgeous growing at the base of my fruitless olive tree.  

The Green Glass is a perfect foil for the deep purple-maroon ingredients. My succulent starting point was to add two small Aeonium rosettes. Not sure of the cultivar because I inherited this plant when we moved here in 2006.  Almost like a touch of embroidery, the dark plum version of sweet potato vine (Ipomoea batatas) spills from the neck of the slender vase.

The Turquoise Glass gets a fresh accent from lime green and chartreuse stems. I started with an un-named lemon-lime sempervivum that has pretty pointed leaves. These bold forms have a fluffy collar of chartreuse dead nettle (Lamium galeobdolon).

My challenge to you is to walk outside, clippers in hand, and create a foliage bouquet with what you have growing in your garden. Don’t overlook the unexpected ingredients. Hey – maybe that awesome artichoke leaf in the vegetable patch is worthy of a starring role in a vase. Or perhaps the conifers could stand in for my succulent ingredients. Have some fun! The best part? It means you have a lovely centerpiece for free!

A charming necklace and a gesture of friendship

Sunday, June 20th, 2010

The back story

The cake says it all. Good-bye again.

My nearly four years in Los Angeles have been quite amazing. We arrived here in late August, 2006, not really excited about leaving our beloved Seattle, but trying hard to embrace our “new” life here in SoCal. 

The mood around our household has changed dramatically in 2010. The boy who was entering high school when we moved here has just graduated and is college-bound. The child who came here as a 4th grader is now a teenager, ready for 8th grade. The husband who came here for a pretty great job lost it during the financial meltdown. But in the interim, he earned an MBA from UCLA and joined an amazing new company NOT in financial services – one that uses his combination of legal and business talents for a compelling new business strategy.  

Happy in LA

 As for me, well, this four-year California chapter has been quite an adventure. I have grown professionally, honed my design sensibilities and in many ways gained more confidence (guess that comes with turn 50 anyway, right?). I have met and interviewed incredible people – designers of homes and gardens, artists, actors, directors, producers, animators – famous people and unusual characters alike, all of whom embody this beautiful spot on the planet. Writing about the homes and gardens they possess has been a privilege. Seeing those stories appear in some of the most well-respected publications has been quite satisfying. 

So now, we are moving again. And while I have alluded for months to our plans to relocate to Pittsburgh, the surprise ending of our California chapter is that we are actually returning to Seattle

Bruce’s company – at what feels like the eleventh hour – has shifted strategy and is moving its corporate HQ to Seattle. Manna from heaven, I say. A small part of me thought the Pittsburgh thing would be a fun adventure (actually, after what we’ve been through on the unemployment front, I would have willingly moved to Siberia). I have a few acquaintances in Pittsburgh – through Garden Writers Association – and I was interested in spending more time there getting to know them better. That optimism was combined with anxiety about having to garden in Zone 4 or 5; whatever low temperatures Pittsburgh experiences in the winter, at the very least I know it has snow – lots of it.  

So here we are, on the threshold of yet another move. But one that brings us full-circle back to the city where Bruce and I first met, lived as were newlyweds, gave birth to and raised two wonderful sons, became first-time homeowners, and even built our dream house, living a life surrounded by so many cherished family and friends.  

READ MORE…

More spheres in my garden

Saturday, June 19th, 2010

Tempest holds a stainless-steel Mesh orb in its arms. The piece measures 70 inches tall.

As a follow-up to my last post about round objects in the landscape, I thought I’d show off a few more of my spherical works of art, from my backyard. You can see how appealing it is to start with a shape and then repeat it often. Some of the orbs in my garden are more obvious than others. One of the round forms is quite subtle. It is part of a sculpture called “Tempest” by my friend Jennifer Asher and her collaborator-fabricator Mario Lopez.

Jennifer owns TerraSculpture with Karen Neill Tarnowski  and the two women never cease to amaze me at their innovation and talent. These pieces fill a void in the outdoor sculpture world – bringing contemporary sculpture to the residential setting at far below the huge price tags you usually see.

Tempest, closer up

TerraSculpture originally created Tempest in a powder-coated bright orange finish. My husband Bruce was interested in the piece but suggested that we have Jennifer and Mario make the base in weathered steel, which somehow fits our style better.

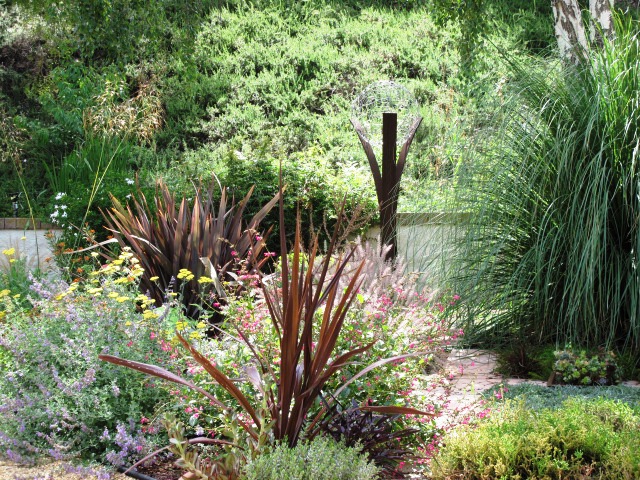
I love the shape of the base – three “arms” join together and then gradually open to cradle a stainless steel mesh ball. The weathered steel (some might call it “rust”) echoes the dark burgundy-rust blades of my garden’s New Zealand flax and Cordyline plants. There’s something really wonderful about the piece’s see-through quality, too. Upon seeing “Tempest” standing in our garden, visitors are likely to utter a gasp of delight, followed by the immediate question: Where did you find that awesome piece?

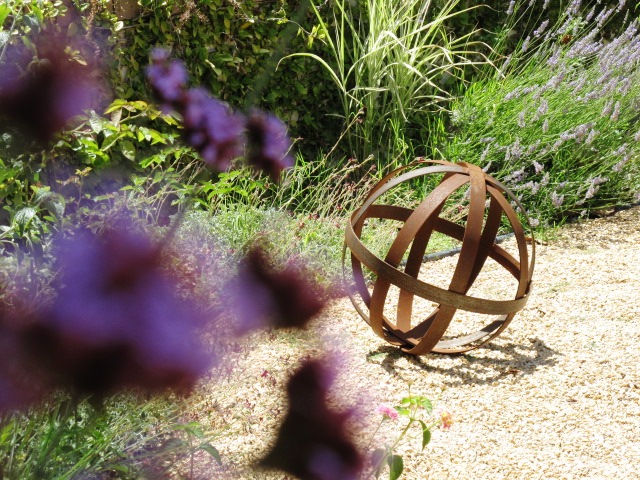
My weathered steel orb - a pretty object in the garden.

More steel – also rusted – appears in the 24-inch orb I purchased from my friends Annette Gutierrez and Mary Gray of Pot-ted in Los Angeles. I’ve shown earlier pics of their tangerine and aqua-finished objects.

For me, the weathered steel works well with everything else in my garden. See how pretty this piece looks on the “California Gold” crushed gravel? On the other hand, if Annette and Mary ever decide to make their metal orb series in lime green, I will be the first in line to snag a small-medium-large trio!

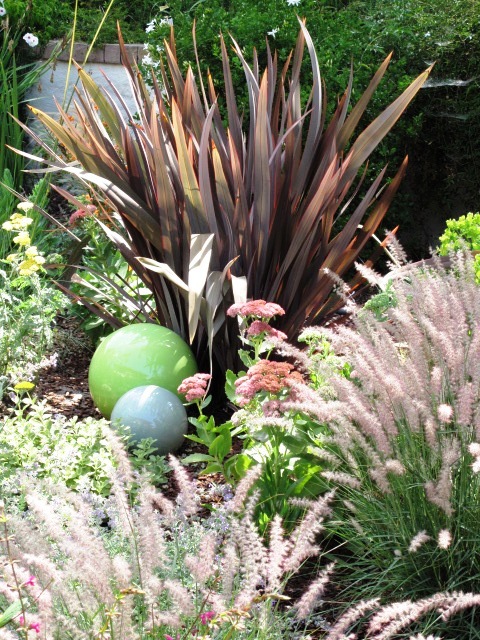
The perennial bed is dotted with orbs, from Bauer Pottery

And what about those awesome Bauer balls? I think I have six of them (it’s an ever-changing number). Here are two of them, looking nice and settled-in at the base of a New Zealand flax. These Bauer glazes are called Lime Green (15 inch size) and French Blue (8-inch size).

The glossy finish and classic round forms add up to nothing short of stunning, especially when surrounded by foliage, flowers and ornamental grass plumes.

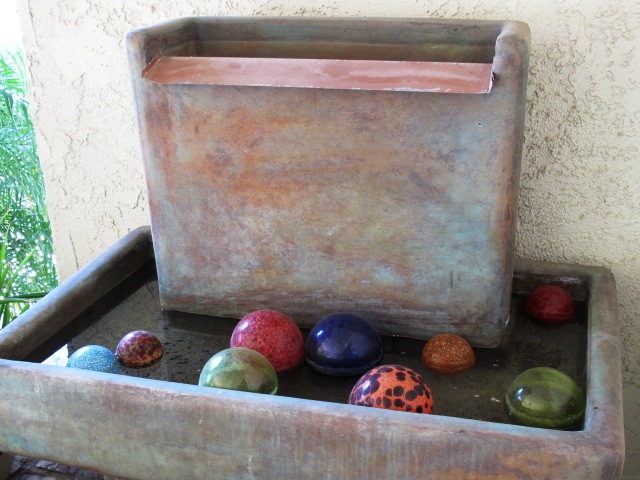
Colorful glass floats add a lot of character to this fountain.

I have a thing for floating glass balls, too. Here is a little cluster of them, floating in the fountain on our entry porch. There are several glass artists who make these decorative balls. You can usually find the artists and their wares at major flower shows.

One of my favorite sources is Glass Gardens NW. Owner-artist Barbara Sanderson makes a rainbow of glass floats and orbs, as well as larger sculpture pieces for the garden. Check her out!

Finally, the garden has curves of a more organic nature – and that is in the outline of two crescent-shaped perennial beds. With so much linear geometry in my backyard (the horizontal lines of the house, patio, pergola, wall and pathways) it’s nice to visually break up these forms with sinuous curves.

Circles, spheres, orbs, and globes in my garden

Monday, June 14th, 2010

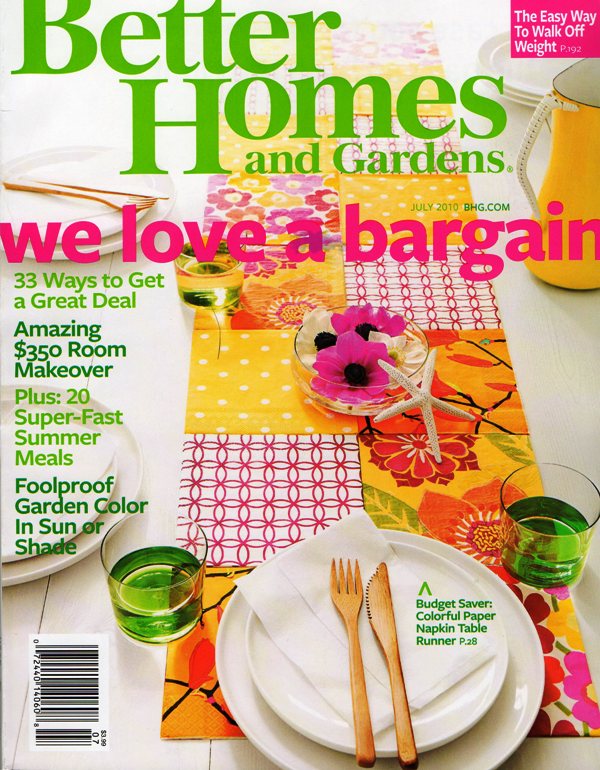
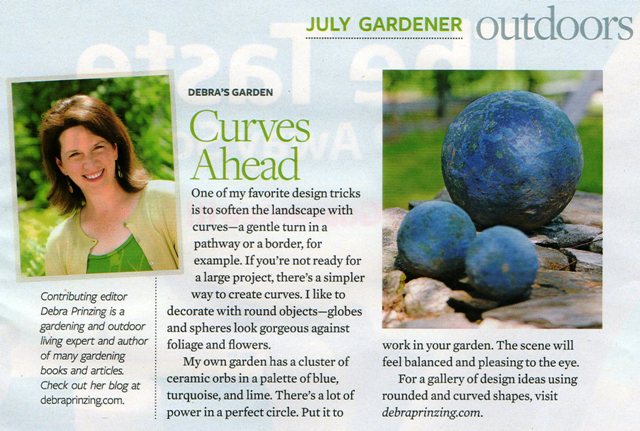
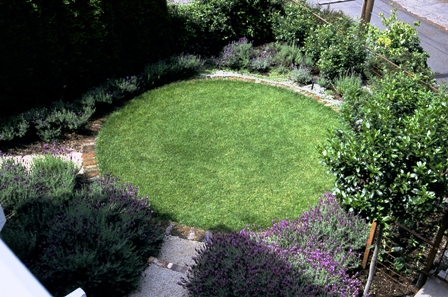
In the July 2010 issue of Better Homes & Gardens, I wrote a short item for my “Debra’s Garden” column called “Curves Ahead.” It could also have been titled “Three Cheers for the Circle.”

I am obsessed with round shapes — balls, spheres and orbs — and I love to dot the garden with these forms. This design trick relates to one of those basic lessons anyone who studies the art of landscape design is taught: Choose an idea and repeat it frequently.

My eye is naturally drawn to orbs and globes. They are so pleasing to me – in fact, I wrote about this passion previously – in an earlier blog post, “Zen of the Circle.”

Ornamental globes, obelisks and balls have taken up residence here in my Southern California backyard — check out the photograph below.

And it’s not just the three-dimensional geometry that puts a smile on my face. Curved outlines, such as the edge of a perennial border, patch of lawn or a turn in the path echo the orbs and reappear as arcs or crescents in the garden.

My interest in the sexy, organic globe shape has come “full circle” (pun intended) from a single idea to a cohesive design theme and a nice way to use ornamentation. Look around your own garden. Wherever you see a bare spot, perhaps it’s calling out for an orb or two.

I included a post-script note in my BH&G piece, promising to share my gallery of rounded and curved design ideas with our readers. Here it is – enjoy! Please send me your own photos and I’ll include the best ideas here, too. Check the bottom of this post for some of my favorite shopping resources.

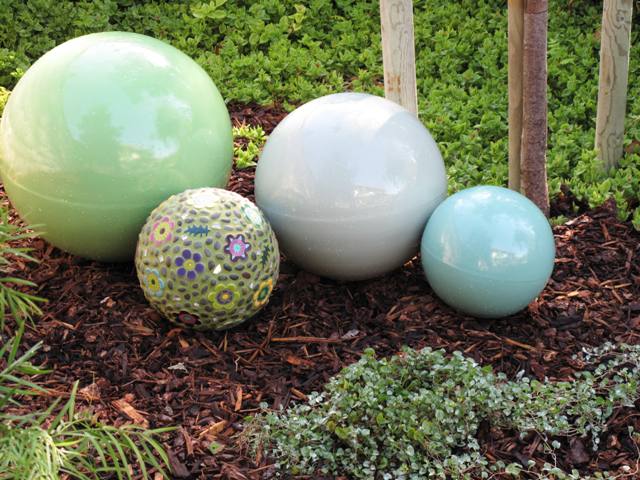
My cluster of orbs in a dreamy palette of green, blue, and teal - with a wonderful mosaic orb by Vashon Island, Wash., artist Clare Dohna

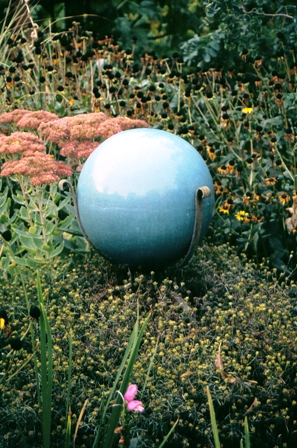
A stunning, cool blue ceramic globe in a Yakima, Wash., garden. You can tell it is mounted on a pedestal to elevate it above the foliage.

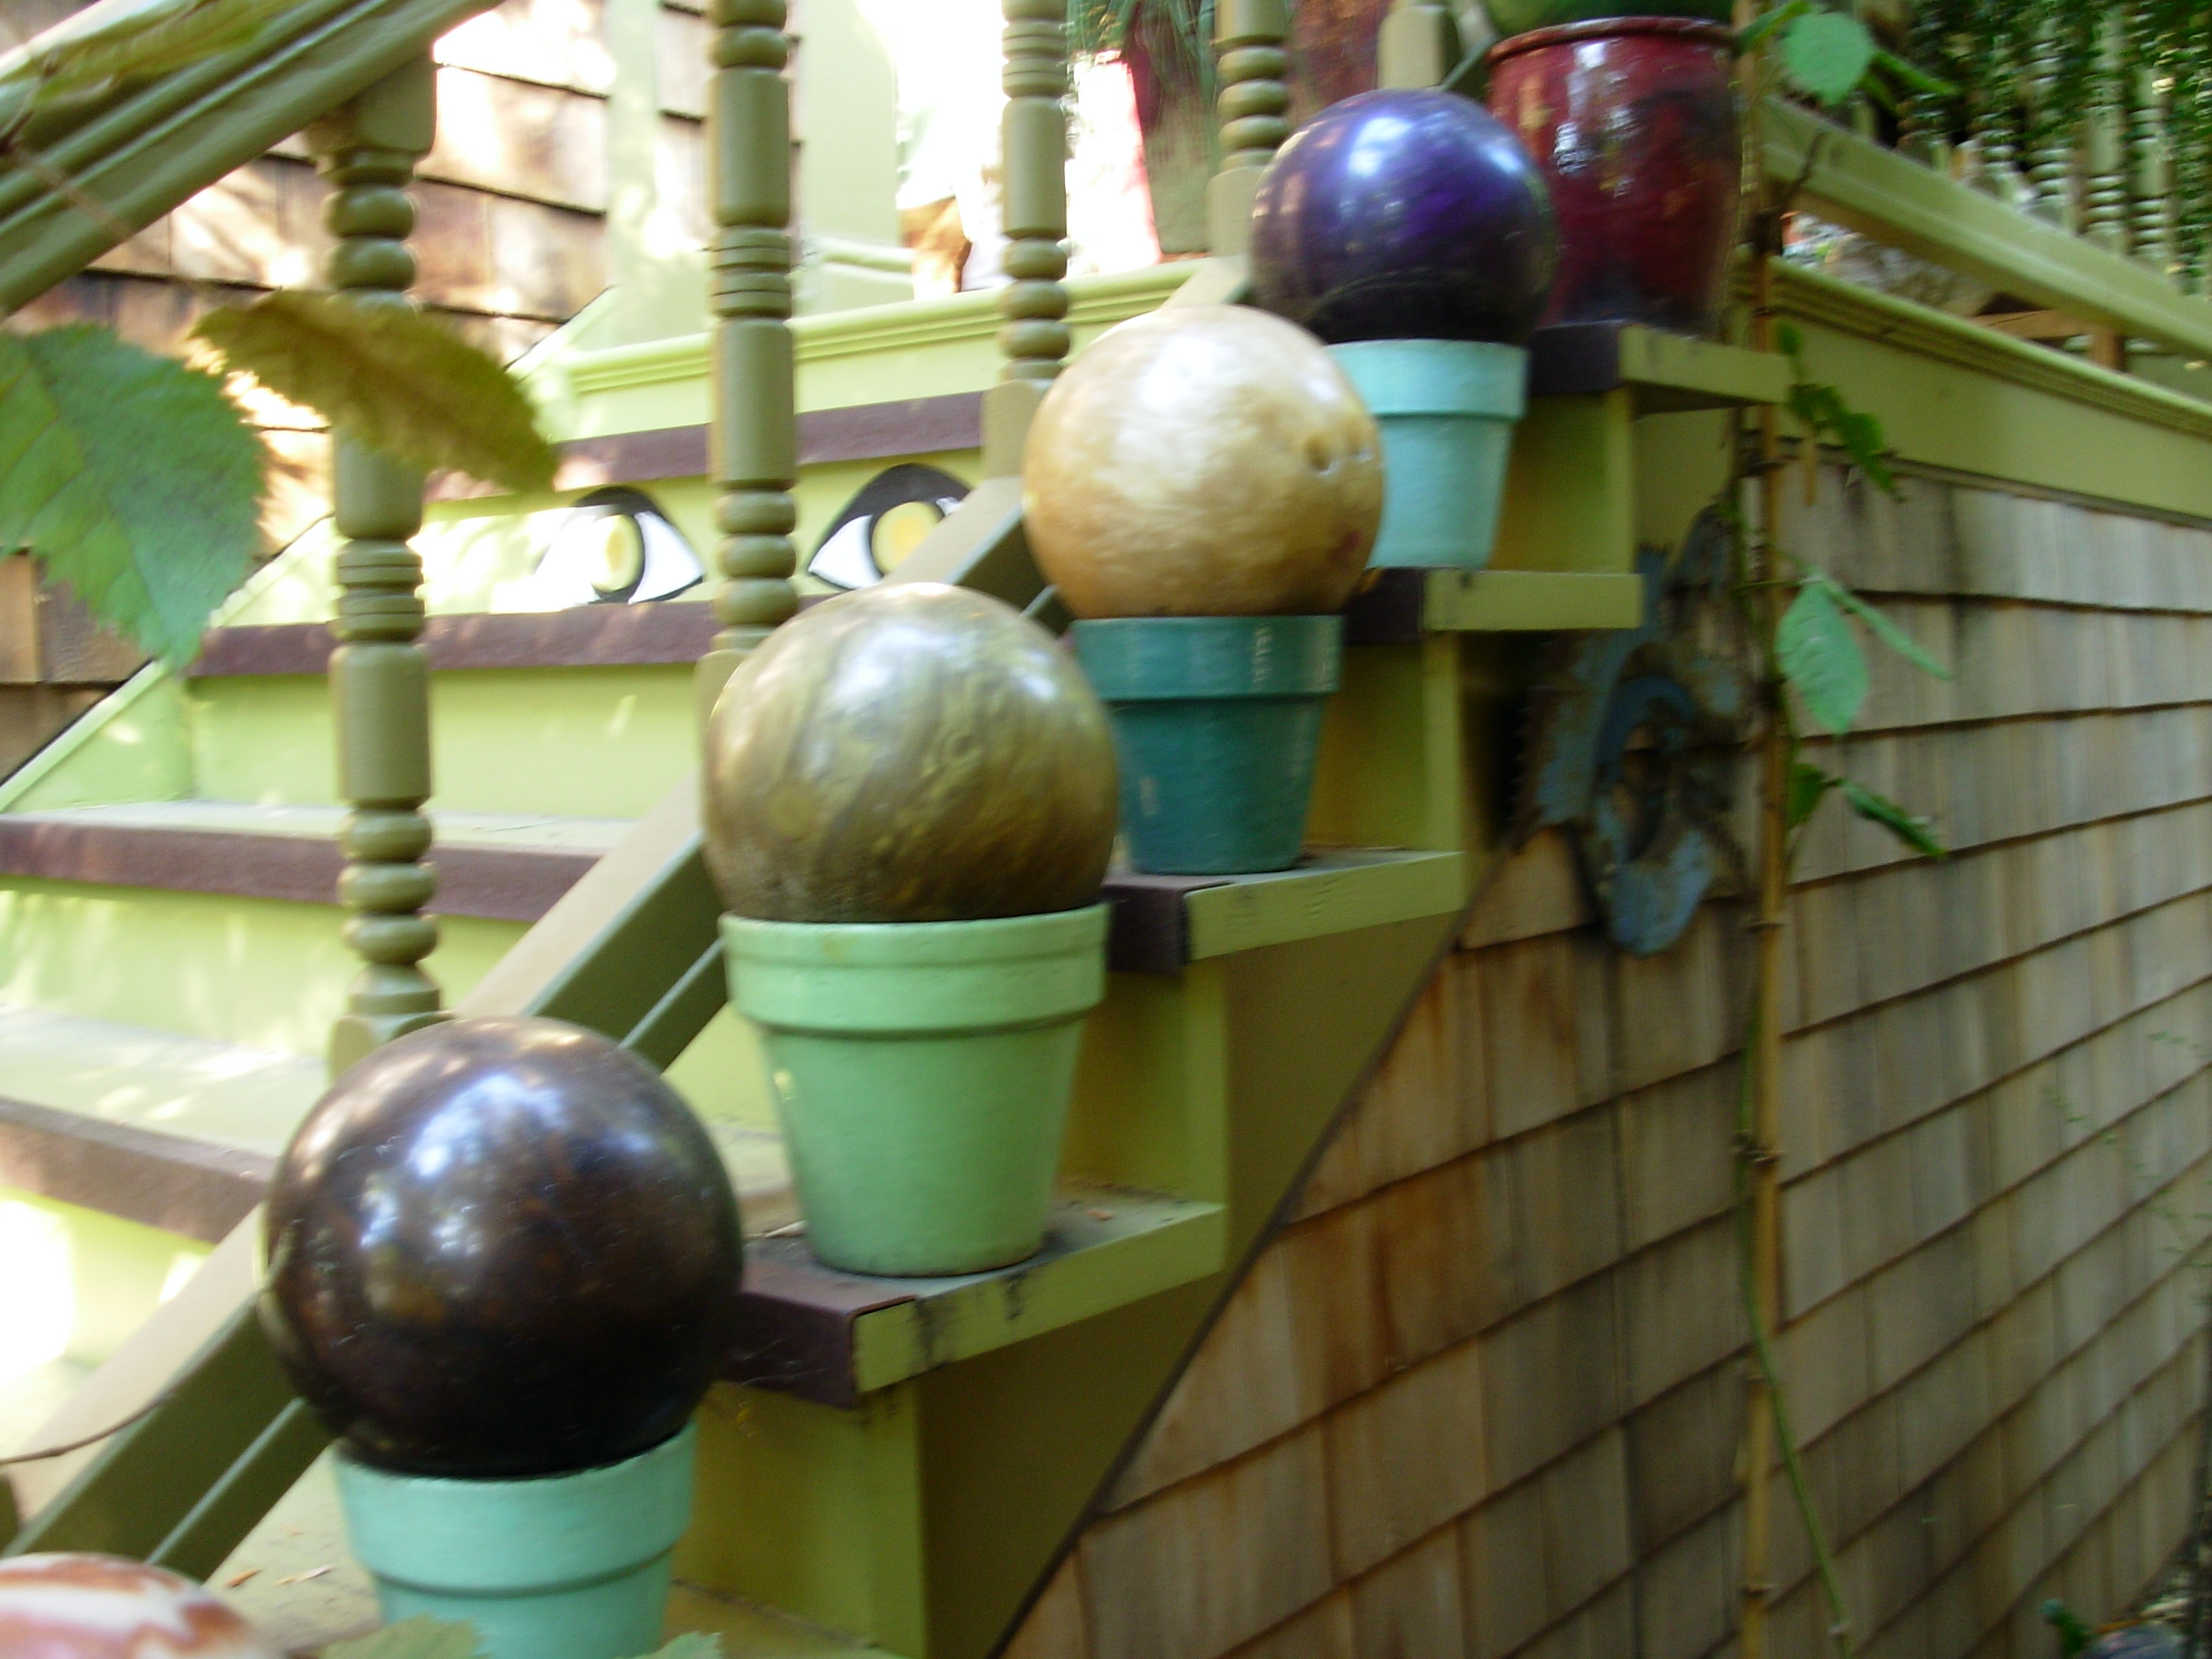
Yes, these awesome orbs are actually vintage bowling balls. Each one rests on a painted flowerpot and is stair-stepped outside the porch of Berkeley, Calif., artist Marcia Donohue.

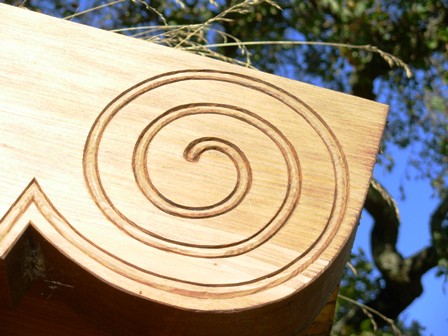
A finely-carved spiral woodworking detail appears at the end of a beam that forms the roof of a dining pavilion in our book, Stylish Sheds and Elegant Hideaways.

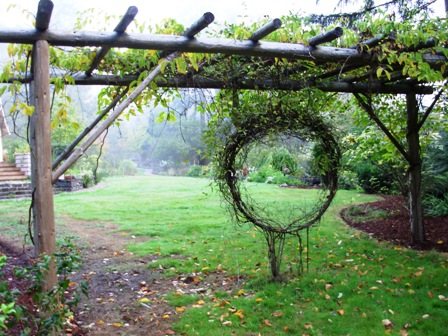
The open circle - a "moon window" or "dreamcatcher" - provides a beautiful perspective in my friend Mary-Kate Mackey's Eugene, Ore., garden. It is mounted beneath an arbor where a hard kiwi grows.

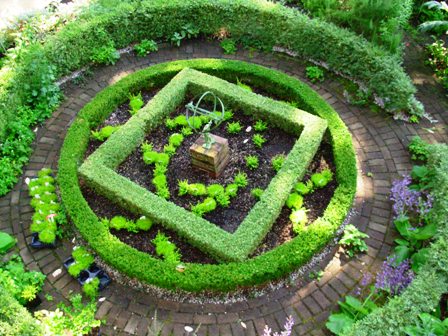
My friend Kathy Fries designed a square-in-a-circle knot garden in her Seattle area landscape.

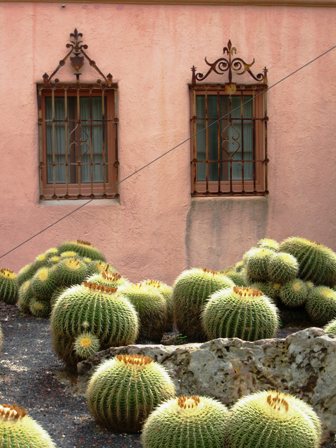
Plants like these golden barrel cactuses are naturally orb-like. You can see these at Lotusland, an estate garden in the Santa Barbara area.

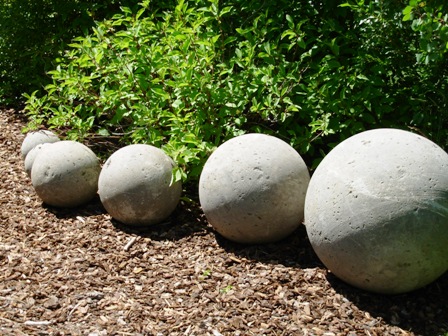
This graduated set of concrete orbs just knocked me out when I first saw it in Sun Valley, Idaho a few summer's back. Thanks to my friend Mary Ann Newcomer, I got to visit some pretty amazing landscapes there.

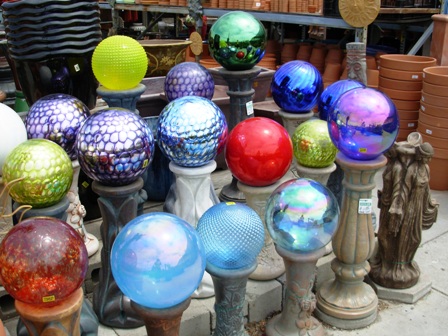
A visit to any well-stocked garden center is likely to showcase the myriad choices of balls. I spotted a rainbow of gazing balls at Green Thumb Nursery in Ventura, Calif.

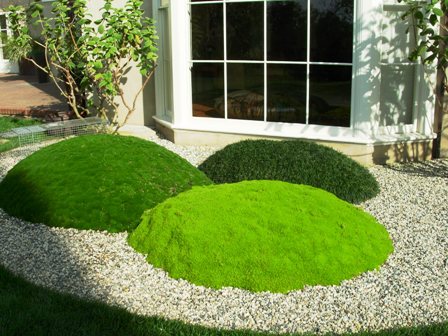
Restful, zen-like. Three types of moss are sculpted into a gravel garden display designed by Southern California landscape architect Graham Stanley.

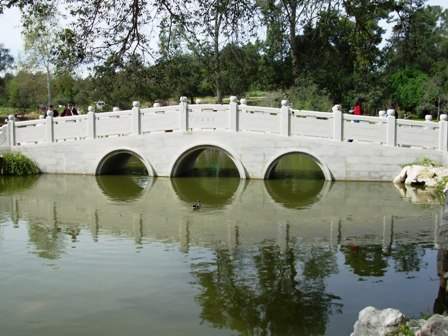
Look for circular forms in public gardens - you'll find them. The arches of a lovely stone bridge are reflected in this pond to create an almost perfect circle. This bridge is at the classical Chinese Garden, recently opened at the Huntington Library, Art Collection and Botanical Garden in San Marino, Calif.

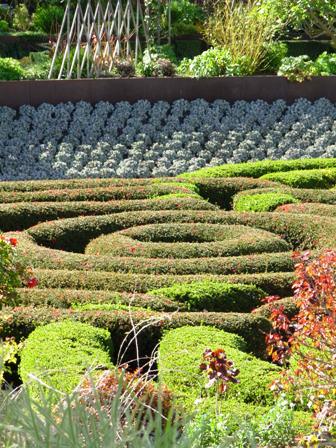
Artist Robert Irwin sculpted flowering azalea shrubs into a circular maze at the Getty Center in Los Angeles. The clipped, concentric circles bloom in white, pink and magenta flowers.

The pebbles in a path detail, arranged on edge and curved into an eye-pleasing pattern.

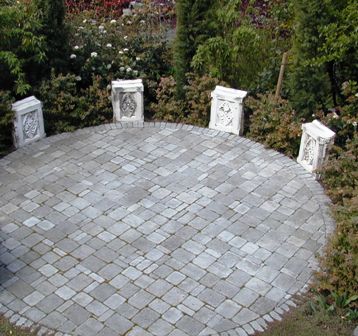
A round "carpet" laid with sand-set concrete cobble-style pavers. Designed for my Seattle friends Rand Babcock and Tony Nahra by Daniel Lowery of Queen Anne Gardens.

If stone isn't your thing, try turf. This tiny grass "throw-rug" appears in the Seattle backyard of landscape architect Erik Wood and designer Carina Langstraat

Wow! Metal obelisks - powdercoated in orange (or turquoise), designed by Annette Guttierez and Mary Gray from Potted, in Los Angeles (see ordering details below)

Best resources for spherical garden ornamentation:

Pot-ted Store: Three graduated sizes of balls made from steel strapping will lend a lovely moment of architecture to the landscape. I have the medium-sized one in weathered steel (my preferred material). Annette and Mary, owners of Los Angeles-based Pot-ted, now sell a series finished with bright orange and turquoise powder-coating – their fav hues. Oops – I mean “aqua” and “tangerine.” Inquire about custom colors! Prices: $98 (18-inches); $139 (24-inches); and $169 (30 inches). Shipping available.

Bauer Pottery Garden Orbs: My friend Janek Boniecki has revived the classic California earthenware known as Bauer Pottery. In addition to making reproduction urns, dishes and serving pieces (in that awesome, sun-drenched palette), Janek and crew also create ceramic garden orbs glazed in Bauer colors. Yellow, dove gray, French blue, Federal blue, chartreuse, lime green, midnight blue, parrot green, turquoise, white, black and aqua (for some reason, the Bauer orange pieces are slightly more expensive, perhaps because of the glazing involved).

I am a bit addicted to these “globally admired” orbs, thanks to the company’s occasional factory outlet sales in Los Angeles. I have five or six of these gumball-shaped objects, which look tres-bien in and among foliage, flowers, blades and stems. Prices: $75-$82 (8-inch); $100-$110 (12-inch); and $150-$165 (15-inch). If you think you’ll be in the Los Angeles area sometime, make sure to check the Bauer web site to see the warehouse sale schedule. You will definitely find great prices and maybe even an orb or two (if I don’t get there first!).

Clare Dohna, Mosaic Artist:  Based on Vashon Island, Wash., artist Clare Dohna makes vibrant mosaic tiles in dazzling botanical shapes (flowers, bugs, leaves and more). She uses these tiles to adorn the surfaces of all sorts of wonderful garden sculpture and art, such as bird baths, bird houses, egg shapes and — my favorite – mosaic spheres. You can see one of her pieces at the top of this page; it plays nicely with the solid-colored Bauer orbs. Contact Clare directly (from her web site) to inquire about color schemes and prices.

A low-water planting recipe

Tuesday, June 1st, 2010

A dreamy landscape in the sky, designed by Lauren Schneider

If you pick up the June issue of Sunset magazine – the one with skewers of salmon on a cobalt blue plate on the cover – turn to pages 51 and 52.

There, you will see a short (and I mean short!) story by moi. It started out much longer, but is now not much more than the length of a photo caption.

As these things go, I can’t complain. Thanks to the way we communicate these days, full-length magazine articles now read like Cliff Notes versions of themselves. The photo tells most of the story and then a few captions and call-outs do the rest of the heavy lifting.

In this case, the story called “Lush Look, Low Water” was inspired by a rooftop garden owned by Mike McDonald and Jill Martenson, a visionary young couple who built Margarido House, the first LEED-H Platinum home in Northern California.

The “green” home and its eco-friendly landscape have received a lot of press, but the Sunset story really gives readers the specifics on designer Lauren Schneider’s approach to the roof garden. A special thank you goes to Sunset’s Julie Chai for shepherding this story from our initial conversation to the final publication.

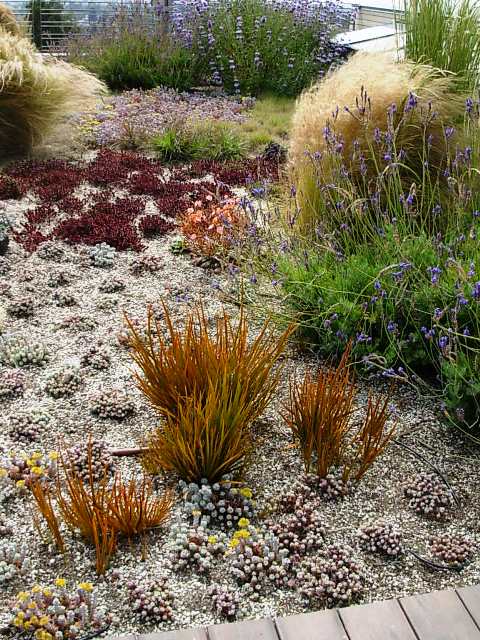
Check out the attractive clumps of Libertia periginans, a New Zealand iris relative valued for its bronzy-orange blades and vibrant color.

Surprisingly dreamy, soft and fluid, despite its exposure to the harshest of elements (wind, sun, saltwater, for example), Lauren Schneider’s design can be replicated in similar rooftop or in-ground conditions. The photos you see here are mine. I included the original full-length story in my articles section.

Eight hardworking native and Mediterranean plants create the central elements of Lauren’s design:

Echinocactus grusonii, Golden barrel cactus

Lewisia cotyledon ‘Sunset Strain’

Nassella tenuissima, Mexican feather grass

Sedum spathulifolium ‘Cape Blanco’

Lavandula multifida, Fernleaf lavender

Libertia perigrinans

Sedum rupestre ‘Angelina’

Sedum spurium ‘Voodoo’

Plant your summer centerpiece

Wednesday, May 26th, 2010

On location in my own backyard with BH&G senior art director Shelley Caldwell

One perk that comes with my new gig as contributing garden editor for Better Homes & Gardens was recently producing a photo shoot in my garden. Some of the shots from our March session, photographed by the very talented Jack Coyier, appear in the June 2010 issue of BH&G (on newsstands now).   

The story idea came from the Home Design department rather than the Garden Group, but I got involved because this design/entertaining story included plants.    
This is my tale of what happens with a great story idea and how it takes the journey from something pretty HUGE to something fairly modest. I’m learning that it’s all about the creative process, not just the end game.   

It all started when I was asked to come up with three planted container ideas that could look good outdoors all summer long. That sounds easy, doesn’t it? The editor asked:   

As part of a larger summer outdoor entertaining guide, we want to give some ideas for summer-long living centerpieces. Wondered if you would have some thoughts on that and be interested in designing 3 centerpieces. 

I sent her several suggestions featuring foliage plants. Here they are: 

  1. Wood window box planted with edibles: Herbs (chives, flat-leaf Italian parsley, oregano, thyme, and strawberries)
  2. Galvanized zinc or aluminum containers with bold foliage – such as Rex begonias (dark green and burgundy) with creeping jenny or helichrysum (lime foliage that drapes over the edge of the planter)
  3. Terra cotta pots with air plants (silver-blue tillandsias); This is to show a low-maintenance alternative to succulents; tillandsias do not require planting and can be arranged on gravel or pebbles that fill the containers (and misted over the summer to keep alive).
  4. Glazed pottery with grass (or grass-like) plantings; Planted with tufts of green mondo grass or seeded with wheat grass, fill the shallow, Asian-style containers for fresh, summer-long lawn on your table. The grass can be embellished with clear glass votive holders or peppered with cut flowers inserted in the grass with stakes (for single events). This is Jack Coyier’s idea and I think it’s cute!

One of the tabletop designs shot in my backyard - featured in BH&G's June issue

The feedback? Where are the flowers? This is the editor’s reply:   

Something to think about . . . how can we tweak these to be a little more decorative and festive, and a tiny bit less about foliage? Can we get one of them centering on a beautiful bloomer?   

Yikes! I forgot the flowers. Actually, I didn’t really forget them; I just selected foliage plants thinking they would be lower maintenance than flowers (which might require regular dead-heading, fertilizer, etc.) and be guaranteed to look pretty from Memorial Day to Labor Day. Turns out, BH&G readers really LOVE their blooms. There can never be too many flowers, remember?   

I refocused my brainstorming to include more, more, more blooms. The story planning went through several iterations until I was told this might be a feature spread with five different planted centerpieces. I went to town – actually sourcing plants and containers from as far north as Ventura to as far south as Hollywood, logging 200-plus miles on my Volvo’s odometer as I pulled pots, plants and accessories for the March 9th prep day and March 10th photo shoot.   

From left: Jack Coyier, Char Hatch Langos and Shelley Caldwell

The plan was to photograph all five tabletop looks. Thank goodness for the very talented Char Hatch Langos, an LA-based stylist who logged even more hours and miles in her car hunting down props than I did!   

She arrived on Tuesday with BH&G senior art director Shelley Caldwell. Between the two of them they had a condo’s worth of patio furniture, textiles, vases, dishes, flatware, napkin rings – you name it – crammed into two cars! All of this for five different looks!   

The looks related to five themes that we had worked out: Romantic; Asian; Edible/Herbs; Citrus Mix-n-Match; and Tabletop Tray of Collectibles.   

So it was a fun two days, with a lot of fine-tuning, adjusting for the sunlight bouncing off of my California Gold crushed gravel garden, unseasonably low temperatures and brisk winds.   

READ MORE…

My sedum-planted wicker chair

Sunday, May 23rd, 2010

Take a seat. A succulent seat, that is.

Voila! My sedum-planted wicker chair as garden art

If you’ve ever admired the charm and whimsy of a planted chair, you’re not alone. I’ve always liked plants combined as a design element with furniture. When my mom passed along Grandma’s 1940s wicker porch set, I knew that the slightly unraveled rocking chair was destined for a new role in my garden. So two weekends ago, on Mother’s Day, I started creating a sedum seat for the cherished rocker.

After giving Grandma’s wicker chair a fresh coat of herbal green paint, I was ready to turn the family hand-me-down into an ornamental garden feature. Here’s Part Two of my Mother’s Day gardening project, which illustrates how to prepare and plant the chair. 

Step One

Step One: Using a sheet of 1/4-inch wire mesh and a pair of wire clippers, I cut out a seat-sized section to fit into the chair’s base. A staple gun came in handy to secure the mesh to the piece of wood bracing.

Step Two: I layered sections of dry Angel Moss over the mesh. A highly-absorbent variety of sphagnum moss, Angel moss is a nifty product that I discovered last month while teaching four container and hanging basket design classes for Gardening How-To magazine. The moss hails from the bogs of New Zealand and, because of the way it is farmed and harvested, is considered a renewable resource. You can purchase pre-formed liners to fit into wire hanging baskets or flat sheets to use for projects such as mine.
Step Two

As dry as a piece of brittle cardboard, Angel moss changes its character dramatically when exposed to water. It’s a fabulous medium for baskets, window boxes and the mesh seat of my wicker chair because the moss proves itself to be an excellent material for holding soil and plants. It doesn’t dry out as quickly as the kind of coco-fibre or woodland moss we’re used to here in North America.
Step Three: On top of the Angel moss I spread approximately 3 inches of my planting medium. I’ve learned that the best environment for growing succulents (especially in containers) is to mix equal parts organic potting soil with cactus mix. Erin Taylor, owner of Botanik, a great garden emporium in Summerland (near Santa Barbara) taught me this recipe soon after I moved to Southern California. One look at her shop’s awesome succulent containers and I knew she was speaking from experience.

Step Four: My friend Jean Zaputil, who I call my garden muse for the 25 years of design, horticulture and landscaping knowledge she’s shared with me, was visiting from Seattle last weekend (along with our mutual friend Jan Hendrickson).

We had a little free time on Sunday morning so Jean offered to do the planting layout for my chair. She worked with about 14-16 small succulent plants of varying colors (ranging from silvery-white to lime green to red-burgundy).

Step Four

Before planting the “seat,” we tackled the tricky gap in one of the chair’s rolled arms.

Plants in the "arm"

A total negative from my mother’s point of view (the shredded wicker arm reminded her that a childhood dog had gnawed on the arm and practically ruined it for comfortable use), I decided to use the gaping void as a spot for more succulents.

Jean fashioned a shallow tray with the 1/4-inch wire mesh sheeting. We fit it under the arm and wired it into place. Just as with the seat, we inserted some pieces of Angel moss and poured in some soil. The chewed-away openings now hold three succulents, including the very pretty Sedum rupestre ‘Angelina’. Its chartreuse-color and fluffy form will drape over the arm and soon obscure the mesh tray.

Jean Zaputil, as always, my garden muse

Jean arranged the sedums, sempervivums and other succulents to create the planted seat.

Even though the root space appears shallow, these plants will do just fine. They are ideally suited for my project – able to withstand extended periods of drought.  A quick “shower” every week or so will give the plants enough moisture to take root in the soil/Angel moss and begin to spread, eventually filling in the seat.

And pretty soon, I’ll have a lush, succulent “cushion” for my grandmother’s wicker chair.

Now I’m looking at a modern wicker chair – a Pier One version with leg bent from too many teenagers leaning back in it while playing X-box games – and thinking about giving that chaise a new life in the garden. It’s currently natural colored, but maybe a coat of paint and a new planting theme will give it the necessary style to move outside.

Wonder what plants belong in that chair? Maybe I’ll paint it peacock blue and do an all-white flowering scheme! Stay tuned.

My Mother’s Day gardening project

Sunday, May 9th, 2010

A sedum armchair. Lush and fluffy. Makes you want to sink right in. I love that the lime green arms have been painted to pick up the bright foliage.

Ever since I can remember, I was in love with a 3-piece set of wicker furniture that stood inside the enclosed porch of my grandmother Helen Winslow Ford’s home in Hammond, Indiana. 

After I wrote the above paragraph, I started asking myself “what was it about the wicker porch furniture that tugged at my heart?” Vintage wicker somehow symbolizes all the feelings of comfort, care and love that I always felt at Grandma’s house. Those emotions continued with my own mother and the home she created and kept for her family. And now, maybe I can emulate those traits here in my grownup life, for the husband and sons I care for.

That timeworn wicker – a love seat, arm chair and rocking chair – made its way from Grandma’s home on Florence Street to my mother Anita Ford Prinzing. I first remember seeing the pieces in our Portland, Ore., house (perhaps Mom inherited the furniture after Grandma passed away – I’ll have to ask her).

Mom updated the 1940s seafoam green wicker with a coat of 1970s chocolate brown paint. She replaced the aging seat covers with cushions of a quilted rust-orange-sunflower yellow patchwork print. 

Soon after Bruce and I married in 1984, Mom gave me the rocking chair. I took off the curved “rocker” sections and converted the piece into an armchair. I painted the woven wicker a soft blue-gray. The new cushion was covered in a tiny blue-and-raspberry polished cotton print. I also gathered and piped a cover to hide one of the chewed up arms.    

The shredded weft and warp of the wicker was the fault of mom and her brother’s childhood dog. Consequentially, the chair was always considered a bit junky because you couldn’t sit in it without your sweater sleeve snagging on the bits of wire sticking in every direction.    
Later, my parents shipped me the wicker love seat. I am not sure how I got so lucky because I know my brother Scott and his wife Kris used it for a while. But somehow my teenage “request” to inherit the piece lodged in my mom’s memory and she sent me the brownish wicker love seat in 1997, after she had owned it for more than two decades.
That was the year we lived in a 2-bedroom apartment with a newborn (Alex) and a 5-yr-old (Benjamin) in Seattle’s Madison Park while building our dream house in nearby Seward Park. I remember the enormous box arriving from UPS or some other shipping service. I had to open it in the courtyard outside, because there simply was no space in our apartment to do so.    
My yummy green paint choice - a perfect garden color!

Recently, after downsizing, my parents arrived to see us in Southern California while en route to their place in Mesa. The “good” wicker armchair (the one the dog didn’t eat!) was wedged into the back seat of their car. Personally delivered by my folks, the chair has joined its love seat companion on our back patio. Both pieces now need a face lift but they are in good shape considering they are at least 70 years old. I’m thinking of painting them glossy black and adding lime green cushions with black piping. Won’t that look modern?!   

Mom told me, “I’m going to give you the nice chair but only if you promise to get rid of the one that’s unraveling.”    

I said, “Okay, I’ll stop using it to entertain garden guests. But is it okay if I find a spot for it as a piece of art in the garden?”    

She couldn’t say no!    

Today I started the makeover of my Grandmother’s wicker chair

Last fall, I removed the disintegrating cushion and seat, and placed the bottomless chair out in the garden. Yup, it’s in the right place. For months, I’ve wanted to paint it lime green and “plant” the seat and torn-up arm section with sedums and other succulents.   

I have admired planted chairs before. Last summer I saw a peacock blue chair in a garden display at the Ventura Co. Fair. Its seat and back were planted with succulents. Luscious! [see my photo – above]    

So today, my Mother’s Day gift to myself was to dig out the electric paint sprayer, clean off the chair’s wicker framework, and head to the hardware store for paint. I came home with an outdoor-ready semigloss in a color I can only think to call guacamole green.    

The painting is finished. Doesn’t it look great? Perhaps it needs a second coat after this one dries. I’ll do that tomorrow, before the demands and deadlines of the coming week take over my calendar.    

The new-leaf green, aka “guacamole green” will transform the old wicker

Next: I want to fill the empty seat area with a panel of 1/4-inch mesh sheeting. I have a piece lying around from a planting project a few summers ago. I  used it to anchor some succulents into a path and stop some critters (rabbits? possums?) from digging up the plants each night.    

The mesh will create a supporting base for moss, which will be covered with a shallow layer of potting soil-cactus mix as my planting medium. Into that, I’ll plant a new “cushion” of all sorts of sedums. Voila! My long-awaited planted chair.    

I’ll post photos as I go along. I’m also thinking of using the mesh to contain soil behind the gaps created by Mom’s hungry dog so I can plant a few more succulents there.

I don’t remember much about her family pet other than that the dog’s name was Sue-Sue. According to Mom, my grandfather used to open the front door and call out to the dog: “Oh, Susanna!”    

That’s a silly story, but I remember it made me laugh as a girl.

A horticultural weekend in Los Angeles

Saturday, May 8th, 2010

Agave attenuata - the most sculptural and simply perfect form in the Southern California garden

Joanne White leads the way along the rose-laden path in Marylyn Ginsberg and Chuck Klaus’s garden

I have spent many moments this past week reliving the wonderful experience of leading the Northwest Horticultural Society’s “LA Garden Tour” last weekend.  

It was a lot of work for the group’s tour co-chairs Gillian Mathews and Renee Montgelas and me, but we agree that the four-day excursion was a huge success (well, we won’t discuss the bus fiasco on Saturday night – no fault of our own!).  

I said “yes” to planning and leading the tour after several years during which Gillian and I fantasized about putting together a weekend trip.  

Gillian and I have known each other since 2000 or 2001 when I was still reporting on retail trends for Puget Sound/Eastside Business Journals in Seattle and she had just launched her garden emporium, Ravenna Gardens. From there, we not only helped each other with our respective auction projects, but we became friends. Gillian, in fact, is responsible for me assuming the editorial duties for the horticultural society’s Garden Notes, a quarterly newsletter that I edited for a few years on two occasions.  

We first worked on a tour together in 2005 when I led an autumn weekend to Eastern Washington/Yakima area. And only three weeks after I first arrived in Southern California in late August 2006, it was serendipitous that Gillian and Renee brought an NHS group to Santa Barbara and Pasadena. I joined them for much of that tour and honestly feel that it was my happy introduction to Southern California horticulture and landscape design. When I visited some of Santa Barbara’s great public and private gardens and nurseries with the group, I thought to myself: “I am going to be okay down here.”  

Gillian may not realize how directly and indirectly she has influenced and encouraged the course of my career to leave business writing and embark on garden and design writing – but she has!  

Fast forward 3-1/2 years and it was my turn to show off LA to many old and several new NHS friends. Here’s a recap and some photos to introduce the awesome design style of LA’s gardens:

READ MORE…

LA in BLOOM

Thursday, May 6th, 2010

Gregg Fleishman's "Puzzle Prefab Shelter" and Laura Morton's dog shelter with a planted roof were two features of the New California Garden, designed by members of the Association of Professional Landscape Designers/Greater LA Chapter

During the weekend of April 30-May 2, the 127-acre Los Angeles Arboretum & Botanical Garden presented “Living Green: Essentials for the Home Gardener,” an outdoor flower and garden show that was an essential place to welcome the spring growing season.

The LA Garden Show seems to expand in size and style each year, adding exciting and informative speakers on topics ranging from sustainable design (“Green Architecture: Volume and Shape in the Mediterranean Garden,” by Gary Jones) to edible gardening (“Ten Trees in One: Grafting Citrus and Avocados,” with Darren Butler).

There are al fresco-style gardens, planted in or on top of real soil, just like Chelsea and other outdoor garden shows, which I think is a vast improvement over those dark, fluorescent-lit caverns that house indoor displays.

And of course, while the somewhat aggressive male peacocks are strolling and squawking, the two-legged garden show-goers are chatting with designers, snapping pics, waiting in line for lunch (I loved my chicken tacos, served with fresh cilantro), and, of course, doing some plant- and art-related retail therapy!

One of the Arboretum's resident peacocks strolling the greens

I mention shopping because as far as I’ve been able to discern, the marketplace at the LA Garden Show is one of the very best stops for plants, garden art, accessories and other must-have items for the horticulturally-inclined.

 I only wish it lasted longer than 3 days because I didn’t get around to all the plant-sellers, horticultural societies, garden accessory purveyors and other vendors. I learned that efforts by the Arboretum’s volunteer marketplace managers resulted in nearly twice the number of exhibitors this year over last. It was a well-curated lineup of offerings (thankfully, no schlocky stuff).

The festive and enticing Garden Markeplace - where we all engaged in a little horticultural retail therapy

I checked in with a few of my favorite folks including Pacific Horticulture Magazine, Southern California Horticultural Society, Leslie Codina Ceramics and TerraSculpture.

A tiny tabletop landscape by Smallweeds

 A new discovery: Smallweeds, which designs miniature tablescapes and also sells miniature accessories for making your own tabletop and fairy gardens.

I did a lot of browsing and gabbing with old and new friends, a little shopping, and a lot of note-taking while spotting new products, themes and trends. One of my very favorite picks of the weekend is the powder-coated obelisk series, created by Annette Gutierrez and Mary Gray. The women own Pot-ted, an eclectic, must-visit garden shop on Los Feliz in Los Angeles.

Yowzer! Shiny and bold, the powdercoated metal orbs are the hot, new "objet" for your garden.

As experienced and artistic film industry veterans, the women sure know how to create high style on a shoestring. They also know that it’s often easier to design something themselves rather than wait around for the marketplace to catch up with a need or opportunity.

Thus, the colorful objets for the garden, seen at left. Can’t you just imagine how elegant and artful these spherical shapes would look, grouped one, two, or three on a lawn, a gravel patio, or even tucked into a perennial border with stems and petals weaving in and out of the openings?

Annette and Mary aren’t claiming to have invented the ringed orbs (some of the earliest ones were made from leftover steel straps used to hold wine caskets together). But they do love the way the steel shapes take to easily to the powdercoated color. And since aqua and orange are the Pot-ted purveyors’ two favorite garden colors, they started with this palette. You can visit the shop or call to inquire about shipping. There are three sizes and boy do they look awesome: 30-inch ($169); 24-inch ($139) and 18-inch ($98).

READ MORE…