The Slow Flowers Podcast is the award-winning show known as the “Voice of the Slow Flowers Movement.” Launched in 2013 as the original flower podcast, we’ve devoted more than 10 years to covering the business of flower farming, floral design, and the Slow Flowers sustainability ethos. Listen to a new episode each Wednesday, available for free download here at slowflowerspodcast.com or on iTunes, Spotify, and other podcast platforms.
March 24th, 2011

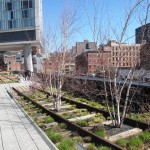
The High Line is NYC's newest public space.
I spent about 48 hours in New York City last week, staying at my favorite bed and breakfast at West 81st Street and Columbus Avenue on the Upper West side.
I mistakenly scheduled the visit to coincide with St. Patrick’s Day, one of the many days when people in Manhattan go crazy, whether they are Irish or not.
Yet, the weather was “pure spring” – certainly milder than we have had in Seattle lately – and my spirits were lifted just getting off the subway from JFK to the city.
My objective for stopping through NYC on my way to speak in Toronto was to meet some editors face-to-face and to spend time with some very dear friends. I had a half-day “free” and unscheduled, so last Thursday morning I hopped the downtown C Train across the street from Central Park and rode it to West 23rd Street. My destination: the nearly two-year-old public park called The High Line.
You’ve probably read about this amazing public-private endeavor – an elevated park that runs along 10 to 12 blocks on a former 1930s freight track high above Tenth Avenue between Chelsea and the Meat Packing District. I’ve read lots about it, too. But for a landscape design and horticulture observer like me, nothing compares to the first-person tour.
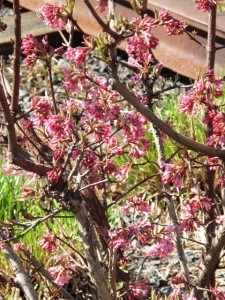
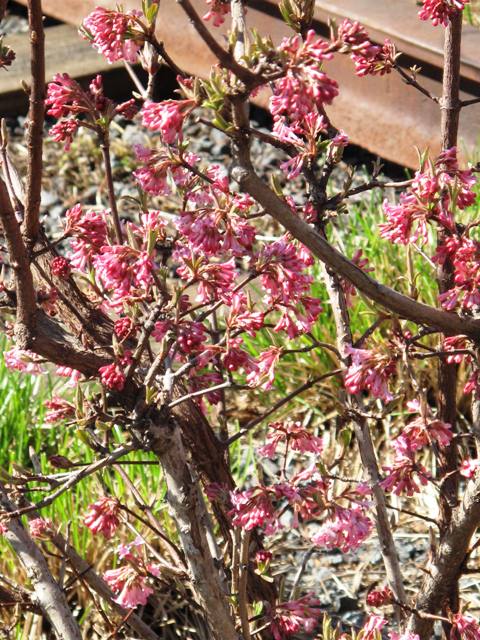
A true sign of spring: Viburnum x bodnantense 'Pink Dawn'
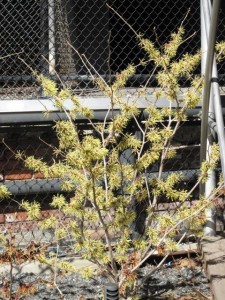
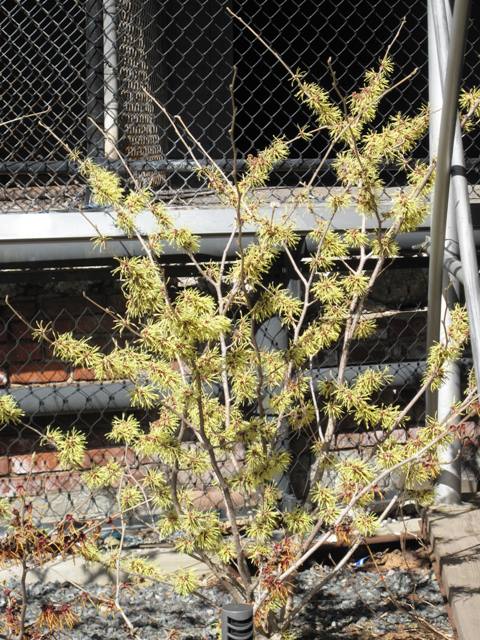
Wonderful witch hazel in bloom.
When I had dinner the night before with my talented NYC go-to-gals, Ellen Spector-Platt and Ellen Zachos, co-creators of the popular NYC gardening blog Gardenbytes, they gave me some tips on where to disembark from the subway (23rd Street Stop) and warned me that not much would be in bloom.
Blooms were not essential, yet I did enjoy spotting crocuses, witch hazel and a couple beautiful flowering ‘Pink Dawn’ viburnum shrubs showing off in the warm, spring sun.
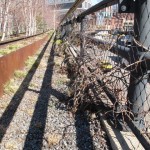
The edgy, industrial setting was just as delightful to my eyes. The rails of this RR-in-the-sky last carried a train of frozen turkeys in 1980.
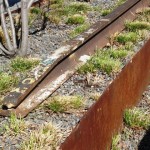
Over the ensuing decades nature has had her way with the long-abandoned site. According to the High Line web site, its designers selected plants to “echo the wild, self-seeded landscape that grew up on the structure after the trains stopped running.” The landscape was designed by James Corner Field Operations in partnership with Diller Scofidio + Renfro.
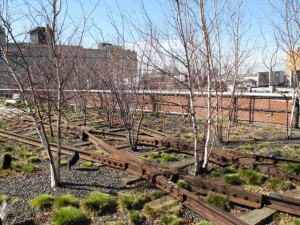
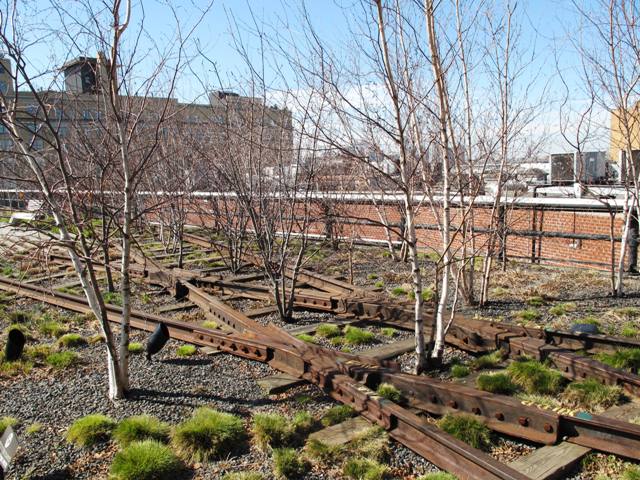
A beautiful grove of trees, planted between the rails.
The origins of this reimagined public space can be traced to 1999, when community residents founded Friends of the High Line, the nonprofit public conservancy that today operates under a license agreement with the NYC Department of Parks and Recreation.
The forward-thinking citizen group fought for preservation and transformation at a time when the historic structure was under threat of demolition. Friends of the High Line now provides approximately 70 percent of its annual operating budget and is responsible for both stewardship of the park and its public programs.
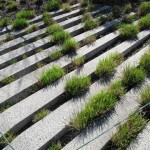
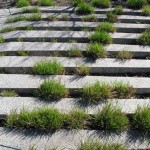
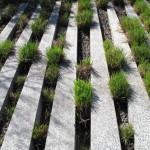
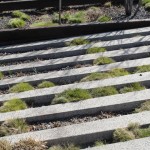
Beginning my tour at the northernmost entrance on West 20th Street, I climbed the steps and arrived to see a new view of the Hudson River and surrounding buildings. Light and airy, the park’s design has retained original crisscrossing steel tracks where groves of trees, shrubs and grasses are planted. The main walkway, which is wheelchair and stroller-friendly, appears to be formed by staggered bands of granite that emulate railroad tracks and also accommodate soft vegetation.
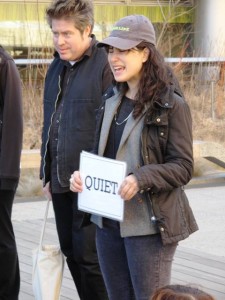
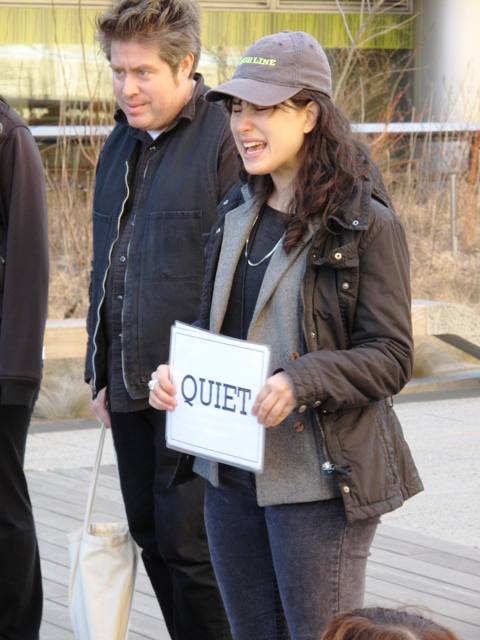
Even parks in major metropolises can be "QUIET"

Look up: it's a park!
Plenty of seating encourages people to rest, admire the scenery or eat a sandwich.
I happened upon a group of schoolchildren on a class tour near the bleacher-style amphitheatre where public performances often take place. A docent held a sign that read QUIET, and I smiled as I overheard her telling the children that the designers wanted to create a place where the noise of the city streets wasn’t so powerful. You know, quiet is one of the strongest sensations I experienced on my visit.
The juxtaposition of a park-in-the-sky with a city’s hustle-and-bustle down below seemed to amplify the silence. And I envy those folks in Manhattan who can visit The High Line whenever they want.
Posted in Architecture, Creativity, Gardening, General, Landscape Design, Plants | 4 Comments »
March 7th, 2011
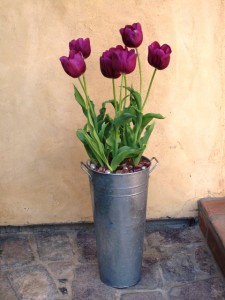
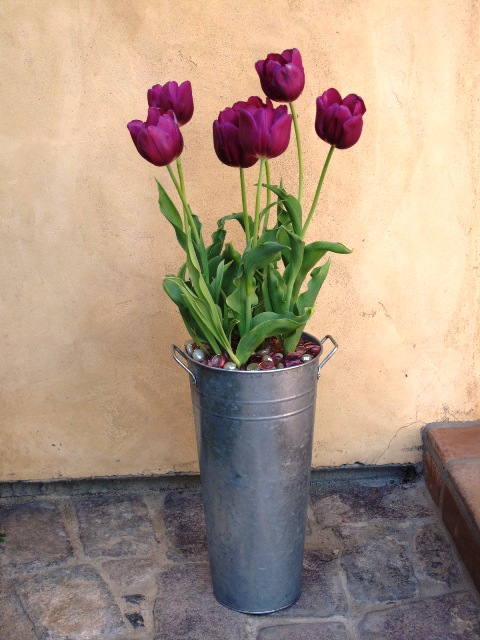
A galvanized flower bucket is paired with plum-purple tulips and shimmery pink glass as a soil topper
A year ago this month, I met my photographer friend Jack Coyier and his assistant Stuart Gow at a great location perched above the ocean in Malibu. My car was filled with flats of flowering bulbs – tulips, hyacinths, daffodils, grape muscari blooms — and an assortment of perennials and annuals as their companions. Oh, and lots of pots.
Color-coded pots, selected to match or coordinate with the blooms of spring bulbs purchased in 4-inch pots and nursery flats. It was a bulb garden in a Volvo station wagon!

March 2011 Better Homes & Gardens
We photographed a feature that I created for Better Homes & Gardens, which you can find in this month’s issue.
Called “Matched Sets,” the story gives hope and design inspiration to anyone who forgot to plant bulbs last fall.
It’s not too late to buy beautiful flowering bulbs, just peeking out of their buds. In Seattle at least, we have a variety of narcissus and daffodils, grape hyacinth, a gazillion tulip choices and at least three colors (pink, white and dark purple) hyacinth.
For a few bucks, you can plant these in a container, plunk it on your front porch or patio, and look like a genius who really did think about bulb-planting last October.
When you match the pot color to the bloom color, the design packs a punch. In some examples you see here, I tweaked the rules; in others, I didn’t deviate from the palette’s theme. It was fun working with Stuart and Jack, and seeing this story in print brings back some great memories of our day together on location in Malibu.
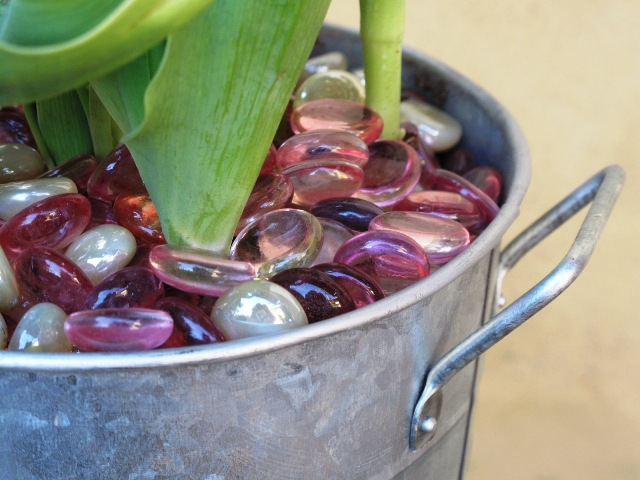
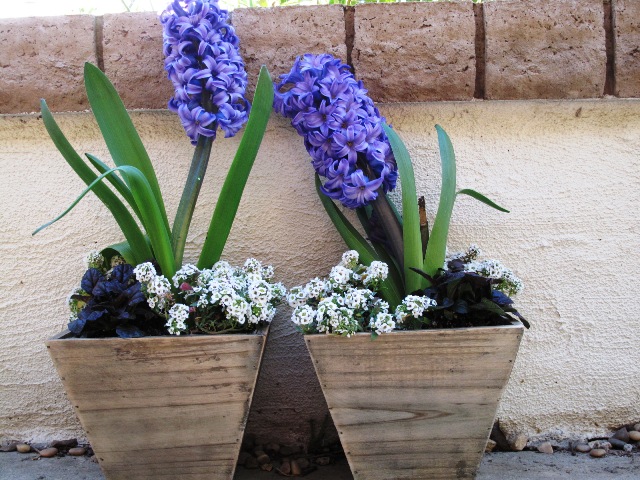
Two of the designs we shot didn’t make it to the pages of BH&G, so I’ve included them here. The first is above right. Below is a detail shot of how perfectly the glass marbles look as a color-matched soil topper, followed by a close-up of the not-used hyacinth design:
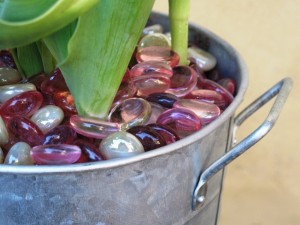
An affordable and reusable way to add color to any pot design.
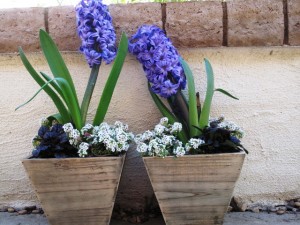
The hyacinths didn't behave well that day, but I do love the checkerboard accent of white alyssum with dark purple ajuga at the base of each container.
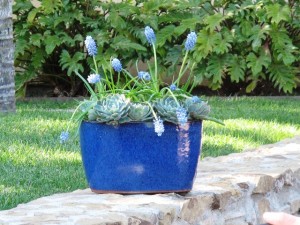
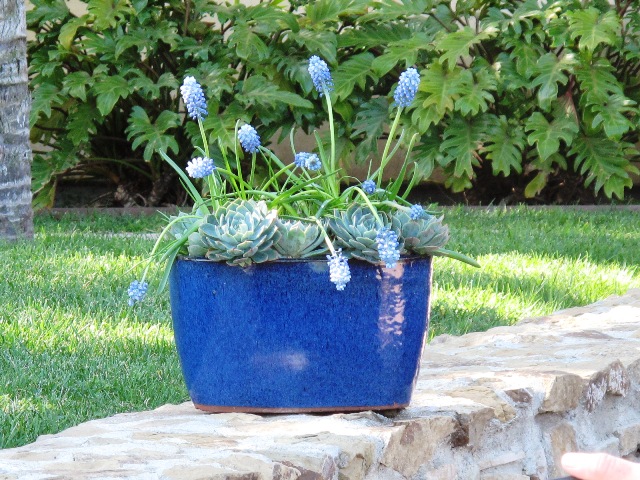
My absolutely favorite design: Oval-shaped blue-glazed pot, with blue=green echeverias and sweet blue grape hyacinth (muscari) bulbs.
Simple tips to get started:
- Select bulbs with blooms that match your container’s color
- Add cool-season annuals, grasses, succulents, or perennials that match or complement the palette
- Plant bulbs first, then pack other plants around them so the bulbs seem to be emerging through the plants at the base.
- Remember the basics: Use potting mix and a container that has proper drainage.
- Water regularly.
Sources: Blue pot (Sperling Nursery & Gift Shop, Woodland Hills, CA), square wood containers (Rolling Greens Nursery, Los Angeles), galvanized flower pot (Michael’s Craft Stores).
Posted in Creativity, Gardening, General, Writing | 5 Comments »
March 4th, 2011
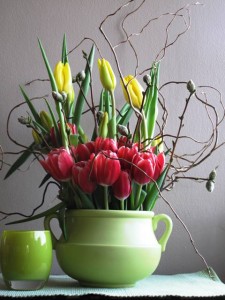
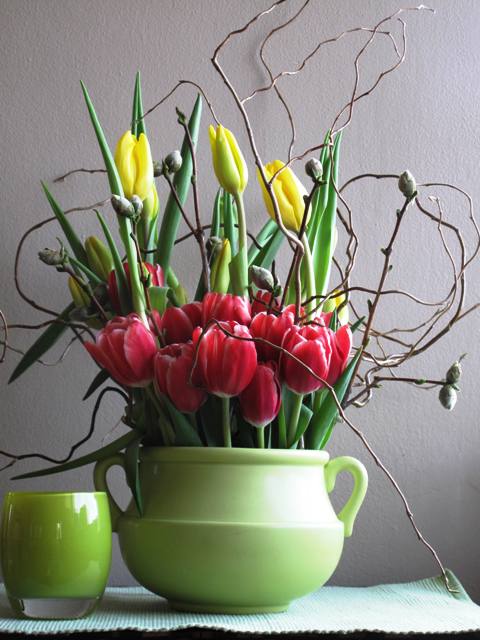
A textural display of two colors of tulips with curly willow and camellia buds on stems fill this vintage green urn.
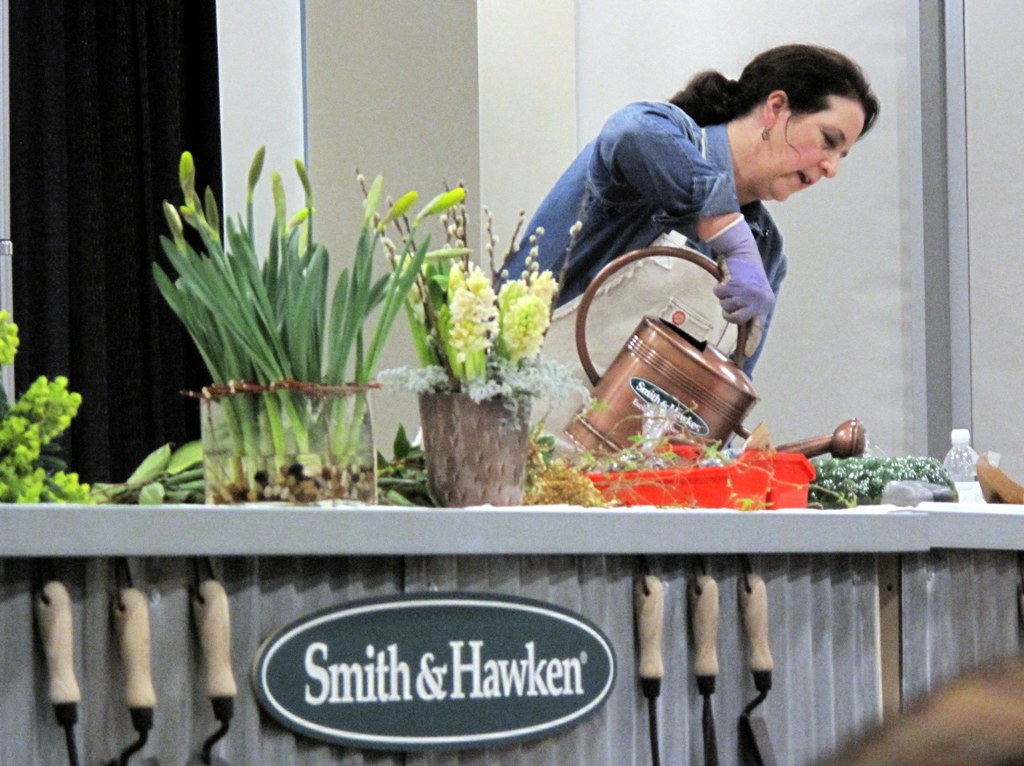
The Northwest Flower & Garden Show, the country’s second-largest indoor flower show, was staged last week. It was a great show and I’m sure I’ll be posting future stories about some of the wonderful design ideas, plants and speakers that inspired me. But right now I want to show off some of my floral design projects with simple instructions. The arrangements are from my talk and demonstration last Thursday on the Smith & Hawken DIY Stage.
Here in Seattle the crocuses and snowdrops are only just now blooming. Daffodil foliage is just a few inches out of the soil. So my talk on “Floral Design with Spring Bulbs” was geared to the flower-lover who seeks out local blooms from growers in his or her own backyard.
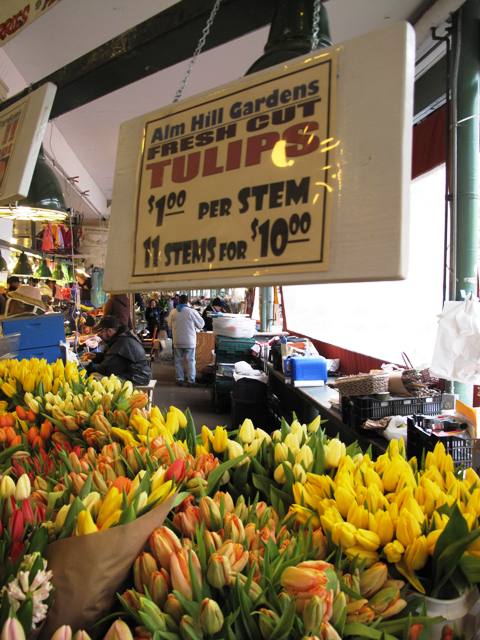
One such grower is Alm Hill Gardens, owned by Gretchen and Ben Hoyt. You can find Alm Hill flowering bulbs and other cool crops like lilacs and peonies year-round at the Pike Place Market and at weekly outdoor farmer’s markets including Ballard, University District and West Seattle. I encourage you to always ask questions about where and how the flowers you buy were raised. There is nothing better than meeting the farmer who actually grew your bouquet.
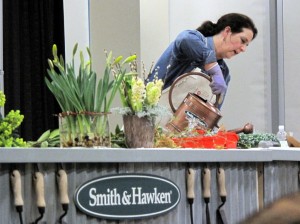
Fun on the Smith & Hawken DIY Stage
For a few weeks prior to last week’s flower show I had fun playing with tulips, daffodils and narcissuses, and hyacinth flowers to come up with the techniques I wanted to teach.
The detail photos you see here are from those samples, so the tulips (sadly) are not Alm Hill’s, although they are still fresh and locally grown. During my demonstration I was too busy to stop and photograph each project, but perhaps someone who attended will surprise me with their pics, as my friend Lorene Edwards Forkner did yesterday when she showed up with a CD of a few photos from the talk (THANK YOU!).
For each of these projects, my goal was to use an organic method of stabilize the blooms, rather than the conventional green foam blocks called “florist oasis.” That product, I have learned, is a carcinogen that contains formaldehyde (why would you want to touch or breath it?); and furthermore, it does not break down in landfills. I do understand why designers have used it for years. So far, there really isn’t an organic alternative to organizing and arranging flower stems to maintain the perfect form or angle. Yet increasingly, I am meeting and interviewing floral designers who consciously shun the green foam and use alternate materials to stabilize flower stems.
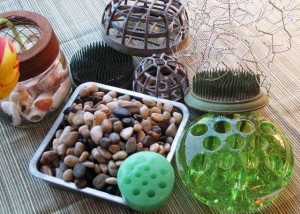
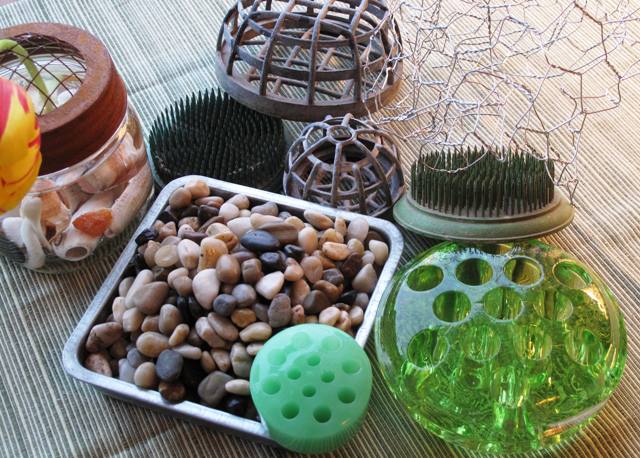
Here's a selection of my flower-stabilizing options, including lots of vintage glass and metal "frogs"
Here are a few options:
- Pebbles, sand, gravel or marbles in the base of a vase
- Pliable twigs wrapped around the inside of a vase to create a basket weave-like framework. One designer who David Perry and I interviewed uses shredded wood shavings called Excelsior inside her vases. This is the type of material used to ship wine bottles, and it’s biodegradable.
- Good, old-fashioned flower frogs in ceramic, glass or metal. I’ve been picking these up for a few bucks at weekend flea-markets. One of my favorite is a half-dome cage. It is heavy so it sinks to the bottom of the vase; and it has 3/4-inch square openings, which is ideal for woody stems. These are the arranging tools of the past, seriously useful for the present!
- Foliage. I often start an arrangement using soft, fluffy foliage as the “base” that peeks out over the top of the rim. For winter/early spring arrangements, Dusty Miller is a nifty option. It is lacy and soft – and it lasts for up to 2 weeks in water once cut. Once you fill the vase with the foliage, all the other flower stems can poke through the foliage and they will remain in place.
- Balled up chicken wire is another time-honored trick for stabilizing especially larger arrangements. It also works well for wide-mouthed vases. Get a roll at the hardware store (my local hardware store told me the proper name for this stuff is “Poultry Cloth” – whatever). You will need use wire cutters to trim off the length you want. Use gloves to protect your hands from wire scratches and create an open “ball.” After inserting into the container, make sure that a portion of the wire emerges above the rim so your design looks fuller.
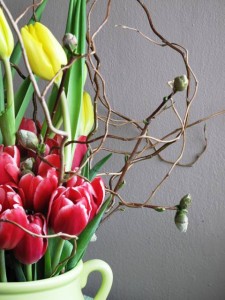
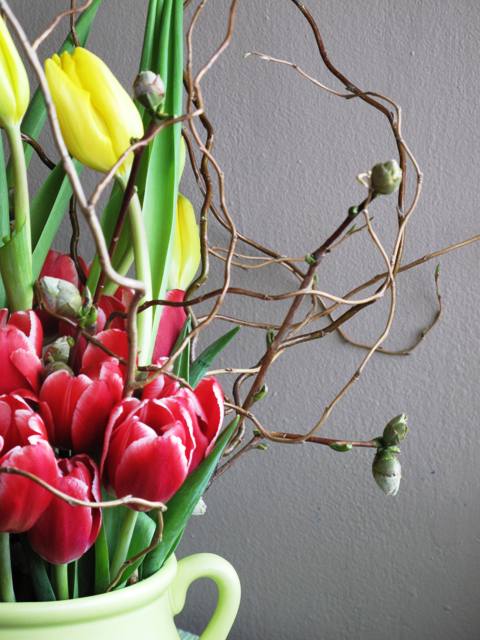
All these fresh spring details play so well together, especially the sprouting willow branches and the camellia buds.
Design One: Tulips (2 colors) with curly willow and camellia buds. I used a 4-1/2-inch diameter x 2-inch high dome-style metal flower frog in a vintage lime-green urn with handles.
- Note that the curly willow is starting to sprout tiny green leaves. That’s what happens when willow stands in H20 for a few weeks inside a warm home.
- As for the camellias, these are branches left over from a photo shoot last month. The dried leaves were crunchy and unattractive, but the buds were plump and interestingly shaped. So I grabbed my floral shears and clipped away the leaves. The chubby buds on the branches are a nice architectural accent.
- I first inserted the willow and the camellia branches, forming an open “nest.”
- Next, I inserted 10 red tulips, cutting their stems short so the flowers are close to the opening of my vase.
- Finally, I added the yellow tulips, cutting the stems longer. You will note that none of the short or tall tulips are the same height. I like to stagger them so there is a less formal feeling to the design. As I inserted the tulips, I used the framework of the branches to also help support their flowerheads, especially the tall ones.

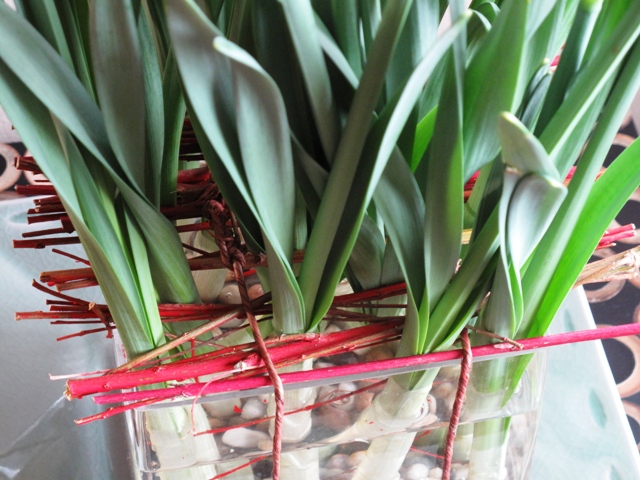
Flower stems, shrub twigs, pebbles and twine. Deceptively simple!
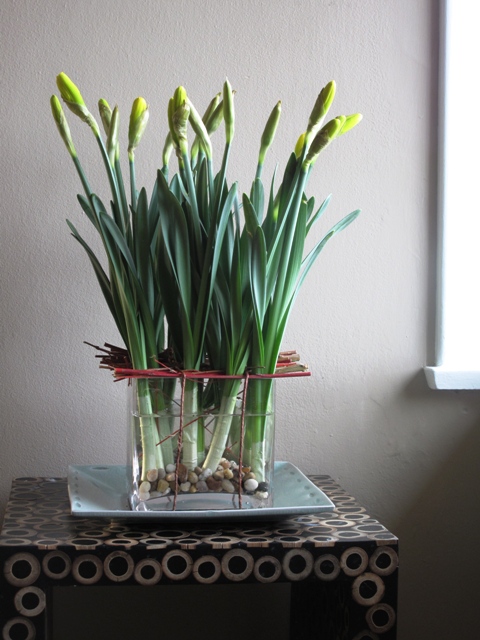
Design Two: Daffodils and red-twig dogwood branches. I used a 6-by-6-by-6 inch glass “cube” vase and filled the bottom 1/4 with medium-sized pebbles.
- The inspiration for this design comes from a Winter 2008 edition of by Design, which is published by The Flower Arranging Study Group of the Garden Club of America. In the article, Cres Motzi demonstrated a way to layer a row of cut branches over the opening of a rectangular container and “strap” them on with twine to create a framework for inserting branches. Her design also used floral foam inside the container, but I find that completely unnecessary here.
-
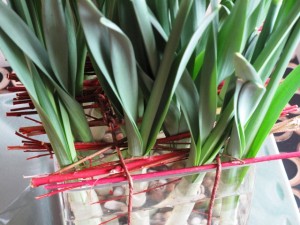
Detail of the twigs as they are strapped onto the vase.
I cut 9-inch lengths of pinkish dogwood branches, lining them up in parallel rows across the opening of the vase. Available at craft stores like Michael’s, twine-wrapped wire is an ideal material to strap around the bottom of the glass vase and over the twig arrangement. It can be twisted taut and secure. There is a band of twine on either end of the twig arrangement.
- This design is so simple and serene that it called for a singular flower. Fifteen just-picked daffodil stems look great here. I inserted them into openings between twigs and twine, staggering them in an informal arrangement. You can see how well these stems stay upright, aided by the pebbles in the base of the vase.
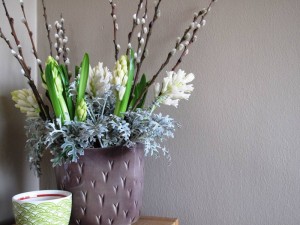
Shades of white, silver and pewter make for a pretty wintry floral palette.
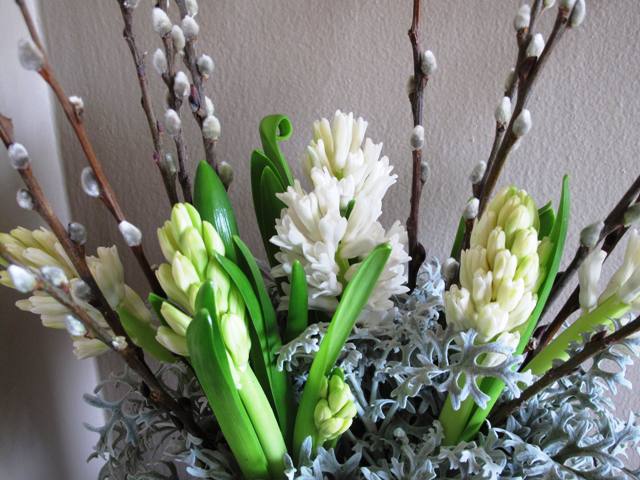
Design Three: Hyacinths, Dusty Miller and pussy willow branches in a vintage oval vase. Here, the Dusty Miller foliage is the stabilizing element for the other stems. The vase is a 6-inch high vintage 1940s piece. The opening is an oval, approximately 7 inches long x 4 inches wide. I love this vase! It came from a visit to Old Goat Farm in Orting, Wash., owned by my friends Greg Graves and Gary Waller. Their nursery and shop is filled with surprises, including some vintage pieces like this.
- Even here in the dead of winter, good old Dusty Miller (Senecio cineraria), a shrubby perennial from the Mediterranean region, is holding its own. Gray and kind of ubiquitous the rest of the year, Dusty comes in handy when one needs a soft foliage ingredient to contrast with darker greens. I robbed this batch (with permission) from my friend Nancy Finnerty’s Madison Park garden two weeks before I used it in the flower show demo. This stuff is pretty ironclad. Cut the stems as long as possible and start filling up the vase with them. The leaves are deeply cut and lobed; when used in a floral arrangement, they take on a lacy profile.
- Insert 5 or 7 long-stemmed hyacinth flowers. Right now, Alm Hill Gardens is selling
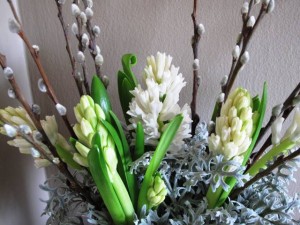
Ready for a close up!
creamy white, dark pink and deep purple varieties – and the scent is truly intoxicating! Gretchen explains that she gets the longer-than-normal stems by starting the bulbs in the dark. Those poor babies are reaching for light during their growth phase, so that’s why their stems are much longer than the ones you or I would grow in the ground. Pretty gorgeous stuff. Again, notice that the stem lengths are staggered.
- Finally, insert 7 or 9 pussy willow branches, also at varying heights. These are from a grower in Oregon and I like how they resemble floral exclamation points in this wintry white arrangement. This design is long-lasting. If the hyacinths decline (yet they still look great and this arrangement has been finished for 8 days!), you can always replace them, cuz the pussy willow and Dusty Miller will keep on keepin’ on for at least twice as long.
During my demonstration, I was so pleased that Gretchen Hoyt was in attendance with her assistant, as well as several other seasoned growers and designers – and they offered lots of suggestions and tips. One tip from Lorene’s bag of tricks os how to refresh H20 in a vase with so many complicated parts like the branched framework and the curly willow. Her technique is to first put the vase in the kitchen sink. Using the spray nozzle on the faucet, gently spray fresh water into the vase until the existing H20 starts spilling up and over the edge. If you continue for a minute or so, you will have completely replaced old, dirty water, with new, fresh water. Voila!
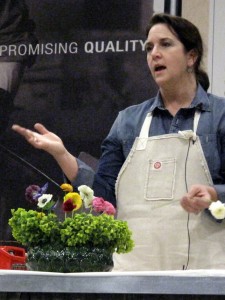
I'm working with locally-grown flowers and garden ingredients at the Northwest Flower & Garden Show.
If you are wondering about some of my other resources you see, here is a list:
Finally, a special thank you to my partner-in-flowers, David Perry. The projects you see here will be featured in our forthcoming book, A Fresh Bouquet. And I can promise you that the photos he takes will be dazzling beyond belief.
We invite you to follow along with us on this journey at our blog, A Fresh Bouquet.
Posted in Creativity, floral design, Gardening, General | 7 Comments »
February 26th, 2011
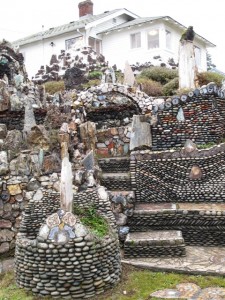
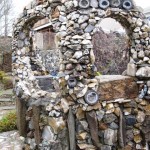
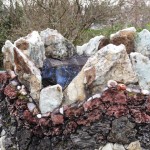
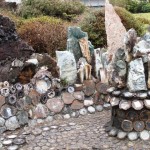
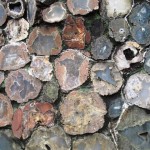
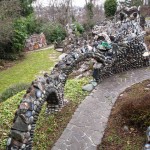
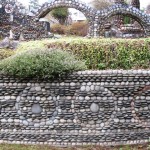
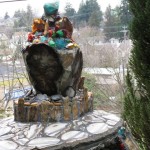
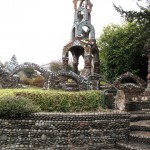
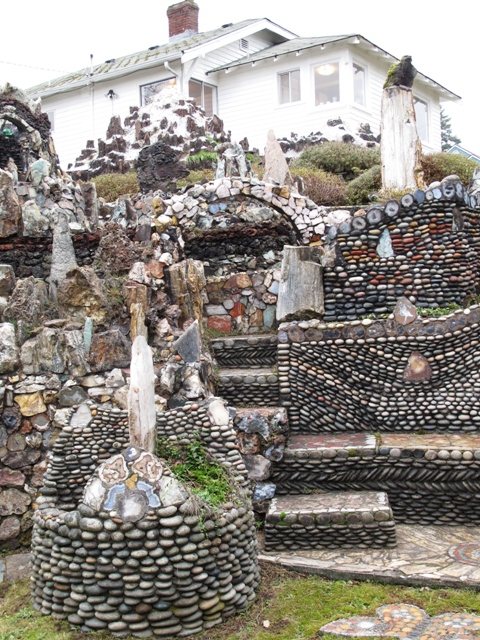
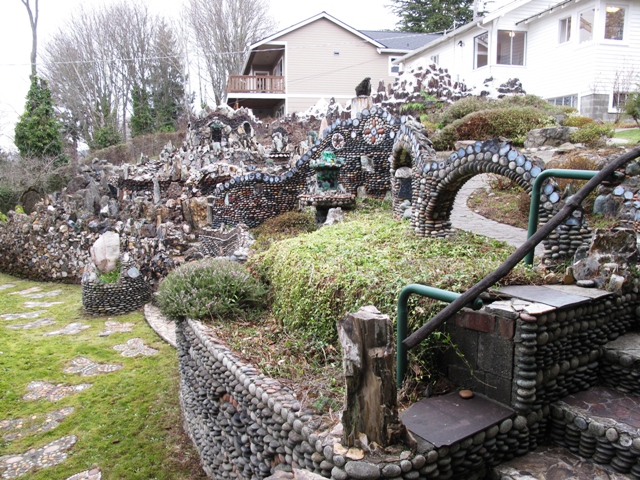
Simply mind-boggling, the detail and artistry of one man's vision.
The Walker Rock Garden has been the subject of fascination over the years. Tens of thousands of visitors — from rock and gem hounds and garden enthusiasts to folk artists and historic preservationists — have visited.
And each has an opinion about this modest West Seattle property built by Milton Walker over the course of several decades.
Now that I’m living back in Seattle, in West Seattle in fact, I was thrilled when my garden guru and friend Jean Zaputil told me there was a chance a few weekends ago to tour the property.
You see, the Walker Rock Garden, originally the home of Milton and Florence Walker, is being sold. No family members have lived in the humble white cottage for years, but one of their adult offspring and a niece recently listed it for sale and the agent, Brad Cooper, plans to regularly open the garden for admirers and anyone who wants a last chance to see this one-of-a-kind stone-sculpture installation. Visit the link above to learn about future open garden dates.
This garden began in the backyard of a residence where lived a family of five: father, mother, two sons and a daughter. Like many similar gardens that move from private to public, this one has a back story. In spite of the various expectations that Milton’s heirs had for his rock garden, the one constant that most people can agree on is that his garden was an unparalleled artistic expression.
My friend B. McGillvray, a stonemason, artist and musician, agreed to share his first-person experiences about the Walker Rock Garden.
How do you describe the garden?
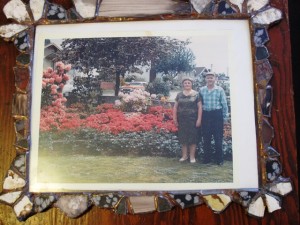
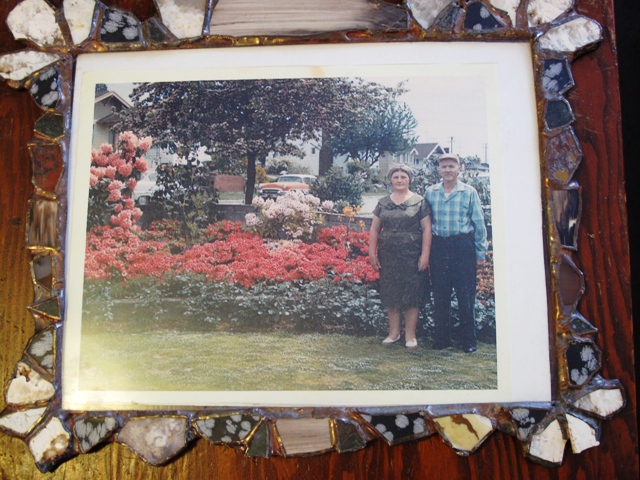
An undated photograph of Florence and Milton Walker
The garden is one of the very best examples I’ve ever seen using this type of stonework. Milton was not a tinkerer. He was a highly visionary folk artist.
And yet he worked in semi-obscurity, right?
He was part of a group of men in America who fit this profile: they started in their mid-fifties, and they worked for about 20 years. Then they died or left their work, after which, within about five years, the place falls apart, is destroyed or sold. These people were eccentric. They definitely had a vision, a mission, for building their work. What set them apart was that they were not formally trained artists.
What are some other examples?
I would include Kubota Gardens in Seattle and Watts Towers in Los Angeles.
When did you first visit the Walker Rock Garden?
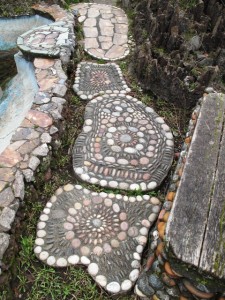
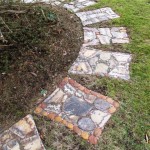
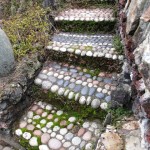
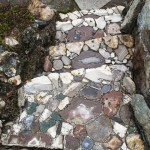
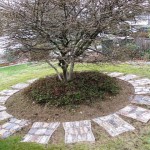
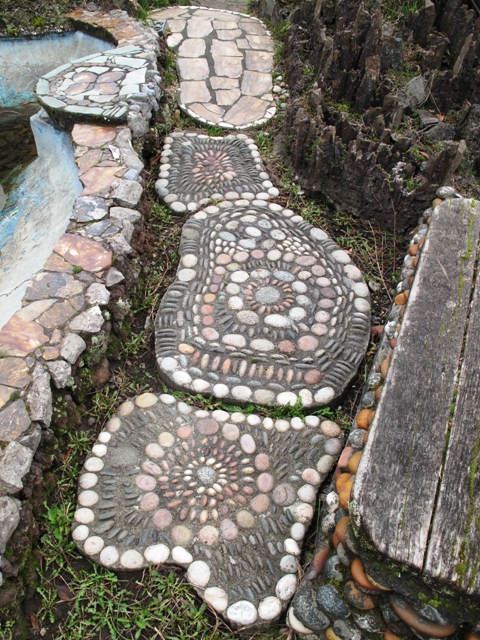
Intricately-patterned stepping stones lead through the garden.
In 1989. Milton’s death a few years before had put his wife Florence in a position where she couldn’t keep up the garden on her own. It’s a really intensive place (to maintain) and she had quite a job to keep everything running and clean. She talked with me while my friend went around and took pictures. I really connected with her and she asked me if I wanted to get involved with a group that was starting called “Friends of the Walker Garden.”
What was Florence’s role in the garden’s creation and preservation?
Florence made it clear to me that Milton was the sole visionary. He did the stonework and she did the garden. Florence was a longtime gardener who was a past president of the West Seattle Garden Club. She was very well known and very wise about gardening in an old-fashioned kind of way. She was a plain-spoken person from Eastern Washington, yet she had a very Zen-like quality in the garden. When I met her, she was around 73 years old and she wore a big straw hat and used a big walking stick.
What did Florence tell you about how Milton begin to build his vision?
[In the late 1950s or early 1960s] Milton and his son George went to Ohme Gardens in Wenatchee, Washington. Ohme looks natural (you have to look hard to see that it is man-made). Milton was impressed with the Ohme ponds and how they reflect a bright greeny-blue color. He wanted to build something similar, so he created a pond in his backyard and painted the inside blue. But he was pretty disappointed because he thought it looked like a blue bathtub. So he started adding rocks to give it scale; after that, he built three more ponds and a fountain.
So the rock garden expanded from there?
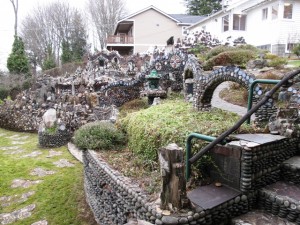
You can see the rustic "mountains" at the top right of this photo. They were said to be inspired by Washington's mountain ranges.
It’s all organic in the way it grew. The mountains, which look more rustic, are part of the older garden in the central area right behind the house. Milton was not a stonemason (he worked at the Boeing Co. as a troubleshooter), but he kept ramping up his work and improving his skills. What you see here is really world-class stone work.
When did he start doing the detailed rock-work?
In the 1960s, Milton found out that a rock shop in Oregon was going out of business. He bought all of the inventory — 11.5 tons of rock, semiprecious stones and pebbles — for $175. As Florence told me, every weekend for one entire summer, they drove down and bought stone back to Seattle. The backyard had sorting bins and piles organized by color and size of rock.
All those pieces became intricate walls, stepping stones, water features, a patio and outdoor fireplace, and an amazing tower. How did Milton actually build them?
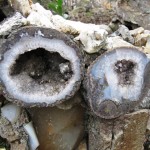
Some of the pieces were free-formed using rebar and concrete. Others started with half-thick cinder-block built as a regular, utilitarian wall you would see anywhere, then “rocked over” (Florence’s term) with pebbles laid in row after row, or matching pieces of agate.
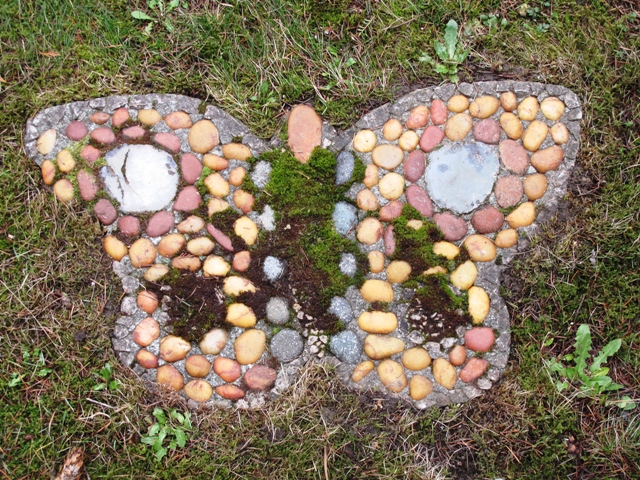
What is the significance of the butterfly motif?
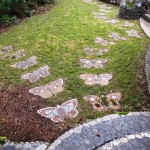
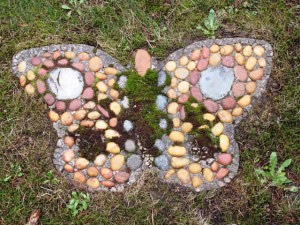
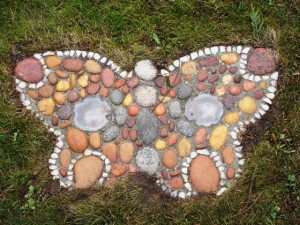
I think Milton liked the symmetry of the butterflies. It was just a nice garden symbol. He used butterflies extensively in deluxe square-shaped stepping stones or by creating actual butterfly-shaped stones on the ground.
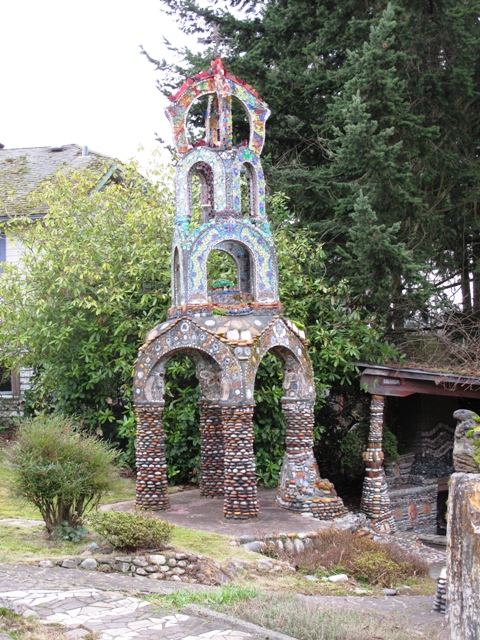
Can you tell me about the tower?
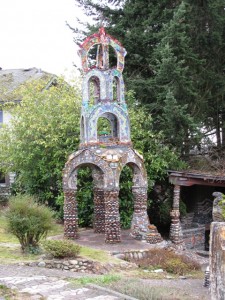
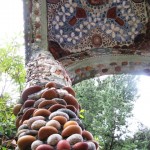
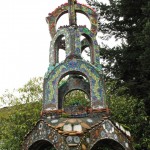
Milton erected and embellished a fanciful tower to honor America's bicentennial in 1976.
Milton called it the “Bicentennial Tower” and he gave it a birthday cake top that reads 1776-1976.
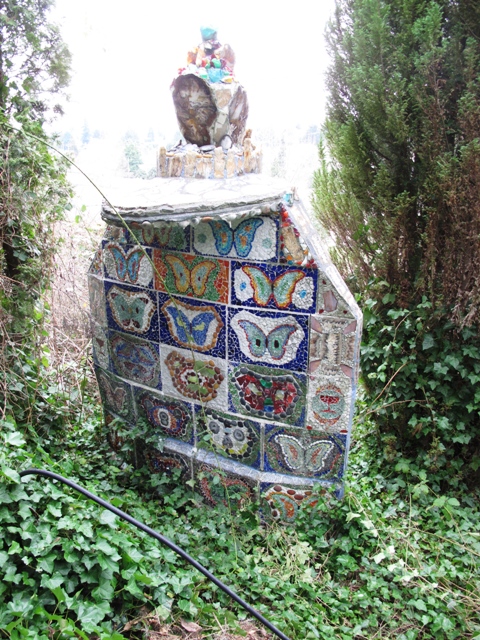
What about the semi-hidden swing wall at the lower level beyond the rest of the garden?
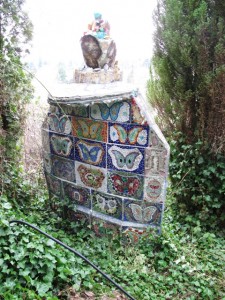
More beautiful stone butterflies appear on the "swing wall," partially hidden at the bottom of the garden.
It was one of Milton’s very last pieces, actually built over the kids’ swing set. The uprights and cross-sections became like the rebar that he built over. Milton used chips of marble, agate and chunks of slag glass. I think had he lived, he would have continued building in that area of the garden.
Can you describe how your own work changed from your relationship with the Walker Rock Garden and from knowing Florence?
At the time I met Florence and helped her in the garden, I was working as a landscaper. It was while there that I took on more serious thought about stonework. Florence taught me how Milton made the pieces and I actually did some of the restoration of his work, such as patching and pasting.
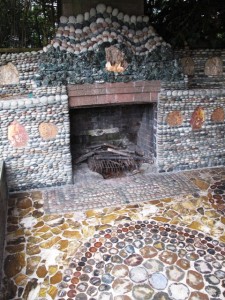
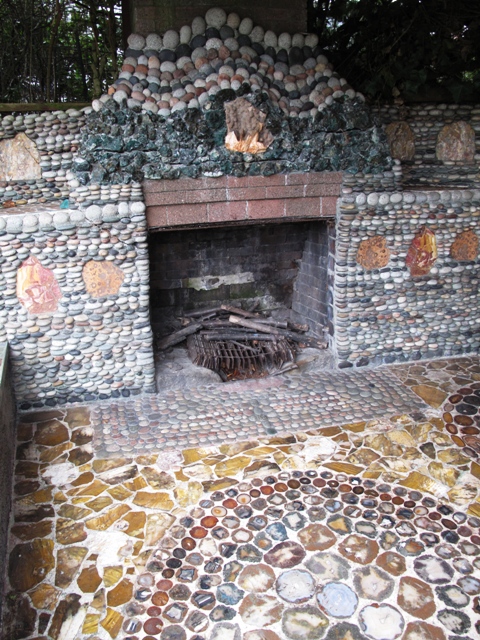
Family and friends gathered for celebrations or simple meals on the covered stone patio, complete with an outdoor fireplace.
If I’m building something now, especially my water towers, I feel as if I’m influenced by Florence. I didn’t know Milton. I knew his work, but my insights of the garden came from Florence. She had a way of being inspirational. She had great little gardening tips that I still use and think about. Her love of that garden really came through and she chose to share the most intimate things about the garden with a small group of us.
Why did you fall in love with this place?
Milton was a great artist and Florence was really the personality in the garden. I saw an opportunity to learn some big lessons and I took it. I was half Florence’s age and we lived very different lives, but it was an amazing kind of relationship. I remember her 80th birthday when we gathered on the stone patio with a birthday cake recreating an exact stepping-stone. The little pieces of chocolate were colored to represent the pebbles.
What do you think will happen to the garden now that it (and the home) is for sale?
The garden’s ownership will move out of the family. The primal knowledge of this garden is almost lost. People are saying they hope somebody buys it who loves it and preserves it. I truly hope that someone who is motivated does buy it to preserve the garden as an entire work of art.
Posted in Architecture, Creativity, Gardening, General | 7 Comments »
February 10th, 2011
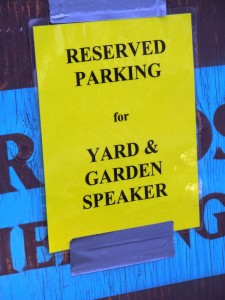
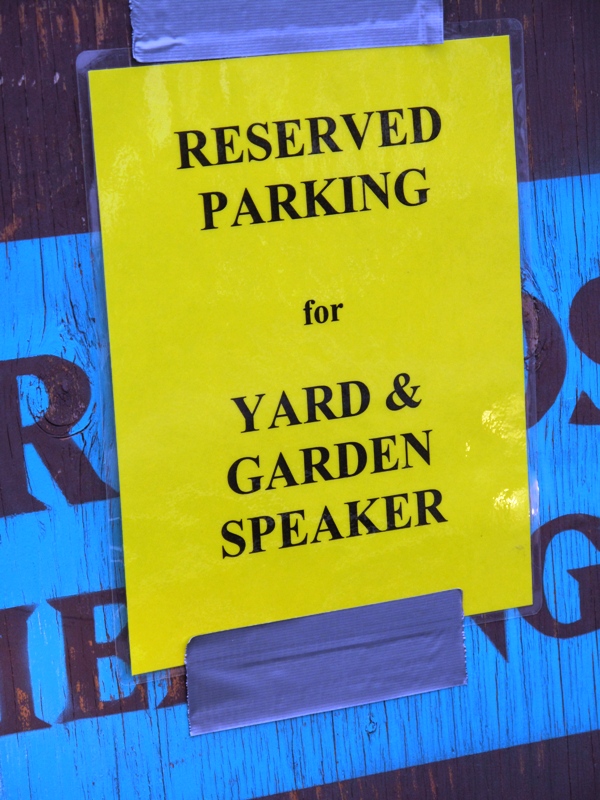
Nothing warms the heart of a speaker more than to pull into the venue and see a sign like this! Thank you Diane Threlkeld, chair of the Yard & Garden Lecture Series - how thoughtful!
Last Saturday, I traveled to Port Townsend, Washington, to speak at the Yard and Garden Series 2011, an educational program produced by the WSU Jefferson County Master Gardeners. Such a great audience of enthusiastic kindred spirits.
After my talk and floral design demonstration on Sustainable Flower Growing and Design, I promised to post some of the resources for seasonal, local, and sustainable flowers. Here they are:
California Organic Flowers (www.californiaorganicflowers.com); Here’s a link to our post about visiting this cool farm in Chico, California
Jello Mold Farm (www.jellomoldfarm.com); Our friends Diane and Dennis grow sustainable cut flowers in Mt. Vernon, Washington. Read their list of “where to buy” (including Farmer’s Market, CSA orders and Seattle area retail shops)
Peterkort Roses (www.peterkortroses.com), a fabulous, family-owned rose farm in Hillsboro, Oregon. Their roses are grown sustainably in hoop houses year ’round. The colors are pure, the scents are not cloying, and the flowers are totally fresh. While Peterkort sells wholesale only, you can ask your local florist to order from them directly. Demand for locally-grown ingredients will help give flower consumers more choices and eventually replace those steroidal mega-rose imports. ReadSandra Peterkort Laubenthal’s blog for news and updates on the rose-growing world.
Wild Ridge Organics (www.wildridgeorganics.com); Specializing in Australian and South African cut flowers, based in Salinas, California. These are the awesome exotics used in my arrangement that one lucky audience member took home with her.
Upcoming: My collaborator, photographer David Perry, and I are hitting the lecture circuit in 2011 – spreading the word about their passion for locally-grown flower crops and the designers who use these ingredients.
If you are in the Seattle area, come hear from and meet us at the Northwest Flower & Garden Show, February 23-27, 2011. Our appearance details (click on the links below for lengthier course descriptions):
Thursday, February 24th
- 12:15 p.m. Hood Room: “Conquering Your Digital Camera: Making Beautiful & Memorable Garden Photos,” with David Perry
- 2:30 p.m. DIY Stage: “Floral Design with Spring Bulbs: Bring Spring Indoors with Beautiful Blooming Bouquets,” with Debra Prinzing
Friday, February 25th
- 12:15 p.m. Hood Room: “A Year in Flowers: Seasonal, Local & Sustainable Floral Ingredients,” with David Perry
- 2:00 p.m. DIY Stage: “The Winter Bouquet: Sustainable Floral Designs From Winter’s Bounty,” with Debra Prinzing
Posted in Creativity, floral design, Gardening, General, Writing | 3 Comments »
January 9th, 2011
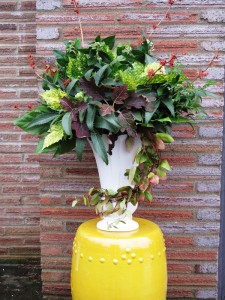
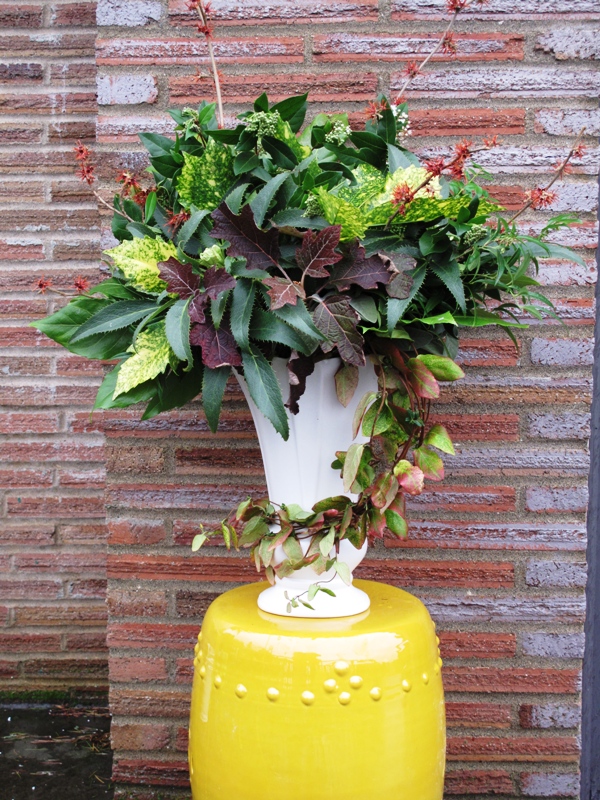
By borrowing this lovely cream urn from my friend Lorene, and by clipping ingredients from her garden and that of Jean Zaputil's, I created a dramatic winter bouquet.
Earlier this week, my collaborator David Perry and I were the “program” for Woodinville Garden Club’s first meeting of 2011. It was an auspicious beginning for what we anticipate to be a great year gathering stories both visually and with words for our book project, A Fresh Bouquet.
Frequently, the feedback to our “seasonal, local and sustainable” mantra has to do with the argument that one can only follow this practice in the peak growing seasons when annuals and perennials are in their glory (you know what we mean – roses, peonies, dahlias, even sunflowers….they don’t usually sing in January!)
That’s true, but living in the seasons means that of course you don’t want a vase filled with August bloomers in the dead of winter. That’s like eating a mealy hothouse tomato out of season. Yes, it’s red in color, but that’s about as much in common the January grocery store tomato has with the off-the-vine, warm, juicy, flavorful heirloom you grow in the garden and add to your late summer salads.
So after our illustrated lecture on “A Year in Flowers,” featuring some pretty incredible images that Dave has captured on our joint and his solo excursions, we set out to design and demonstrate some great ideas for winter bouquets. Suffice it to say, David created an uniquely “David” arrangement. Yes, it involved power tools and an unexpected combination of leaves and blooms. When he blogs about it, I’ll add the link here.
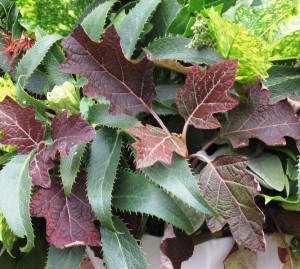
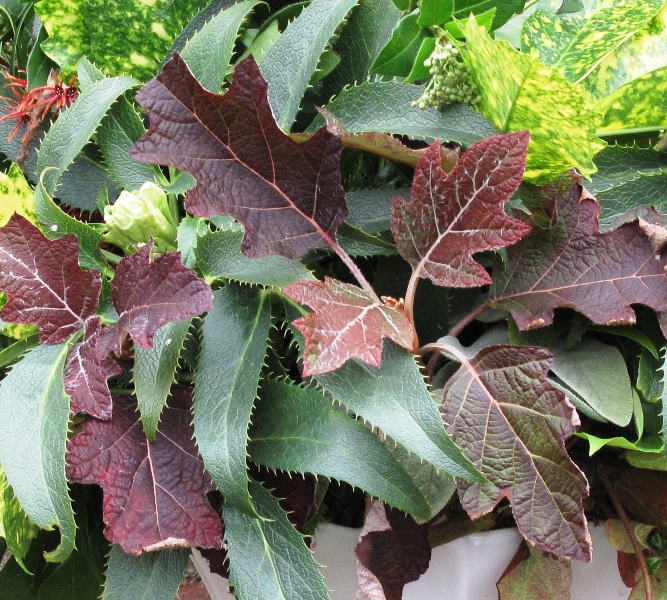
This detail shot shows how the oakleaf hydrangea adds wine to the bouquet, showcased against the hellebore foliage; a glimpse of the yellow-and-green acuba foliage is in the upper right corner.
For me, I wanted to fill a vase with winter beauty. Some of you may know that our family is in a bit of transition. We finally sold our house in Southern California, but we are still living in a rental house in Seattle, while house- and garden-hunting for a permanent residence.
I yearn for my previous Seattle garden where I could gather more than enough ingredients for any impromptu bouquet (does this come close to admitting that I’m an over-planter? YES! But I don’t own that garden anymore, sadly). I’m a bit limited with the offerings at our rental house and I don’t want to denude all the plants my landlords consider theirs!
So, on Tuesday, I went “flower shopping,” which means I visited the amazing gardens of two friends, clippers in hand. It was sunny out, and very cold. Some of the shrubs showed signs of frost damage. After all, It was January 4th! But I was not disappointed and my garden designer friend Jean Zaputil walked me around her backyard and entry garden, encouraging me to take a little of this and a little of that.
Her bounty included Fatsia, which has huge, palm-like foliage. Green and glossy, this is good stuff – perfect for adding drama to a vase. We clippped branches of green Boxwood, another hardworking shrub that is just as hardworking in an arrangement. Oh, and the Sarcococca, or sweet box – divine. If you have never grown this evergreen shrub, which has little pointed leaves and hard-to-see, super fragrant white winter flowers, think about planting it now. It’s hardy in the Pacific NW….not in the midwest, unfortunately, according to my friend Danielle.
I also left with a few stems from Jean’s Acuba shrub, which is another one of those plants you sometimes ignore in the summertime when everything else looks so swell. But even the famed Christopher Lloyd admired this plant – its bright yellow foliage is splashed with green flecks. And there’s nothing like something golden to offset all that greenery. It ended up as one of the magical ingredients that perked up my bouquet. I also talked Jean into letting me clip two branches from her about-to-bloom Helleborus argutifolia – with its leathery, serrated, olive-green foliage and the pale green flower in bud.
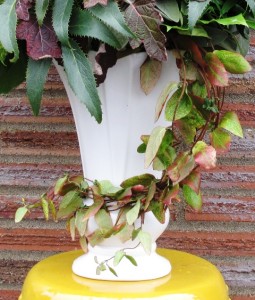
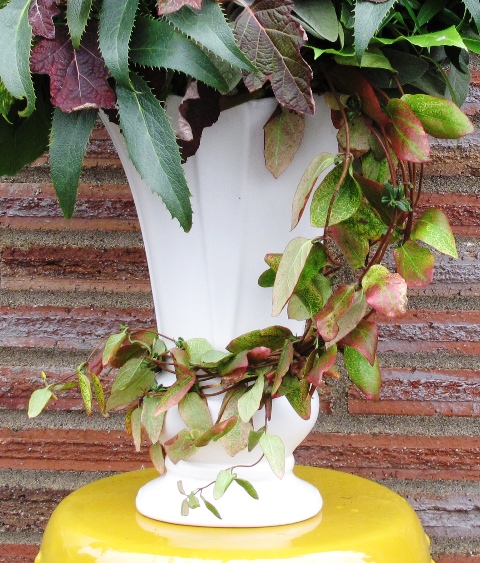
Here's how the honeysuckle vine looks, wrapping around the base of the urn.
After leaving Jean’s, I headed to Lorene Edwards Forkner, plantswoman, designer, blogger and fellow writer — another incredibly talented friend (I am blessed with many of them!). Lorene’s garden is very close to Puget Sound, which is often a bit milder than the rest of Seattle. That’s the only reason I can come up with to explain why her Oakleaf Hydrangea shrub was still hanging onto several deep burgundy leaves in pretty sets.
Like the golden Acuba, the wine-colored Hydrangea foliage added great contrast to the bouquet. Oh- and the ‘Jelena’ witch hazel – yes, this glorious, fragrant shrub is just beginning to flower in Lorene’s front yard, so she allowed me to clip a few branches. The blooms of the witch hazel are little puffs of burgundy-copper – and it doesn’t take many of them to perfume a room. I made this bouquet on Tuesday and four days later, the dining area where I set the urn was still heady with the scent.
You can look closely to see most of these ingredients in the photos here. One more thing I want to share about this abundant bouquet. Notice the draping vine? That’s a cascading and twining length of a rugged honeysuckle, also from Lorene’s property. I wanted it to spill elegantly from the mouth of the cream-colored urn, but it was a little too stiff to give me the look I envisioned. So I started wrapping it around the base of the urn and – well, that looked better. I employed a trick I learned from a Portland floral designer we recently interviewed, Jennie Greene. She uses tiny lengths of twine-wrapped wire to secure branches and stems in place. Easy t0 find at craft stores, I pulled out a roll of the wire, cut off a couple inches and secured the honeysuckle in place.
Now who says there’s nothing to put in a vase in January? This creation illustrates just one way to gather from the winter garden. Go see what you can create!
Posted in Creativity, floral design, Gardening, General | 14 Comments »
© Debra Prinzing, all written and photographic content. Website design/development by Willo Bellwood/Metric Media