Debra Prinzing

Get the Email Newsletter!

Archive for the ‘Writing’ Category

Spring bulbs, this time in planters

Monday, March 7th, 2011

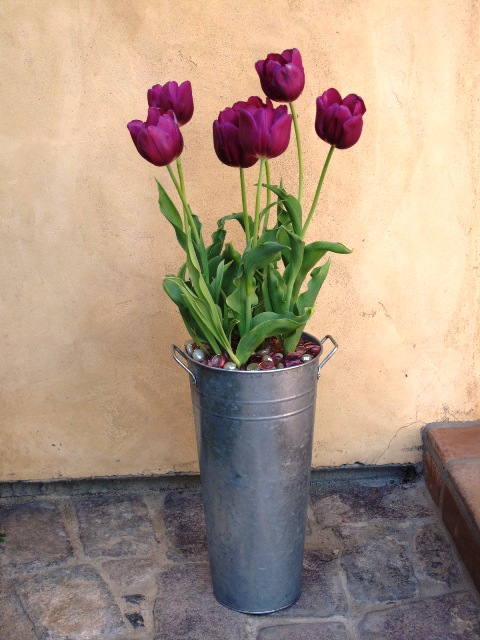
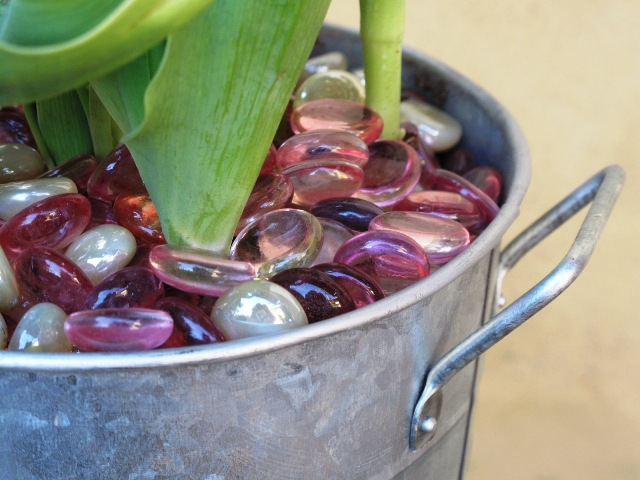
A galvanized flower bucket is paired with plum-purple tulips and shimmery pink glass as a soil topper

A year ago this month, I met my photographer friend Jack Coyier and his assistant Stuart Gow at a great location perched above the ocean in Malibu. My car was filled with flats of flowering bulbs – tulips, hyacinths, daffodils, grape muscari blooms — and an assortment of perennials and annuals as their companions. Oh, and lots of pots.

Color-coded pots, selected to match or coordinate with the blooms of spring bulbs purchased in 4-inch pots and nursery flats. It was a bulb garden in a Volvo station wagon!

March 2011 Better Homes & Gardens

We photographed a feature that I created for Better Homes & Gardens, which you can find in this month’s issue.

Called “Matched Sets,” the story gives hope and design inspiration to anyone who forgot to plant bulbs last fall.

It’s not too late to buy beautiful flowering bulbs, just peeking out of their buds. In Seattle at least, we have a variety of narcissus and daffodils, grape hyacinth, a gazillion tulip choices and at least three colors (pink, white and dark purple) hyacinth.

For a few bucks, you can plant these in a container, plunk it on your front porch or patio, and look like a genius who really did think about bulb-planting last October.

When you match the pot color to the bloom color, the design packs a punch. In some examples you see here, I tweaked the rules; in others, I didn’t deviate from the palette’s theme. It was fun working with Stuart and Jack, and seeing this story in print brings back some great memories of our day together on location in Malibu.

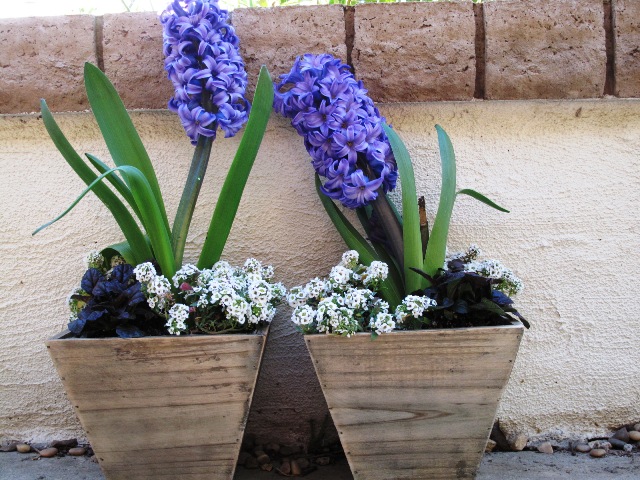
Two of the designs we shot didn’t make it to the pages of BH&G, so I’ve included them here. The first is above right. Below is a detail shot of how perfectly the glass marbles look as a color-matched soil topper, followed by a close-up of the not-used hyacinth design:

An affordable and reusable way to add color to any pot design.

The hyacinths didn't behave well that day, but I do love the checkerboard accent of white alyssum with dark purple ajuga at the base of each container.

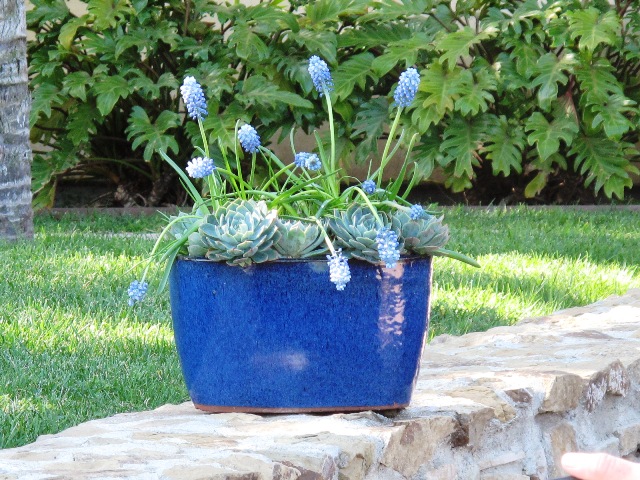
My absolutely favorite design: Oval-shaped blue-glazed pot, with blue=green echeverias and sweet blue grape hyacinth (muscari) bulbs.

Simple tips to get started:

  1. Select bulbs with blooms that match your container’s color
  2. Add cool-season annuals, grasses, succulents, or perennials that match or complement the palette
  3. Plant bulbs first, then pack other plants around them so the bulbs seem to be emerging through the plants at the base.
  4. Remember the basics: Use potting mix and a container that has proper drainage.

  5. Water regularly.

Sources: Blue pot (Sperling Nursery & Gift Shop, Woodland Hills, CA), square wood containers (Rolling Greens Nursery, Los Angeles), galvanized flower pot (Michael’s Craft Stores).

Notes from: A Year in Flowers

Thursday, February 10th, 2011

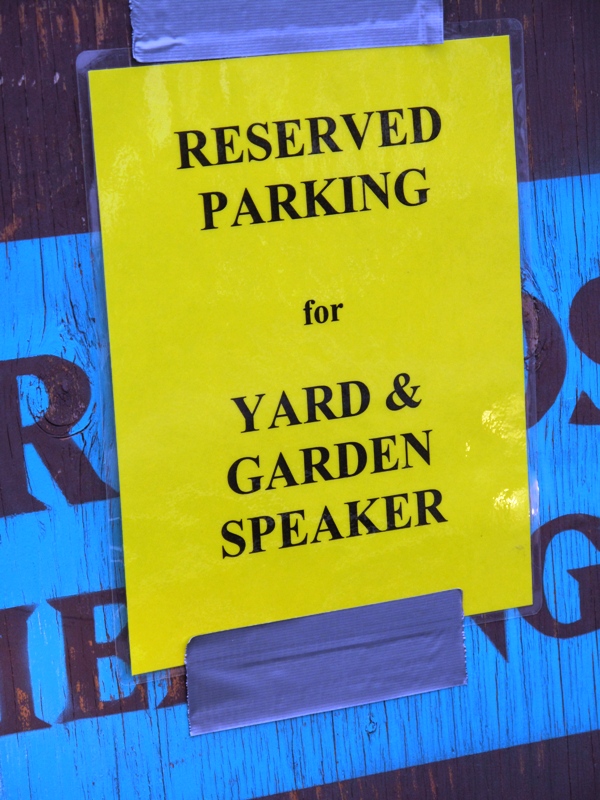
Nothing warms the heart of a speaker more than to pull into the venue and see a sign like this! Thank you Diane Threlkeld, chair of the Yard & Garden Lecture Series - how thoughtful!

Last Saturday, I traveled to Port Townsend, Washington, to speak at the Yard and Garden Series 2011, an educational program produced by the WSU Jefferson County Master Gardeners. Such a great audience of enthusiastic kindred spirits.

After my talk and floral design demonstration on Sustainable Flower Growing and Design, I promised to post some of the resources for seasonal, local, and sustainable flowers. Here they are:

California Organic Flowers (www.californiaorganicflowers.com); Here’s a link to our post about visiting this cool farm in Chico, California

Jello Mold Farm (www.jellomoldfarm.com); Our friends Diane and Dennis grow sustainable cut flowers in Mt. Vernon, Washington. Read their list of “where to buy” (including Farmer’s Market, CSA orders and Seattle area retail shops)

Peterkort Roses (www.peterkortroses.com), a fabulous, family-owned rose farm in Hillsboro, Oregon. Their roses are grown sustainably in hoop houses year ’round. The colors are pure, the scents are not cloying, and the flowers are totally fresh. While Peterkort sells wholesale only, you can ask your local florist to order from them directly. Demand for locally-grown ingredients will help give flower consumers more choices and eventually replace those steroidal mega-rose imports. ReadSandra Peterkort Laubenthal’s blog for news and updates on the rose-growing world.

Wild Ridge Organics (www.wildridgeorganics.com); Specializing in Australian and South African cut flowers, based in Salinas, California. These are the awesome exotics used in my arrangement that one lucky audience member took home with her.

Upcoming: My collaborator, photographer David Perry, and I are hitting the lecture circuit in 2011 – spreading the word about their passion for locally-grown flower crops and the designers who use these ingredients. 

If you are in the Seattle area, come hear from and meet us at the Northwest Flower & Garden Show, February 23-27, 2011. Our appearance details (click on the links below for lengthier course descriptions):

Thursday, February 24th

  • 12:15 p.m. Hood Room: “Conquering Your Digital Camera: Making Beautiful & Memorable Garden Photos,” with David Perry
  • 2:30 p.m. DIY Stage: “Floral Design with Spring Bulbs: Bring Spring Indoors with Beautiful Blooming Bouquets,” with Debra Prinzing

Friday, February 25th

  • 12:15 p.m. Hood Room: “A Year in Flowers: Seasonal, Local & Sustainable Floral Ingredients,” with David Perry
  • 2:00 p.m. DIY Stage: “The Winter Bouquet: Sustainable Floral Designs From Winter’s Bounty,” with Debra Prinzing

LA Times’ Top Home Design Stories of 2010

Wednesday, December 29th, 2010

This just in: the tally of the Los Angeles Times’ HOME section’s most highly viewed stories and galleries of the year. And – wow – 4 of the top 12 are stories that I was fortunate to discover and write for the newspaper.

Here they are – enjoy the inspiration:

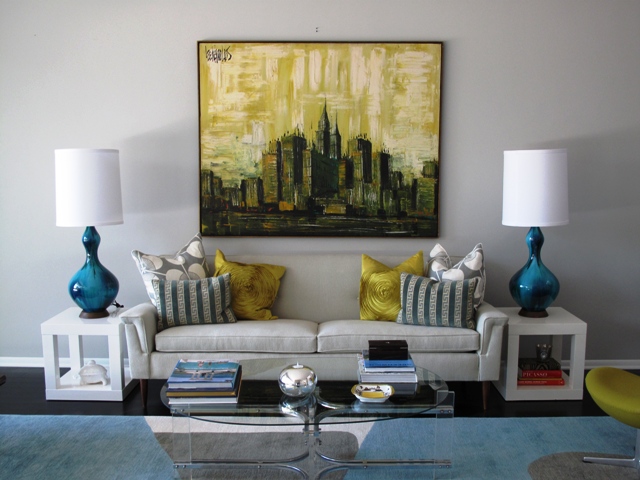
Lara and David's Hollywood Regency Living Room - a delicious palette with a retro art, lamps and furnishings.

1. In Beverly Hills, a Hollywood Regency re-do created by TV personality Lara Spencer and her husband David Haffenreffer.

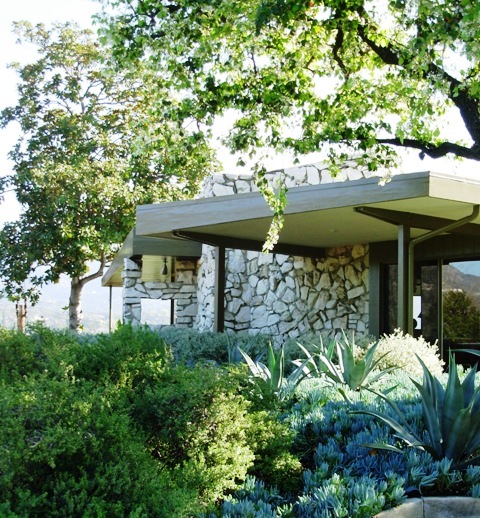
The Daily House in Glendale - an iconic Midcentury house.

2. The historic midcentury Daily House in Glendale, lovingly revived by attorney Chris Burusco.

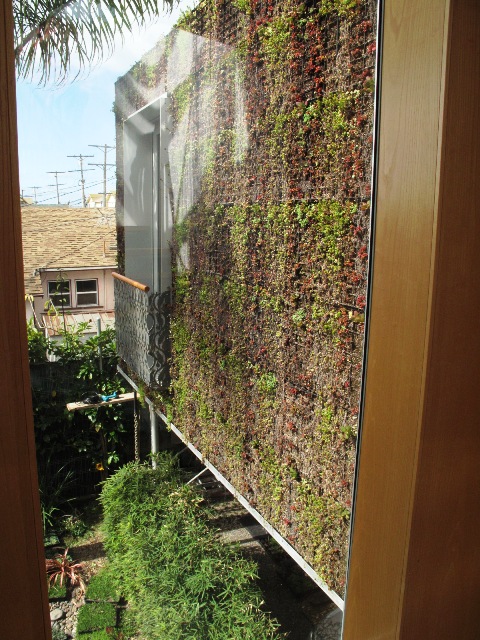
The exterior of Paul and Cicek Bricault's master suite is planted with succulents - a "green" addition in Venice.

3. The growing green Venice house owned by Paul and Cicek Bricault, complete with succulent walls on the exterior of their master bedroom addition. PS, this story also logged in as one of the paper’s most-read Home & Garden pieces of 2010.

The Chartreuse House - in Venice - a bungalow-turned-modern home.

4. The charming, modern Chartreuse House, also in Venice, designed by Lisa Little of LayerLA and Victoria Yust/Ian McIlvaine of Tierra Sol y Mar. Gardens by Stephanie Bartron of SB Garden Design.

Even though I have relocated to Seattle, I continue to report on home design, interiors and architecture for the Los Angeles Times. I’m looking forward to 2011 – can’t wait to discover the great design the New Year brings.

Makeover ideas for your concrete garden ornaments

Saturday, December 4th, 2010

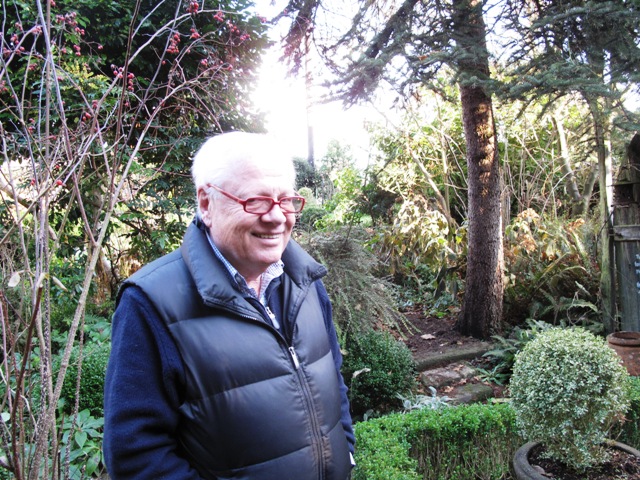
Meet Mark (aka "Marco") Henry ~ in his garden

On Friday, I enjoyed a rare luxury – a return to a favorite garden I’ve written about twice in the past decade: 

I hopped in the car and drove to Snohomish, Wash., where I lunched with two long-time friends from my days working for The Herald, the daily newspaper in Everett, Wash. (it’s a mid-sized city located about 30 miles north of Seattle). 

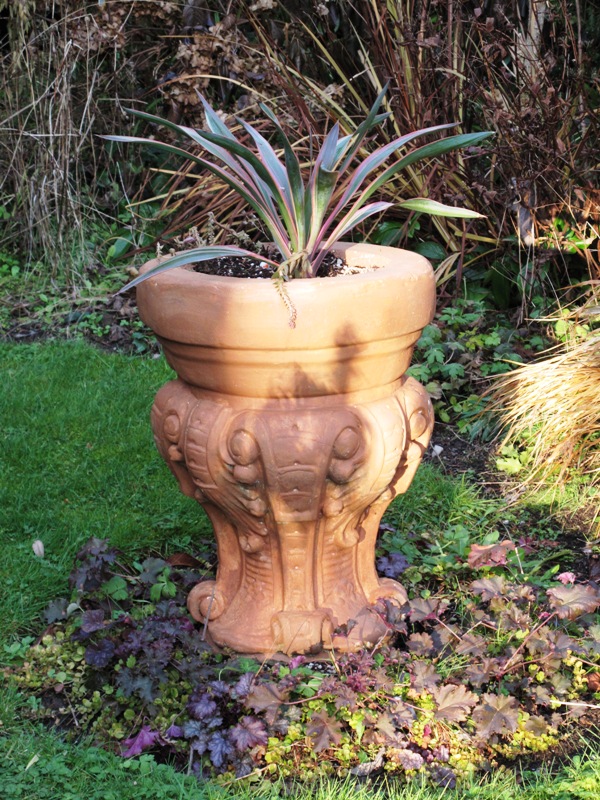
Here is a beautiful planter; once dreary gray concrete, it has been warmed up with a coating of terra cotta-colored Latex paint.

In the process, I learned something new about how to save drab, lifeless cast-stone (concrete) containers and garden ornamentation.

Read on for the simple steps

Marco Henry, a gifted artist, garden and interior designer and Venetian expert, hosted a little luncheon at his amazing home. We were joined by our mutual friend Darlene Huntington, one of my very first “sources” when I joined The Herald’s Home & Garden section in 2000.

Over the years, I have had the privilege of writing about both of these incredibly talented gardeners and their verdant, plant-filled environments. The two introduced me to other Snohomish County plant fanatics, owners of vintage homes, collectors of antiques and garden-makers. I have been so enriched as a writer and gardener from that 4-1/2-year episode of my life. 

After lunch we, of course, ventured out to Marco’s garden. Yes, it’s winter here in the Pacific Northwest, but when you have structural plants (such as Italian cypresses and ball-shaped boxwood shrubs), there’s lots to appreciate. When you see these elements, you understand what people mean when they say to design the “bones” of the garden for year-round interest.

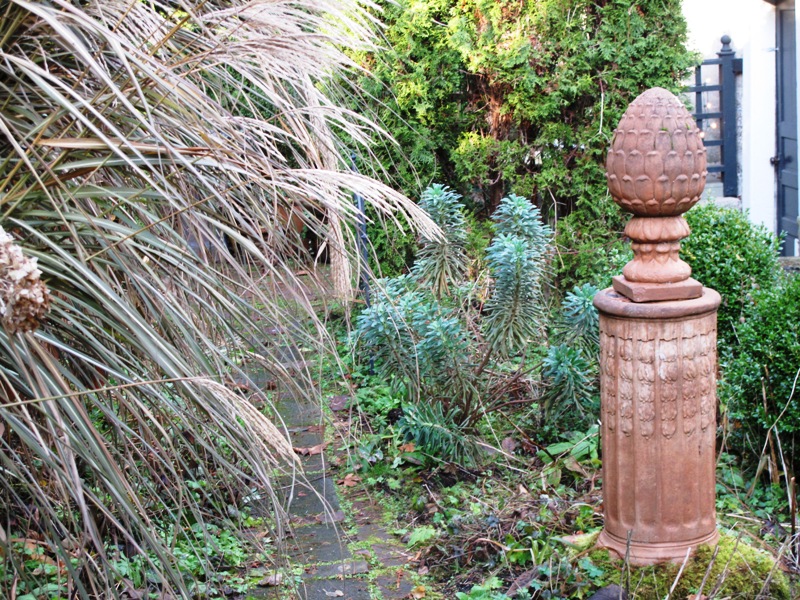
A simple coat of Terra Cotta pigment, from a can of Latex paint, transformed an old concrete pedestal and finial into a work of art.

I first wrote about Marco and his garden when it was included on the Northwest Perennial Alliance’s “Open Garden” tour  in 2000. Darlene marched me over to Mark’s home for an introduction. When I entered the Gothic-inspired wood gate, mounted into a niche in the beautifully-groomed hedgerow, I gasped and gazed in awe at what I saw inside: plant collections, art collections, vintage furniture, water features, sculpture and more – all surrounding a circa 1912 farmhouse and yard, complete with chicken coop and green house. 

This garden has the power to transport its viewer to a horticultural world we all yearn to possess. Is it a formal Italian garden? Or a cottage-style English estate? Maybe it’s a a landscape in the South of France. Each of these influences has a voice in Marco’s garden.

A teacher early in his career, Marco can be credited with giving a generation of fortunate kindergardeners an appreciation for art, color and beauty. Now, the grown-ups in his world can learn from his garden design techniques and his unique aesthetic.

My June 2000 article was called “Secret Garden.” I just unearthed that article and re-read it, savoring some of Marco’s choice quotes: 

“I’m a plant collector, a collector period. Some people put all of their collection together in one place. I don’t. I like to make something artistic out of it. 

“If I buy one of something I like, it’s the beginning of a collection. I could be Chinese porcelain or it could be coleus.” 

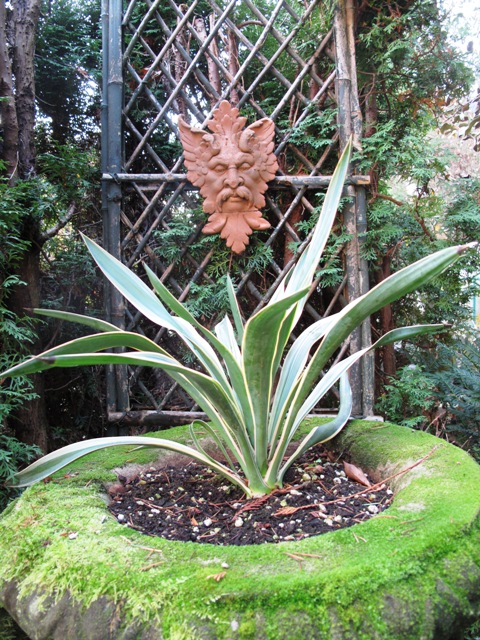
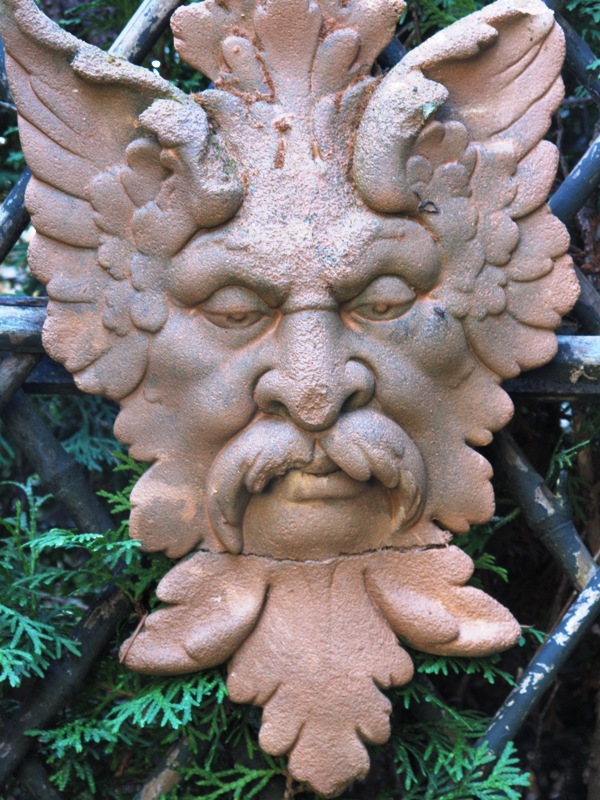
My eyes were drawn to the Green Man plaque, all the more noticeable now that he's been coated in Terra Cotta paint

Looks like original Terra Cotta, doesn't he?

In 2006, I was asked by Cottage Living magazine to again write about Marco’s garden. We had fun with that story, which was photographed by Richard Warren. I loved sharing Marco’s gardening style with a national readership, especially his tips on growing and designing with hydrangeas. 

Marco is passionate about Venice, a city he first visited in 1968 as a young man.  In a post-card written to his parents that year, he said he could imagine living in Venice. Now that dream is practically true, since Marco travels to Venice at least twice annually. He has guided many tours there for fans of Venetian architecture, art and gardens, and he lectures on the lessons we can learn from the gardens of Venice. 

Today’s lesson was all about Terra Cotta and the way it can warm up a garden, especially ones here in the Pacific Northwest that exist under a grayish cloud cover all winter long. Marco showed me several ornamental pieces that began their lives as uninteresting blobs of concrete. Concrete, he says, often recedes and is visually obscured by the greenery around it. Now he’s infused these pieces with the sun-drenched character of Italy. It’s a simple process and one I’m eager to try myself:

The little Terra Cotta "shelf" was transformed from gray cast-stone concrete to rich Terra Cotta - with Latex paint!

1. Find a piece of broken Terra Cotta pottery or a flowerpot with the perfect red-pink shade you love.

2. Take it to the paint store and ask the guys to mix up a can of paint that matches your sample. Be sure to order exterior Latex (water base) paint.

3. Fill a plastic bucket with some of the paint and drizzle in a bit of water to dilute it to a consistency that’s easy to work with. It can be more like a glaze or a stain in thickness.

4. Start painting any old piece of ordinary garden concrete. You may wish to coat the concrete with one, two, or three coats. The water-base pigment will “take” to the concrete differently, depending on how porous it is. Marco says the Terra Cotta-colored paint definitely “soaks” into the pores of the concrete.

5. Finally, you will enjoy what looks like perfectly-cast Terra Cotta. It weathers nicely and may soon take on a patina of age, moss, or lichen.

You’ll be pleased with the resulting appearance of your efforts. Old concrete gets a Mediterranean-style upgrade – to classic Terra Cotta. How easy is that? Thank you, Marco – great tip!

POST-Script: Thanks to Jim Bishop of San Diego-based Bishop Garden Design, who originally saw this post on my Facebook page, I want to share his cool ideas for painting concrete:

If you want to give (terra cotta) an immediate aged look, get a second can of (paint) in a darker version of the first color.

Water this down too or add a glazing agent and paint lightly over the object especially in the recesses. Rub off the excess until you get the aged look you want. Oil based gel stains work well too for creating an aged look and give you a longer working time.

Get out that paint, people! Have some fun!

A mini terrarium to hang from your tree boughs

Monday, November 22nd, 2010

Okay, I know that there is still one more week left in the month of November, but we had a big Seattle snowstorm today and so visions of sugarplums are dancing in my head.

One other reason I’m dreaming about my holiday decor is the just-arrived December issue of Better Homes & Gardens. It hit newsstands with a really gorgeous wreath on the cover and all sorts of design, entertaining and gift-giving ideas filling 275 beautiful pages.

A medium-sized glass "world" to gaze upon in wonder.

I was asked to pick my favorite garden gift for the holidays and you can read about it on page 153. Or you can see it here: An alluring “Forest Floor” ornament created by San Francisco designer Flora Grubb. It is a winner! Thanks to Flora for suggesting we feature one of her custom ornaments and for sharing the photograph you see here.

Living Ornaments:

It’s fun to use living elements and wild-gathered souvenirs from nature in your holiday decorating. I love this “Forest Floor” glass ornament created by San Francisco designer Flora Grubb. Lichens, moss, feathers and seeds cushion a living Tillandsia air plant inside a tiny glass ball – an enchanting, diminutive naturescape to hang from branch or bough.

An occasional spritz of water is all this tiny terrarium needs to continue looking beautiful – even after you take down the tree. Available from www.floragrubb.com; 3-inch, $19.95; 4-inch, $24.95; set of three 2-inch balls, $19.95.

Cool, huh?

Some good news for the print world:

For those of you who subscribe to the New York Times, you can’t have missed a full-page advertisement on the back of today’s Business section. It’s so huge that I couldn’t scan the entire contents of the colorful spread on my tiny printer. But here’s the gist of it:

Better Homes & Gardens, along with Meredith Corp. sister title Family Circle, are the magazine world’s #1 and #2 top books for women consumers, in terms of total advertising pages sold.

Under the leadership of editor-in-chief Gayle Goodson Butler and SVP, Group Publisher James T. Carr, Better Homes & Gardens has earned the support of 1,739 advertising pages this year. 

Just when everyone thinks magazines are a dying breed, here’s a report that “these magazines have held the top two positions in the women’s lifestyle category for 2010 and 2009.”

Just sayin’.

A tour of the Chartreuse House garden

Saturday, November 20th, 2010

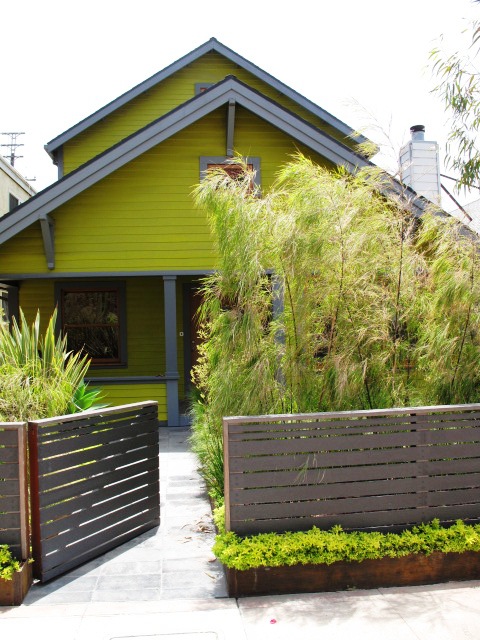
You can't miss the Chartreuse House, seen through the similarly-colored plant palette.

Today’s Los Angeles Times’ HOME section features my architecture/interiors story about Lisa Little and Phil Brennan’s makeover of a pair of tiny cottages in Venice, Calif.

The Venice-based architect and her special effects wizard husband painted the exterior an acid-chartreuse color and trimmed the house in charcoal gray.

Click on over to the story and you’ll see a fabulous web gallery of images shot by photographer Katie Falkenberg.

I also included a sidebar on Stephanie Bartron’s amazing work in the postage stamp-sized front yard, which faces a Venice walk street, which appears in LA at Home, the Home section’s daily design blog.

But you really can’t see much of the garden in the Times’ web gallery.

I promise you – it’s something to behold, featuring a dazzling palette of plants that enliven the small entry garden and play beautifully with the rugged materials Stephanie selected.

So I will share those photos here, along with the sidebar text:

A Chartreuse garden

As a color-packed accent to the renovated 1905 Craftsman bungalow, the Chartreuse House’s front yard is a example of how much great design can occur in a tiny patch of soil.

Yet before choosing a zesty palette of drought- and salt-tolerant plantings, designer Stephanie Bartron, of SB Garden Design, had to address some of the less visible challenges of the property’s postage stamp-sized entry. Prior owners had piled layers of topsoil over the sandy native soil, which created a drainage mess.

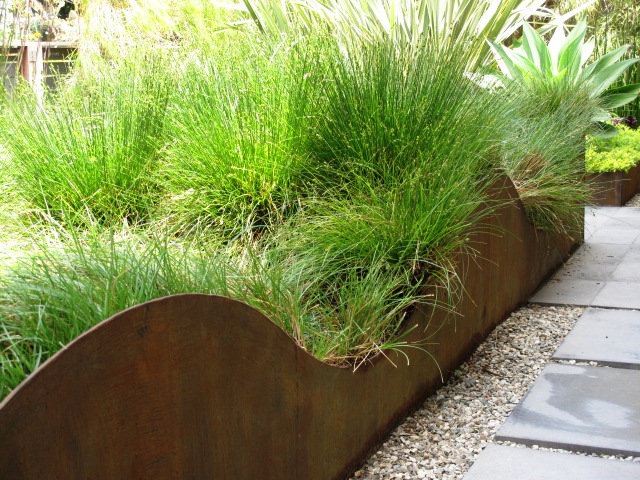
A wave-like pattern gives lots more interest to the raised bed.

“I needed to lower the grade of the front yard in order to move water away from the house,” Bartron says. “We calculated the volume of soil to excavate and used that amount to fill two raised planters. That way we didn’t have to haul away any material.”

Divided by a permeable walkway of concrete tile, the raised planters are formed by boxes of thick steel plate that have been roughly finished to encourage rusting. Now weathered, the boxed-beds replicate the Cor-Ten steel used to make the vertical planter in Little and Brennan’s courtyard.

The same weathered steel forms a slender raised planter at the base of the charcoal fence facing the walk-street. It is filled with a ribbon of golden oregano and Sedum rupestre ‘Angelina’ — which dazzle against the darker fencing.

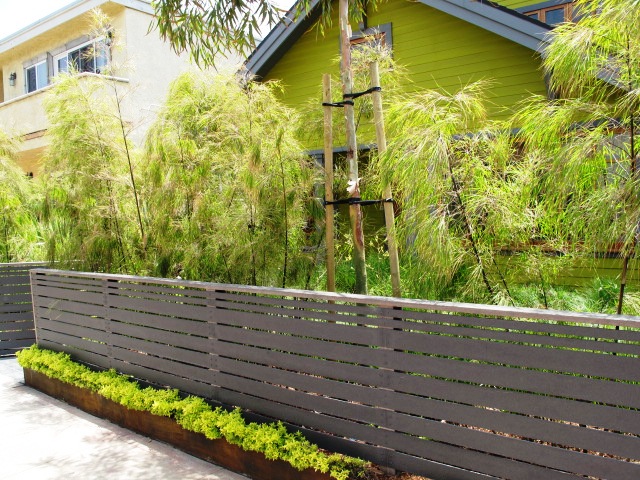
The chartreuse scheme continues outside the gray composite fence.

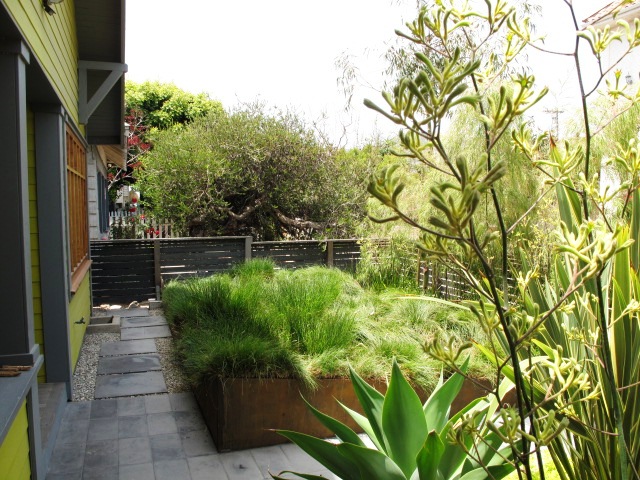
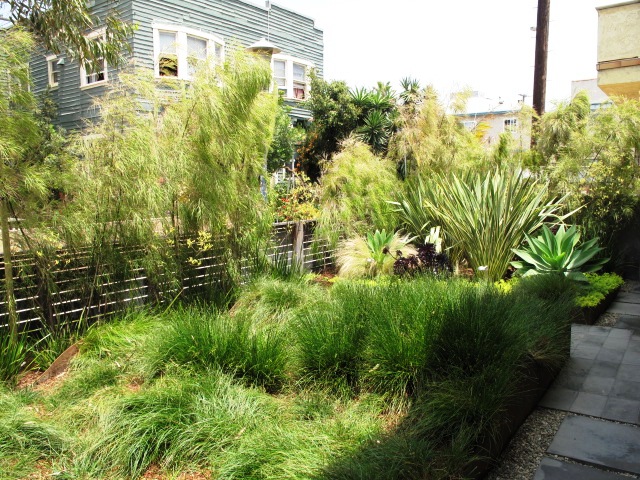
Bartron asked the metal fabricator cut a “wave” detail along the top of the larger planting box and in it she installed a sedge meadow, a nod to the nearby beach.  Privacy screening comes from a “hedge” of weeping Mexican bamboo and alternating chartreuse and yellow-flowering kangaroo paws.

“The plants create a punch of color in  such a small space,” Bartron says. The lacy bamboo fronds, the tall kangaroo paw stalks and the undulating drifts of sedge are constantly moving, thanks to the ocean breezes. Little added a eucalyptus tree to the front area, situated so that it will eventually grow high enough to screen the house’s topmost windows.

Such a simple yet sophisticated combination of plants in the smaller of two raised beds.

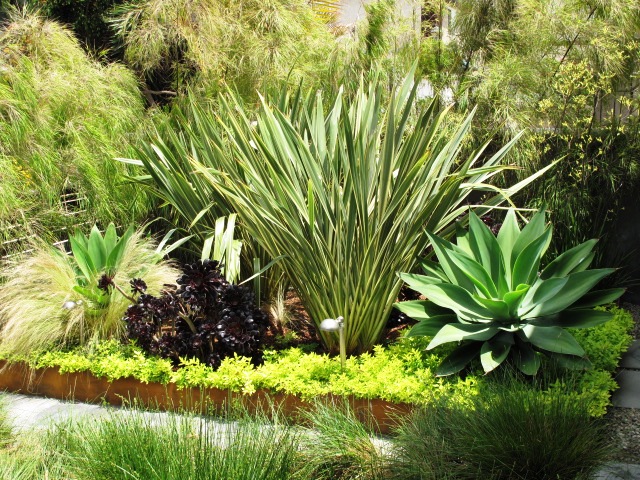
For the smaller of the two planter boxes, Barton paired dramatic clumps of smooth agave (Agave attenuata), known for growing well near the ocean, with Mexican feather grasses, dark purple Aeonium arboreum ‘Zwartkop’ and yellow-and-green variegated New Zealand flaxes. The entire bed is under-planted with the chartreuse Sedum rupestre ‘Angelina’. Filled with detail, it is a diminutive landscape that causes visitors to slow down and experience while approaching the front door.

The garden has many sustainable features, including low-maintenance plantings and permeable surfaces. Yet, says Bartron, its main design motivation is a response to the architecture. “This is such an artsy, whimsical place and I see the garden as a colorful jewel box for Lisa and Paul to enjoy.”

–Debra Prinzing

I’ll close with just a few more photos:

The larger of the two raised beds is planted mostly with Carex, to emulate the waves of the nearby Pacific Ocean.

This view shows how the Mexican bamboo and the kangaroo paws provide ample screening from the walk street traffic.

Playful and suitable for the setting, the lemon yellow kangaroo paw sways in the breezes.

What to do with salvaged shutters

Thursday, November 18th, 2010

Read on to learn what I'm going to do with these amazing shutters!

I recently spent the morning at a cool local flea market in Seattle. I was up early and out the door by 7:15 a.m., ready to get my creative juices going.

My mission: to discover as many castoffs from others that could make their way home with me.

The destination: 2nd Saturdayz, a popular flea market where vendors, dealers and designers come together to do business with salvage-savvy shoppers.

The apt motto: A Saturday Market of Fine Tastes and Curious Treasures.

Once inside the doors of a huge hangar (yes, the flea market is held at a decommissioned Naval base), I met up with Jean and Gillian. But not too much socializing is encouraged at these events. That is, IF you want to get the best deals. First-come, first-serve is the motto. Or: Every woman for herself.

I shouldn’t limit this endeavor to the female salvager because there were many men in attendance at 2nd Saturdayz. But still, you know what I mean. It’s a gal’s paradise.

Galvanized chicken feeder. 30 sizeable oval openings. A succulent planter or a flower holder? Or both?

Lately, I’ve been collecting vintage flower frogs, which makes sense since I’m living and breathing floral design. But this time, instead of finding glass and metal frogs, cages and stem-holders to displace the dreaded florist’s Oasis, I picked up a galvanized metal chicken feeder.

Think of a loooong ice-cube tray with oval cutouts. In metal. Very cool. Now that I’m looking at it again, I may just use this nifty piece as a planter for hardy succulents. It’s probably leaky so that’s going to give the drainage I’ll need.

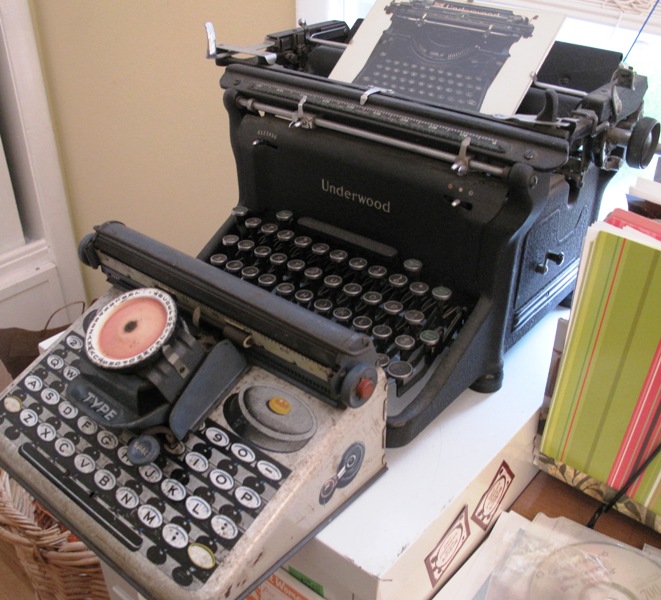
A nearly-pristine child's typewriter complements my grown-up Underwood.

I also picked up a vintage child’s typewriter. It can play nicely with my retro black Underwood typewriter that we bought back in 1985 at the Rotary Club Auction on Bainbridge Island. I think I paid $5 back in the day.

Those old typewriters, truly relics, are now priced at $50 on up. And to think so many of them have been dismantled to make jewelry from the letter keys. I’m guilty of buying one of those alphabet bracelets, too.

When I walked into one small “booth” with my friend Jean, an awesome Seattle landscape designer, I found myself absent-mindedly stroking the frame and spindles of a cast iron baby crib. The vendor had taken off one of the crib’s side-rails and piled pillows and cushions on the springs and against the three remaining railings.

Here's the end of the baby crib. Next time you see this, I'll be lounging against some cushy pillows, perhaps under a shade tree. This crib will become my garden bench.

What did it recall? Yes, a very fashionable garden daybed or bench. And for $100, I totally lucked out. My friend Gillian, who is a pro at this sort of buying-and-selling of antiques and vintage items at Ravenna Gardens, pulled me aside to share the secret that she’s seen other dealers selling cast iron baby cribs for $600. I don’t have a “garden” in which to place this bench right now, since I’m in a rental house and I’m not yet ready to invest energy on land I don’t own. But . . . I did decide to bring this crib home and store the pieces in the garage until the next garden comes along. Luck-ee me!!!

I couldn’t ignore the central element inside the warehouse – a little hamlet of potting sheds. Their perky corrugated metal roofs, topped with finials created from shiny bits and pieces, stood high above the flea market’s landscape.

While gazing at the rustic but stylish potting sheds, I met designer/builder Bob Bowling. Owner of Bob Bowling Rustics of Whidbey Island, this engaging shed artist greeted me and generously shared his story.

Turns out, like some of the talented folks we featured in Stylish Sheds and Elegant Hideaways, Bob makes unique structures using reclaimed and recycled materials. Whimsical and playful, and finished off with salvaged windows, doors and other artifacts, the Rustics sheds are each a delight to see.

Bob's cool garden shed was hard to miss.

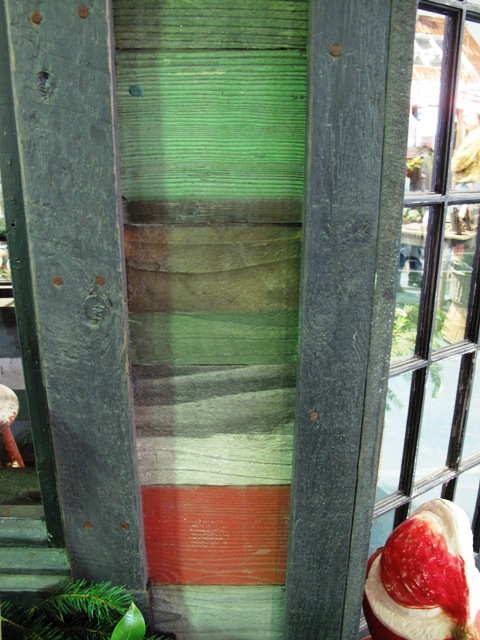
The "stripes" come from variously-stained boards.

The prices are reasonable, too. I should know. For $3200, you can get this “Rasta” shed. It measures about 7-by-7 feet in diameter (plus or minus) and features cool details, like the exterior of alternating stripes of differently-stained boards and the window boxes, door hardware and towering finial.

You could easily spend this much for a pre-fab storage or tool shed on the lot of your local big-box store. Which would add more art and style to your life, while also being quite functional?

All this thrifty flea-market shopping had energized me and made me feel quite artistic.

And then I met that shutter duo that called my name. Loudly. They appear to be half-circle crowns or eyebrow tops from a set of plantation shutters.

Wooden, with 2-inch deep slats, these pieces were displayed separately. Once I noticed both of them, I was not going to leave with just one! I don’t think I got a huge bargain, since I paid $28 apiece (but the seller insisted she had just cut the price in half). Whatever. When you spy something so uncommon, you have to act.

Other than changing the depressing buff-colored paint job to something more lively, what on earth do you suppose I will do with these crescent-shaped pieces?

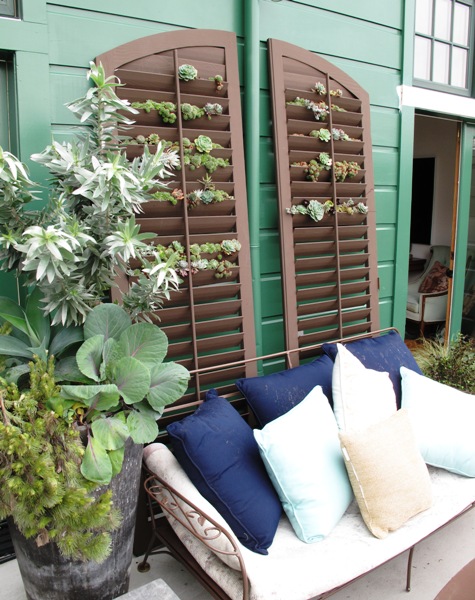
Hello! You two are pretty darned cute. That Baylor Chapman is uber-talented!

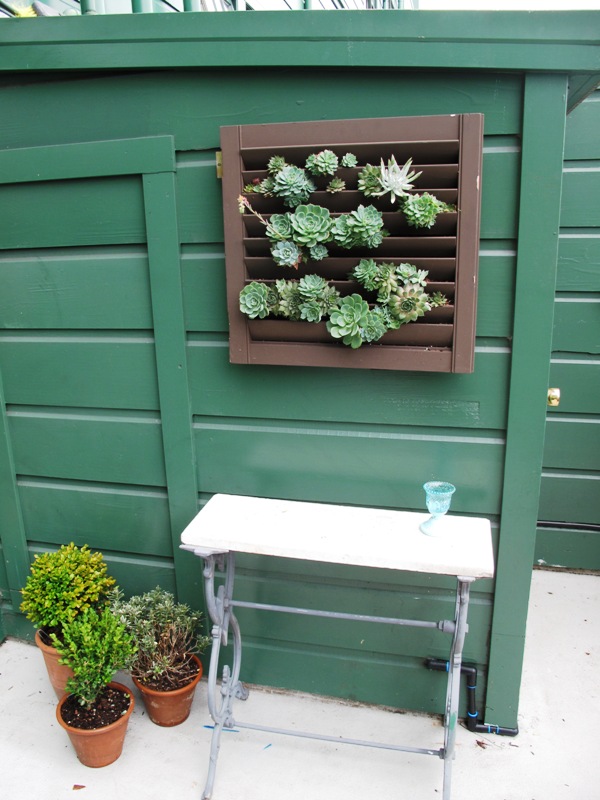
Here's another small shutter-turned-wall garden, compliments of Baylor Chapman.

For inspiration, I hearkened swiftly to my visit to Baylor Chapman, a talented San Francisco floral and garden designer I recently profiled for A Fresh Bouquet. After my friends Susan and Rebecca took me to meet Baylor at her floral studio, the three of us accompanied her to her loft apartment in SF’s Mission District.

And there on the outside roof deck, were some pretty amazing succulent gardens – PLANTED IN SHUTTERS!!!

Naturally, I am going to draw from this incredibly clever idea and put those twin shutters to very good use with a vertical planting of hardy succulents. It may take until next spring, but stay tuned. And if you have any suggestions on what color I should use to upgrade the crappy paint color, please chime in.

The trick, according to Baylor, is to secure a layer of landscaping cloth like a little pocket or envelope behind each shutter opening. Then you can add potting soil and plant your sedums, succulents or whatever else seems fitting. You know, I really do love that chocolate brown finish on the shutters. Doesn’t it nicely offset the silver, gray, blue and green foliage of the succulents?

Well, all in day’s work. More to come as I execute these big plans.

Clever candles for outdoors (and inside, too!)

Sunday, October 10th, 2010

October is well underway, and here is my little “Know-How” piece from the October 2010 issue of Better Homes & Gardens.

It was inspired, in part, by my past visits to my friend Kathy’s garden. She uses outdoor candles incredibly well.

I have always loved the look of luminarias, the traditional candle-lit lanterns that illuminate walkways and paths for Southwest-style holiday celebrations. Modern re-interpretations use paper bags or Mason jars weighted down with a layer of sand in the base holding votive candles inside.

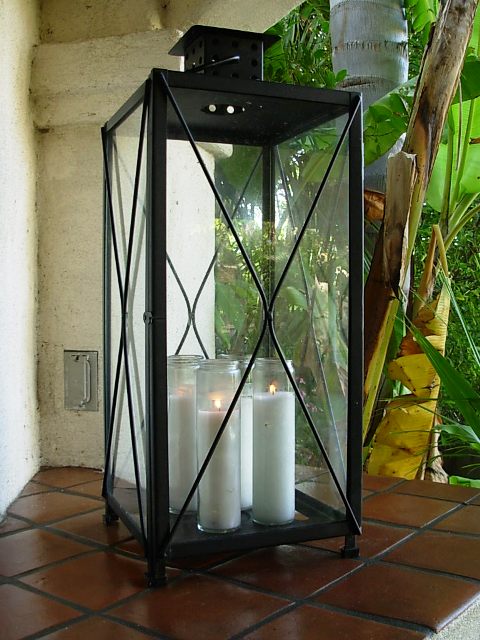
For a fresh twist that takes the luminaria idea and improves upon it, look for 7-Day Candles, also called altar candles. I first saw the brilliant display of these Mexican chapel candles in Kathy’s Southern California garden. Of course, it’s easy to dine and entertain out-of-doors here all year long. But even if you reside in cooler parts of the country, you can still borrow her idea!

White, red, blue or green wax is poured into an 8-inch-tall cylindrical glass container. “You can burn them 15 hours a day for a week,” Kathy says. “Imagine, 110 hours of candlelight for about one dollar!”

You can often find them at Mexican grocery stores or 99-cent/Dollar Stores. I found several styles on the shelf of my local Safeway grocery store – in the Mexican food aisle. And yes, they cost 99-cents!

A cluster of 7-Day candles looks brilliant inside a traditional hurricaine lantern.

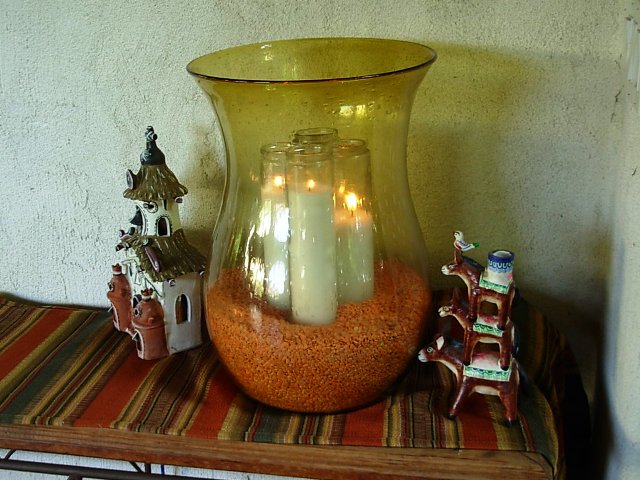
Here are some of the tall, slender, long-burning candles nestled in a base of dried lentil beans. Perfect for autumn decor!

Kathy began decorating with these clean-and-simple altar candles after too many dinner parties where one-inch votives burned out before the evening was over. She lined her outdoor fireplace mantle with a row of the 7-Day candles, which glowed and sparkled during her al fresco dinners.

Kathy also groups three or four candles inside a large, glass vase for impact. A few inches of dry black beans or orange lentils in the base serve as a stabilizer. Try a variation of your own and you’ll enjoy hours of romantic flickering candlelight.

As for displaying 7-Day candles outdoors, such as on a porch, patio or front walkway, don’t worry that they’ll blow out.

Kathy calls the glass cylinders “little hurricane lamps.”

Here are some additional “illuminating” ideas for your after-dark garden enjoyment:

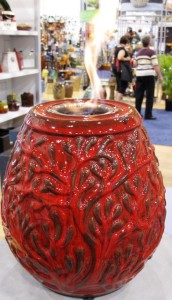
  • Burn a flame:  also adds warmth after dusk. At the Independent Garden Center Show in August, I was amazed at the number of vendors who are introducing these ceramic bowls, lanterns or pots that contain a small metal insert that burns a “gel fuel.” In one catalog, from Napa Home & Garden (see lantern here), the liquid fuel is described as being manufactured from recycled, post-consumer waste – a recycled and sustainable product. The decorative ceramic container burns a long-lasting flame. In the garden, you can illuminate the edges of a pathway or group several lanterns together on a tabletop for after-dark enjoyment.
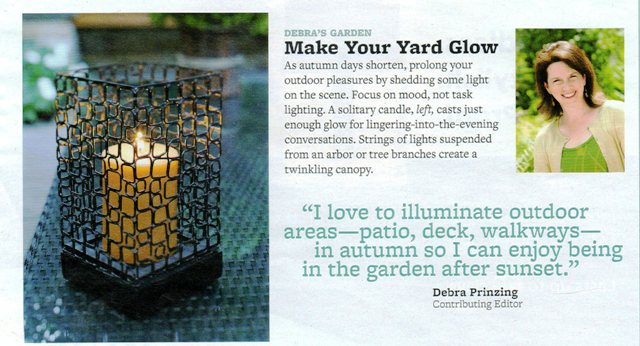
  • String up lights: Create a twinkling overhead canopy with strings of carnival lighting, holiday strands or small lantern lights. When suspended from an arbor or tree branches, the tiny lights lend a flickering, romantic accent – and just enough light for sitting outdoors with a hot drink.

ILLUMINATION UPDATE: My friend Kathy Purdy, at Cold Climate Gardening, just suggested that I check out solar fireflies: “Personally, I can’t see using these if you have the real McCoy, but I’ve learned that not all areas of the country do,” she writes. Kathy, you’re right. West coast gardeners are not as fortunate as you East coast gardeners. I haven’t seen a real firefly since July 2000, when my family visited friends in Washington, D.C. and we lay on our backs (on their front lawn) late at night – watching the magic!

My home design interview with actor Jonathan Togo of “CSI: Miami”

Sunday, October 3rd, 2010

 BEHIND THE SCENES WITH JON TOGO

Actor Jon Togo (center), with designer Lory Johansson and me

If you’re a fan of the “CSI” television franchise, you probably know this handsome young actor I’m standing with in the photo at left. He’s Jonathan Togo, aka investigator Ryan Wolfe of “CSI: Miami.” 

The show enters its 9th season with tonight’s premiere (10 p.m. on CBS). In anticipation of the show, I’ve posted my recent interview with Jon and his interior designer Lory Johansson.

Lory, an inventive and gifted designer whose firm is called Just Joh, introduced me to Jon’s 1958 Midcentury modern “guy pad” in the Hollywood Hills earlier this year. I love that Jon describes her as “the best design Sherpa” because it’s true. She has a gift for helping each client express his or her unique personality through furniture, art, and the home.

The Los Angeles Times photographed the interiors in July, the day of this photo, which Lory’s husband Mats Johansson took with my camera. My interview with Jon and Lory (and featuring a fun commentary by Jon’s mother, Sheila Togo) appeared in the Sept. 18 issue of the HOME section. You can read the story and see a gallery of photos here.

Floral design – straight from the field

Saturday, October 2nd, 2010

Even the Monarchs were willing to be photographed at the flower farm.

In a glorious Iowa field, I gathered flowers for my bouquets.

One knows she’s in relationship trouble when her own mother and dear friend Susan, who was her maid-of-honor in 1984, call to say, “I haven’t heard from you for a while, so I checked your blog to see what you have been up to.”

Umm. I’ve been on the road a lot lately. Way too much on the road for my liking. Being away from home and traveling for 15 of the 30 days in the month of September was ridiculous, but (I guess) necessary. Anyway, for the first time in three years, I went for a full month without posting an entry on this blog. Yikes!

There were many blog posts composed in my mind as an idea or notion would occur to me. “I should write that down,” I thought. But then, the droning lull of the airplane engine would convince me a quick “up in the air” nap was in order. Or I didn’t have access to the Internet. Or something like a deadline for a volunteer project or even – wow – a paying project . .  or someone else’s needs that were way more pressing came along.

So here we are in October – how apropos. The new leaf is turned. I don’t have to travel again until Oct. 12th and that is a single overnight jaunt for a photo shoot in Bellingham, 100 miles to the north.

Seriously, I should be able to squeeze in some news, insights, ideas, GARDENS, cool FLOWERS, and more between now and then.

The story I want to share here is from September 14-16. After six full and intense days for the annual Garden Writers Association Symposium in Dallas, I jumped on a tiny airplane and flew to Des Moines. I met up with the team I collaborate with at Better Homes & Gardens magazine. Eric Liskey (deputy garden editor), Jane McKeon (associate garden editor) and Scott Johnson (deputy art director) and I were up to our knees in flowers.

A view across the flower fields at Howell's Farm in Iowa. Isn't this just the most perfect cloud-filled sky you've ever seen?

Globe amaranth (Gomphrena sp.)

The flowers – ingredients for a how-to story on creating bouquets from field-grown arrangements – were in all their glory at Howell’s Farm.

Based in Cumming, Iowa (in Madison County – yes, where the bridges are!), Howell’s is a sixth-generation family farm. After decades of raising corn and other agricultural crops, current owners Fred Howell and family began in 1985 to grow everlasting flowers.

Today, the farm is an 800-acre destination for people in search of the best varieties of decorative and seasonal crops. In the spring, summer and fall that means people come for the huge variety of annual and perennial flowers, herbs and grasses for cutting and drying. In the fall, they enjoy the amazing pumpkin patch and a cool corn maze. By the end of the year, in the winter, it’s the Christmas trees as main attraction.

After I landed in Des Moines, Eric and I drove out to Howell’s, about 25 miles outside of Des Moines, on a breezy, but gorgeous afternoon. Scott met us there and the three of us followed Erin Howell, Fred’s daughter, on a walk through the five-acre flower fields. As is my typical reaction whenever I visit a flower-growing operation, I was practically hyperventilating with excitement.

Celosia, plume type - what a great color!

This shows how windy it was as Eric (left) and Scott (right) held the oversized "silk" to cast a shadow for one of the bouquet vignettes.

The variety of flower form, color and vigor in Howell’s crops was dazzling. The setting itself was breathtaking. We talked through our options of ingredients, including what “design lessons” we wanted to illustrate in the story, what sizes and shapes of vases we needed to use, and how to CHOOSE among all the great flowers that seemed to say “pick me, pick me!”

Back at the editorial offices, the three of us huddled with Jane to talk about the floral design projects we wanted to assemble and photograph the following day. This was no small task. Everything has to be mapped out so we could envision how things will look on the pages of Better Homes & Gardens.

The sheets on Scott’s clip-board featured his sketches of mini-magazine pages, complete with thumbnails of vases, blooms and notes to show how a four-page flower arranging story might look. We had to think about a color palette for the vases, taking into consideration the textures and hues of each flower lesson. Then Scott raced out to pick up props from all his secret sources (including tables, stands, vases, pitchers, etc.) and Eric and I took a drive over to his personal garden. We needed a few extra plant ingredients to enhance the designs we had in mind, so Eric obligingly let me cut some lambs’ ears and goldenrod from his borders. What else? Oh! a visit to the mall to pick up a denim shirt for me to wear in the photo shoot.

BH&G staff photographer Blaine Moats wanted the perfect Monarch shot. He actually got dozens of perfect shots because the butterflies were amazingly cooperative.

Yes, there it is: Francesca's House

The next morning arrived bright and early and we met out at Howell’s around 7 a.m. Since Jane and I had designed the first two looks the afternoon before, we had a jump start for the photography. But then, the light seemed pretty good for a portrait, so Scott sent me out to cut flowers while our photographer Blaine Moats shot away.  As I walked between the rows of marigolds, zinnias, sunflowers and milkweed, filling my galvanized French flower buckets with stems, I thought: How lucky can a gal get? It was a joyous experience to just be there, to know that I was getting to create bouquets and arrangements that will be featured in the magazine sometime next summer, and to work with such talented, artistic colleagues.

We were soon distracted by a sight so compelling and awe-inspiring that we simply had to stop working. Well, except for Blaine, who just turned his lens on the scene and began to document it. A harmonic convergence of Monarch butterflies was waking up as the day began to warm. They seemed to want to pose for photos, since even I was able to capture some really sweet butterfly portraits as the winged creatures breakfasted on the nectar of hot pink “Kiss-me-over-the-garden-gate” flowers (aka Polygonum orientale).

Milkweed with Monarchs (Asclepias sp.)

Me again - can't stay away from those blooms!

If that wasn’t thrilling enough, by the time Jane McKeon arrived in the afternoon, I had another amazing sight.

“Look over there,” Jane said, gesturing to a distant and lonely farmhouse. “Do you know that it’s Francesca’s house?” Yes, this was the actual Iowa farmhouse used by Meryl Streep’s character Francesca Johnson in the famous film “Bridges of Madison County.”

Another reason to visit Howell’s Farm is to gaze across rows of flowers and see that setting. I may have to rent the film just to see that house on the screen, and to appreciate Meryl’s Oscar-nominated performance from 1995.

There’s lots more to share but my bouquet designs are embargoed until they show up in the magazine. I can’t wait to show them off to you.